


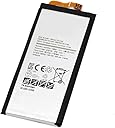

S6 Active Battery Replacement Kit for Samsung Galaxy S6 Active G890 G890A EB-BG890ABA Battery 3500mAh
Product ID: 102628455
🔋3500mAh Power
🔒Overcharge Protection
🔧6-in-1 Tool Kit
🔋 Power Up Your Day with Confidence!
The S6 Active Battery Replacement Kit is engineered with grade A+ battery cells, offering a powerful 3500mAh capacity. It features CE and ROHS certification, ensuring safety and reliability. With up to 500 lifetime charge cycles and a built-in IC chip to prevent overcharging, this kit is the ultimate solution for reviving your Galaxy S6 Active. Plus, it comes with a handy 6-in-1 tool kit for easy installation, making it a must-have for any tech-savvy user.
C**N
My old S6 Active is new again.
I managed to successfully change the battery with no damage to the phone.The phone works great now, like it's new again. Sadly, I had already bought a new phone so I won't be using my old phone anymore. But I did charge the phone with the new battery and used it thru one cycle of the battery and it was like a new phone again. No more suddenly shutting down with 50% still showing on the battery like it did with the old battery. I really liked this phone and wouldn't have bought a new one if I would have known this battery installation was going to go so well.A word of caution though, I was super careful and took my time getting the screen off. It would be very easy to break the screen. I also watched several YouTube videos before starting. The videos helped a lot. Also, if you see the blue guitar pick on the screen as you're sliding it in, stop! That means you're sliding the pick between the glass and the screen. You don't want to see the pick. You want to remove the glass and screen together in one piece.
M**V
Poor quality of the battery
Pros:- Cheap.Cons:- Date of manufactury is November 2018;- Shape and length of contact ribbon doesn't fit original S6 active dimensions. It pulls on the ribbon and barely reach battery socket. It can cause acidental disconnection or crack of the ribbon during normal using.- Contact socket doesn't provide safely fixing of contacts and has no rubber gasket on it.You will see the difference between this battery(white) and other developer (black).I suggest to choose different model.
F**T
dissassembly is not difficult, once you clearly understand the the steps
This process took me over an hour, but the next time would only be 15 minutes, now that i completely understand the process. I watched a video, and used the provided instructions. The major key is that the first step it to remove the screen, which is glued in place. The major detail that I overlooked for a while is that the screen removal is VERY THIN and is glass. The pry tools will go deep into the edges, but this is too deep and not helpful, you are just peeling off the very thin glass (with a very thin copper sheet attached to it). what I found to work best:- heat the screen to be quite hot to the touch, (heat gun will melt the case to keep it moving).- immediately apply a small ribbon of miner oil (baby oil) to the edges of the screen and edges of the three buttons. Small quantity little ribbon, I used a syringe with needle.- suction cup on glass near buttons (helps to ONLY put the oil in small ribbon, oil casues trouble for the suction cup)- pull up pretty hard on the suction cup, and begin peeling the glass, starting at the 3-buttons, press the pick parallel to the glass, pressing the buttons down to catch the pick just under the glass at the buttons. Once started work the pick gently around all directions in the slot for the switches, then work deeper and wider, pulling gently on the suction now, so you do not snap the glass. The pick can slice the glue as you work your way.- As you progress with removal, you will see a thin copper glued to both the screen and the innards, peel this from the innards, so is stays with the screen.- clean the oil off with alcohol on a towel.Other notes:- The wire connectors snap gently into place, but then are held in place with the plastic parts. Do not expect them to snap strongly in place.- I has a challenge getting the battery connector aligned and snapped, needed to shove battery to the top of the holder, and had to twist the wire connector, to get it parallel and snapped on. This took some effort, but NOT MUSCLE. is a tiny connector. I used a magnifying glass and a pair of flat blade tweesers, not provided.- Glue, magnifier, and mineral oil are not provided. You must have glue for re-assembly!!- a small applicator for the glue is necessary, a tiny bit goes a long way!!! I sucked the glue into a syringe.- The screwdriver provided may be OK, but I had one on hand that had a better fit to the screws.Overall, I am extremely happy with the kit, and the battery so far (been 36 hours). Charged the battery for several hours, then letting is discharge totally dead the first 3 times, which may take several days, as even though I have taken 30 photos with flash forced on, the battery is indicating 91% after 36 hours (I have not talked on it in that time though). This is GREAT because the old battery would only let me take a few flash pictures, and would shut off the phone!Definitely worth a try to revitalize your phone, Saved me the money and hasle of changing phones. Best of luck!
R**S
Excellent battery life - have experienced person install
Seemed simple enough. I read the instructions and watched videos on replacing the battery, but when it came down to it, I was unable to open my phone to replace the battery. My techy son replaced it, but broke the screen in the process, making it unusable. LOL, the up side is that it has proven the battery to have an excellent holding power, as I have not been able to turn the phone off since the new battery was installed almost a month ago !
R**R
Not a Simple Repair
This isn't a simple repair. I suggest watching several of the YouTube videos on the Galaxy S6 Active disassembly before attempting it. Once you start, just take your time and go easy. It requires a gentle touch and patience, but if you have both, you can probably do this just fine. Everything will make sense once you start working on it, but be sure to watch the videos first. In my case, the whole thing came apart much faster than it did for some of the experts in the videos. This kit does not come with adhesive for reattaching the screen, so once you remove your screen don't clean the adhesive from the edges of the screen or the battery bracket. You'll need it for reattaching the screen and everything should just melt back into place when you close it up and reheat it. This is a good project for one of those rainy stay-at-home pandemic days.Also, I should mention that I got a new phone when this S6 with the original battery could no longer hold a charge for longer than an hour or so. It had no trade-in value in 2020, but I kept it in a case with a screen protector and it still works and looks like new, so I didn't want to part with it. It will be a backup phone if anything ever happens to my new one.As for the battery... I charged it after replacement and it has been running for 48 hours. The charge indicator says 66%, so I think the battery would have no problems during a full day's use.Update: The charge indicator shows 31% after about 80 hours. Granted, this is a backup phone, but I have used it to send text messages and play music to Bluetooth speakers. I'd say that the battery is working much better than I expected.
R**A
I can't rate cause had to return
I can't rate because the screen broke when I went to take battery out so had to buy a new phone. I do recommend if you are gonna change battery then buy a replacement LCD digitizer
B**C
only a temporary fix for me
Battery worked but was able to move slightly while in the phone. phone stopped working about 8 months later, after opening it looks like the ribbon cable broke where it connects to the battery. until it broke, it worked great....
Trustpilot
2 weeks ago
1 month ago