Deliver to KUWAIT
IFor best experience Get the App
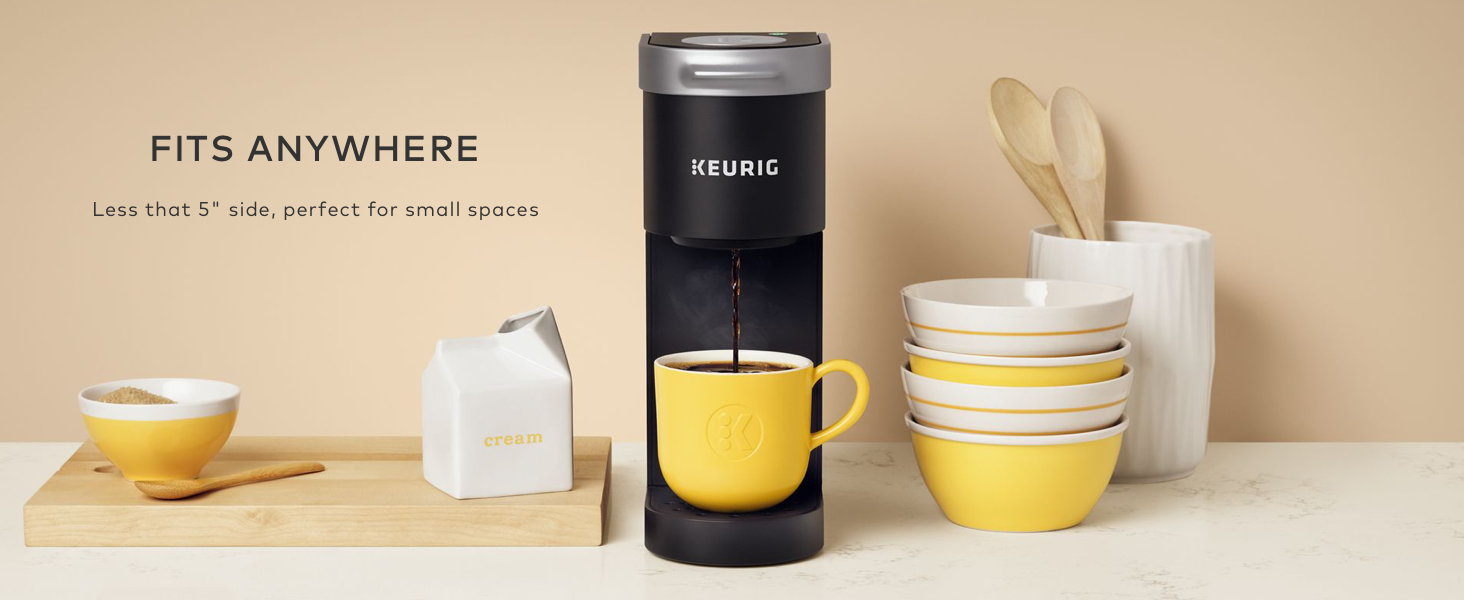
☕ Brew Boldly, Live Small!
The Keurig K-Mini Single Serve Coffee Maker is a compact and efficient coffee machine designed for small spaces. With a brew size range of 6 to 12 ounces, it features a one-cup reservoir, removable drip tray for travel mugs, and an energy-saving auto-off function. Perfect for busy professionals who value convenience and style.
Exterior Finish | Matte |
Material | Plastic |
Item Weight | 4.6 Pounds |
Unit Count | 1.0 Count |
Number of Items | 1 |
Item Dimensions D x W x H | 13"D x 14"W x 6"H |
Capacity | 12 ounces |
Style | Modern |
Color | Studio Gray |
Recommended Uses For Product | Camping |
Operation Mode | Semi-Automatic |
Voltage | 120 Volts |
Human Interface Input | Buttons |
Wattage | 1500 watts |
Filter Type | Reusable |
Special Features | Removable Drip Tray, Automatic Shut-Off, Portable, Removable Tank, Reusable Filter |
Coffee Maker Type | Drip Coffee Machine |
A**.
Perfect for Small Spaces and Cute Too!
I really love this Keurig K-Mini in Dusty Rose - and especially adore the color! I have a small kitchen with limited counter and storage space, so this size is ideal—it’s under 5 inches wide, so it doesn't take up much room at all.Setting it up was really easy, and it's super simple to keep clean. I use it with the My K-Cup Universal Reusable Coffee Filter and fresh ground coffee beans, and while the coffee won’t blow your mind like it would from a more expensive machine, it’s definitely good enough for my daily cup. I love the 6-12oz size options too, since I can adjust it depending on my mood.The cord storage is a great touch, keeping everything neat and tidy, and the removable drip tray fits my travel mug perfectly. All in all, it’s a great little machine for anyone with limited space who still wants a quick, convenient cup of coffee!
S**S
Sleek and Durable!
This sleek yet durable and efficient Keurig will take up minimal counter space and deliver a high-quality coffee experience! The brew speed is lightning fast! It's important to remember that your coffee is only as good as the water you use even with this machine because the particulates in the water can impact the taste. I recommend using a filter such as a Britta or filtered water to ensure scaling doesn't build up inside. This beauty holds up to 12 oz of water to make a big cup and has an auto shut off as well. It absolutely delivers rich flavor!
G**C
So tiny, very efficient!
I'm getting another one for downstairs. These are terrific! Since you're doing one cup at a time, these are great for people who don't drink coffee all day long. They are small & do not take up so much space, work great (take a bit of extra time but who cares?), no filters to replace, fresh water for every cup. Highly recommend.
R**6
READ THE INSTRUCTIONS
Okay. So late last night I decided to order this smaller version of the Keurig Coffee Maker, because I’m short on counter space and I only make one cup of coffee a day anyhow. My new machine was on my front porch this afternoon. (Shop, select, pay, receive. The good, the bad, and the ugly.) Anyhow, I’ve decided to post a few photos and try to write an informative, helpful review, as I see there are some pretty negative, frustrated buyers of this product, and several questions listed that indicate those buyers did not do the very first thing they should have: READ THE LITTLE INSTRUCTION BOOKLET. Now, I must say, these few instructions could have been written a bit more clearly—but that’s par for the course these days, as practically nothing is made by English speaking people, so the instructions are someone else’s idea of the English language. So, I’ve posted some photos to aid in my attempt to make these instructions more “user friendly.”Before I forget, I do have two negative comments on this product (aside from the less-than-clear instruction booklet): The first is that I feel it’s overpriced for what it is. I paid $83+ (including tax) for a little plastic gizmo that should sell for about half that. If it lasts as long as my “big boy” Keurig, which is at least five, maybe six years old, I suppose it’ll be worth it. The second issue is the cord. I do love the idea of the cord compartment ... however, the cord that comes with this machine is only about 18” long. (The cord compartment would have been a lot more useful with the big boy machine, which has a considerably longer cord.) As I don’t even need the full 18”, I stuffed some of the cord back in the compartment, then found that I’d shortened it more than I wanted, but when I tried to pull out a bit longer cord, I could only get another inch or so. Now I have about a 14” cord ... which I can work with, but some people might find that they’ll need a longer cord, so I thought I’d mention it.As you can see from my first photo, the big boy Keurig is considerably larger than this new one (which measures 4.5” wide by 10 3/4” deep, the same depth as the big boy). Another photo shows a closeup of the side of the little clear plastic compartment (referred to in the instruction booklet as the “water reservoir”), which shows the amount of water—how many ounces—is being put into the water reservoir. You must put AT LEAST the minimum of 6 oz, or up to the MAXIMUM of 12 oz. This question of how much water to put in seems to have befuddled many purchasers: I cannot understand why. So long as it’s between the low water mark (6 oz) and the max water mark (12 oz), you’re good to go. HOWEVER MUCH WATER YOU PUT IN, IS THE SAME AMOUNT OF COFFEE THAT WILL POUR INTO YOUR CUP. Maybe it’s more easily understood this way: Use your coffee cup—whether it holds 6 oz or anywhere in between six and a maximum of 12 oz (my red and white cup that you see in one of my photos holds 8 oz, allowing about 1/2” to the very rim) to fill the water reservoir—and you’ll get that same amount of coffee in your cup. An 8 oz cup of coffee, using a coffee pod, makes (for me—I drink it black) a perfect, medium-strong cup of coffee.Now, how to use your new machine: FIRST, as I said, READ THE INSTRUCTIONS. The very first words printed in the booklet are, “Before You Brew.” You’re first going to make a cup of boiling water only—then your machine is “prepped” and ready to go. So, plug it in, then push the “Power Button.” (See my 2nd photo—the power button is that tiny dot at about the 1 o’clock position from the big, round, silver-colored circle with the big K in the center of it. That silver-colored circle is what is called the “Brew Button.”) When you press the Power Button (the little dot), after you’ve plugged in the machine, that dot will illuminate. Next, you lift the cover of the water reservoir, fill your coffee cup/mug with water and pour that water into the reservoir. (Check the measure on the side, to be sure you have somewhere between 6 oz and 12 oz in the reservoir.) Then lower the water reservoir lid and place your coffee cup on the drip tray.Now, you’re going to lift and lower the handle where you would put a coffee pod—EXCEPT THIS FIRST TIME you’re not going to put in a pod, because you’re only going to make a cup of hot water, just to run some water through the machine to prep it.Now that you have your water in the water reservoir, and your cup on the drip tray, and the “coffee pod compartment” handle has been lifted and lowered, you’re ready to “push the Brew Button.” Remember, the Brew Button is the big silver-colored circle. It depresses. I finally figured out that I had to hold it down with three fingers (I have small hands) for 2 or 3 seconds ... and then the “Brew Indicator Light” (a rainbow shape just above the Brew Button—see photo four) will “illuminate solid, then begin to pulse while the water is heating.” It will take a minute or so for the water to heat ... during which time the “rainbow-shaped” light will come on and fade, come on and fade, several times (what the booklet calls “pulsing”). Eventually, that Brew Indicator Light will stay solidly lit, and then the hot water will begin to pour into your cup. When that’s done, toss that water out, and you’re ready to make your first cup of coffee. Repeat all the steps, except this time, of course, insert a coffee pod before lowering the handle.In summation, I don’t think it takes any longer to make one cup of coffee in this new single serve Keurig than it did in my larger water capacity model. Yes, you do have to put water in it each time and you do have to wait for that water to heat up ... but I had to wait a longer time for more water to heat up in my big Keurig. And the amount of time it takes for the coffee to pour into your cup is the same as in the larger model machine—also, the sound is about the same, not loud enough to wake anyone up in another room.I like the extra space on my counter, and if this machine holds up as well as the other one, I think I’ll be happy with it. I do see some reviews that state their machines didn’t work after a short while ... if that’s the case with this one, I’ll be writing an update on my review.
M**Z
fast fast fast
this was ordered to replace my last one that just dropped dead inexplicably ....I was thinking same company same work ethic but my old one took 2 minutes to heat water and start dispensing. the minute I pressed the button this one went to work....I might get to hit that snooze one more time from now on!!!!
ترست بايلوت
منذ أسبوع
منذ شهر