We remain fully operational. Our teams are working around the clock to ensure your deliveries continue safely.

قم بتنزيل التطبيق


معلومات عنا
حقوق الطبع والنشر © 2024 Desertcart Holdings Limited
قم بتنزيل التطبيق


Buy anything from 5,000+ international stores. One checkout price. No surprise fees. Join 2M+ shoppers on Desertcart.
Desertcart purchases this item on your behalf and handles shipping, customs, and support to KUWAIT.
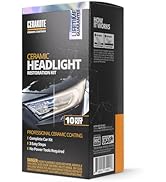
✨ See and be seen: Headlights reborn for life! 🚗
The CERAKOTE® Ceramic Headlight Restoration Kit is a professional-grade, easy-to-use solution that restores and protects vehicle headlights with a durable ceramic coating. Featuring a 3-step process with oxidation remover wipes, sanding materials, and ceramic coating wipes, it requires no power tools and guarantees UV protection lasting as long as you own your car. Highly rated and trusted by over 67,000 users, this kit delivers like-new clarity and enhanced nighttime safety in just 30 minutes.


| ASIN | B084RQKLV8 |
| Best Sellers Rank | #12 in Automotive ( See Top 100 in Automotive ) #1 in Automotive Headlight Restoration Kits |
| Brand Name | CERAKOTE |
| Customer Reviews | 4.6 4.6 out of 5 stars (67,310) |
| Included Components | CERAKOTE® Ceramic Headlight Restoration Kit – Guaranteed To Last As Long As You Own Your Vehicle – Brings Headlights back to Like New Condition - 3 Easy Steps - No Power Tools Required |
| Item Type Name | CERAKOTE® Ceramic Headlight Restoration Kit – Guaranteed To Last As Long As You Own Your Vehicle – Brings Headlights back to Like New Condition - 3 Easy Steps - No Power Tools Required |
| Item Weight | 4.8 ounces |
| Manufacturer | CERAKOTE |
| Model Number | AH-HLKITV |
| Number of Items | 1 |
| Part Number | AH-HLKITV |
| Recommended Uses For Product | Removes Oxidation, Removes Dirt, For Paint Protection |
| Specific Uses For Product | Brake Lights, Fog Lights, Head Lights, Third Brake Lights |
| UPC | 850014615017 |
| Unit Count | 1.0 Count |
| Warranty Description | Warranty |
R**O
Works as good as it says. Great stuff!!
I have used several different so called headlight restoration products before and none have ever worked this well. This stuff really is amazing. Worked better than I expected. It was simple, quick and great price. If you follow the easy instructions on this you WILL get great results and new headlights. I recommend taking a little extra time to watch the 5min instruction video. Key points, use sandpaper only side to side not in circular motion. Make sure it's dry before step 3. This stuff worked excellent on my headlights. I'm only a week into it and still looking great. Highly recommend and I'll definitely use on any other vehicle.
A**X
Incredible Results! The "Z-Line" is Back!
I’ve tried a few "wipe-on" fixes in the past, but the CERAKOTE® Ceramic Headlight Restoration Kit is in a completely different league. If you are tired of hazy, yellowed lenses and weak nighttime visibility, look no further. 📖 Instructions & Ease of Use The first thing that stood out was the clarity of the instructions. The kit breaks everything down into a simple, step-by-step process. Even if you aren't a "car person," the directions are foolproof. They don't just tell you what to do; they explain why each step matters, which gave me the confidence to get the job done right the first time. ✨ Restoration Effectiveness As you can see in my Before and After photos, the transformation is night and day. My headlights went from a dull, oxidized yellow to a factory-fresh, crystal-clear finish. It didn't just "clean" them—it completely rejuvenated the plastic. 🔦 The Real Test: Light Output & Beam Pattern The most impressive part isn't just how the car looks, but how it performs at night. I’ve included a photo of my car parked against a wall in the dark to show the comparison: Passenger Side (Restored): You can see a sharp, distinct cutoff line and the perfect "Z-line" pattern. The light is focused exactly where it needs to be on the road. Driver Side (Not Restored yet): The light is completely distorted. There is no cutoff, just a messy blob of light that scatters everywhere, likely blinding oncoming traffic while providing less actual visibility for me. Final Verdict This kit doesn't just make your car look better; it’s a genuine safety upgrade. Seeing that crisp Z-line back on the wall proves that the clarity is internal as well as external. Highly recommended!
A**R
WOW! I am so impressed!!! You need to get this!
I do have before and after pictures, but I'm too lazy to upload them. Trust me when I say that the difference is DRAMATIC. It's as if I have brand new headlights! I took them from foggy/clouded to crystal clear, without even that much effort. And with the ceramic coating, I expect they will stay that way. Here are some tips from what I learned about using the kit. 1. If you are careful, and you're not doing the lights on a big truck, and the fogging isn't terrible, you can split the supplies in half and have enough left over to do another car! 2. It's not a bad idea to tape off the headlights through steps 1 and 2 (initial chemical cleaning, and especially, sanding). Even though I did this, I still managed to sand off a thin line of paint right next to one of the headlights. That was entirely my fault. 3. You can't really sand too much. I actually did it twice. Instead of going by the clock (they say 3 minutes per pad), I just told myself I would use the applicator twice on each piece of sandpaper, and then take off the sandpaper to sand by hand a third time. In other words, three passes with each grit, for a total of six passes per light. That worked out well, and it wasn't too hard, either. Just be careful you don't sand the paint on your car! 4. Bring a roll of paper towels with you before you start. I spent a lot of time running back and forth to the house. You won't need the whole roll. I used about ten towels, total. So bring a roll, and save yourself some time. 5. Make sure you set aside an hour to do the job, and another hour to let it cure. That's about how long it took me, and I'd never done it before. I believe I can do it again in under 45 minutes, easily. But you'll still need an hour for the final coating to cure. If it's raining, you won't be able to do this work. Also, you should work in the shade. I don't think it would come out very well if you do it in direct sunlight. 6. You will definitely need a spray bottle, filled with water. A 16 oz bottle would be about right. I used a little tiny 2 oz bottle, and had to refill it numerous times. 7. When they say to keep the surface of the headlight WET while you sand, they mean it! Your work will come out much smoother, and go faster, if you do that. If not, you end up with a gunky mess that you will have to clean off anyway, and probably have to sand some more - so why not spray while you go? 8. Be sure to use those paper towels to clean things around the lights very well between each step. It just makes the job easier when you don't have to worry about ruining your paint with the chemicals, and you get all the sanding glop out of the way, so you can see if you are sanding your paint, and not your headlights! 9. Be sure to REMOVE THE TAPE before you begin step 3 (ceramic coating). Then, use a hair dryer to THOROUGHLY dry out the surfaces around the lights (and the lights themselves) before you start coating the headlights. This last step 3 is crucial to performance, and is why this kit is so special. It takes no time at all to do the work, like rubbing alcohol once on the headlight surface. But the chemical isn't alcohol, and it's very strong, so prepare well - you don't want to have to stop in the middle of the application. Dry out those lights and surfaces first (because the chemical coating does not play well with water, at all)! Then know that putting on that coating only takes about 15 seconds per light. You just coat it once, with 50% overlap, wipe off any of the chemical that's dribbled onto your paint, and then DON'T TOUCH THOSE HEADLIGHTS FOR ONE HOUR! Let them cure, and they will be like-new! Again, this kit is marvelous. If I had known the end result would be so amazing, I would have taken it out of the box much sooner. I am going to do my wife's car next. It really is the best thing I've seen to do this job. Somebody put a lot of thought into this product, and you can tell. Not too much work for an absolutely fantastic end result!
A**S
Headlights Said Soft Launch No More — Instant Glow Up Energy
I grabbed the CERAKOTE® Ceramic Headlight Restoration Kit because my headlights were looking cloudy and tired, and I wasn’t ready to drop serious money replacing the whole assembly. I used it in my driveway on a Saturday afternoon before a road trip, following the full prep and application process step by step. What impressed me right away was the clarity and brightness after the final wipe — it was a noticeable difference, especially at night, and the light output looked way cleaner. The quality of the ceramic coating felt legit, not like a temporary shine, and after a few weeks of rain and car washes the water resistance has held up better than I expected. For the size of the kit, there was enough product to fully complete both headlights without feeling skimpy, which made it solid value for money compared to shop quotes. What disappointed me was that the prep takes some effort — this isn’t a quick five-minute fix — and you have to be patient and follow directions closely or the results probably won’t hit the same. I’d recommend it to someone comfortable doing a little hands-on work who wants a real improvement without paying dealership prices, but if you’re looking for instant, zero-effort results, this might feel like more work than you want. Overall, it’s not magic, but definitely a visible upgrade. The size of the project was just enough for my little lights, be mindful of usage and size of area coverage
N**E
Nice and good
D**K
Works.
M**O
Prodotto cosi come descritto. Se si seguono bene le istruzioni il risultato è molto buono ed i fari tornano trasparenti dando un ottimo aspetto all'auto. Soldi ben spesi
A**Q
This product is outstanding. I cannot recommend it highly enough. Needed to get my headlights clear for a mot as it was flagged up last year, and wow what a difference. My car is older and pretty weathered, but this stuff got them clear within a hour. The video tutorial is simple amd easy to follow. Will be using again in the future. This has given a better result that some professionals companies anticipated, and at only 20% of the cost !
J**Y
Works great for removing foggy or light scratches from headlights. But for deeper scratches more coarse paper is needed preferably together with electric tool.
ترست بايلوت
منذ 3 أيام
منذ أسبوع