We remain fully operational. Our teams are working around the clock to ensure your deliveries continue safely.

قم بتنزيل التطبيق


معلومات عنا
حقوق الطبع والنشر © 2024 Desertcart Holdings Limited
قم بتنزيل التطبيق

Buy anything from 5,000+ international stores. One checkout price. No surprise fees. Join 2M+ shoppers on Desertcart.
Desertcart purchases this item on your behalf and handles shipping, customs, and support to KUWAIT.
💡 Drive brighter, drive smarter — light up your journey with Philips Xenon HID!
Philips D1S Xenon HID headlight bulb delivers twice the brightness of standard halogen bulbs with a crisp 4200K white light, enhancing driver focus and safety. Crafted from durable UV-quartz glass, it resists thermal shock and vibrations, ensuring long-lasting performance. Consuming 50% less power, this bulb is an energy-efficient upgrade trusted by major car manufacturers worldwide. Designed for select high and low beam positions, it offers a direct, vehicle-specific fit for easy installation and reliable road illumination.


| ASIN | B00CAV7T56 |
| Auto Part Position | Front |
| Automotive Fit Type | Vehicle Specific Fit |
| Best Sellers Rank | #39,835 in Automotive ( See Top 100 in Automotive ) #238 in Automotive Headlight Bulbs |
| Brand | Philips |
| Brand Name | Philips |
| Bulb Base | Prong |
| Bulb Shape Size | T3 |
| Color | White |
| Color Temperature | 4200 Kelvin |
| Customer Reviews | 4.5 out of 5 stars 9,731 Reviews |
| Fit Type | Vehicle Specific Fit |
| Global Trade Identification Number | 00046677718480 |
| Included Components | BULB |
| Item Package Quantity | 1 |
| Item Type Name | Lighting |
| Item Weight | 0.1 Pounds |
| Light Source Type | High Intensity Discharge |
| Manufacturer | Philips |
| Manufacturer Part Number | 85415C1 |
| Manufacturer Warranty Description | 1 year |
| Model Number | D1SC1 |
| Package Quantity | 1 |
| Specific Uses For Product | Headlight or Fog light |
| UPC | 046677718480 |
| Unit Count | 1.0 Count |
| Voltage | 85 Volts |
| Wattage | 35 watts |
C**N
Range Rover Sport
Great product. Worked great for a 2007 Range Rover Sport SC! Just getting the ballast back on was insane. But that’s more on the car and not the bulbs.
T**N
So far great!
Bought two Sunday night (October 25th) and received them today (Wednesday October 28th) using standard FREE shipping. Nice! Looks like the real deal - Philips bulbs- I have no reason to believe otherwise based on packaging and bulb appearance. Great price at almost half of what Auto Parts stores sell these for. They work fine and have the right color - looks good. I'll write a review later if these have issues or fail early. Installation is fairly easy. If you have any sort of mechanical ability --- like changing a faucet washer, changing a household light bulb, handling basic tools, etc. these should not be a problem replacing on your own. Suggestions (2002 Nissan Maxima): 1 - Don't touch the actual glass on the bulb... some feel that oil from your hands can significantly reduce its lifetime. Opinions vary because that was the standard rule with halogen (which create a lot of heat). I just didn't want to take a chance. 2- You may have to move your battery to access the drivers side light. Not a problem. You don't have to remove it, just move it out of the way. If you have a newer battery, it's probably smaller than OEM (mines smaller) and you don't have to move it at all. 3- You don't need any tools to access or remove the bulb. It can all be done by hand. 4- The cover turns counter clockwise about 1/8 of a turn to remove. 5- The power connector moves slightly less counter clockwise to remove. 6 - The little clip that secures the bulb will move back into place after you squeeze it and then remove the bulb. Just lift up and put the new bulb in and squeeze back into place. It moves up and down... it will not fall out. 7 -Pay attention to bulb position and replace bulb in the same position. 8 - Put everything back in place. 9 - Check headlights! 10- You're done! Congrats you just saved a couple hundred bucks! THANKS AMAZON! P.S. My car is a 2002. Both bulbs went out within days of each other. I suggest replacing both bulbs at once. HID (Xenon) do not work the same as standard halogen bulbs -- they use a lot of energy and require an ignitor -- the system has a bit more going on and has other components that can fail. I hope if you are having headlight issues the solution is a simple inexpensive one. :-)
R**O
Good price.
Sturdy and useful but did not fit.
D**R
Suburban Glow-Up: Verified Philips, Verified Daylight
Product: Philips D3S HID‑style replacement bulbs – compatible with 2016 Chevrolet Suburban LTZ Installation: The bulbs fit the factory HID housing without any modifications. I was able to replace both units in roughly an hour using only the standard tools that came with the vehicle. Something I found along the way was that the old bulb came lose and was bouncing around, probably why it died. Performance: Immediate illumination – The bulbs turn on instantly, eliminating the brief “candle‑mode” dimness I experienced with the original HID modules. Brightness & beam quality – Light output is noticeably brighter and the beam remains crisp across the entire interior cabin. The color temperature matches the OEM white tone, giving the exterior a clean, neutral look. Stability – Throughout several days of regular use I observed no flicker, strobing, or error codes on the dashboard. Durability: The units are sealed, so there is no exposure to moisture or dust. I have not needed to service them since installation. Overall impression: Replacing the stock HID bulbs with the Philips D3S HID‑style units provided a straightforward, plug‑and‑play upgrade for my 2016 Suburban LTZ. The installation was simple, the lighting is brighter and more consistent, and the system operates without any warning messages. If you need a reliable replacement that maintains the original HID look, these bulbs are a solid choice.
C**D
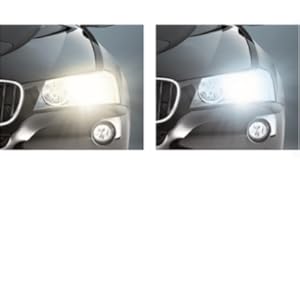
Not an "Intense White Light" as it states, but it'll do
Brightness is not as it says on the listing "Intense White Light" but rather it's more of a yellowed light. Still, I have to blame myself for this buyer's mistake because if you search Google for the measurement of color for light output, you'll see that 4200k is not as "intense of white" as it claims. So a quick Google search would have told me not to believe the intense part of the claim. Oh well. The light on the drivers side (left) is the OEM light which is probably 5000 or 6000k. The one on the right (passenger) is this one. See the difference. I don't like it, but I'm not changing it. I'll leave it in until it burns out as I'm already past the return window. Quoted from Google search results, "Color temperature is a measure in Kelvin that defines the color appearance of the light produced by any source. The range of color temperature goes from warm yellow hues, at low Kelvin values, to cool bluish tones at high values. In vehicle headlighting, the color temperature is more than an aesthetic choice; it is very important in terms of visibility and glare and in general driving safety. Driving at night can make a big difference in your choice of color temperature of the headlights. The warmer light at a lower Kelvin value is easier on the eyes and provides better contrast in bad weather conditions, such as fog, rain, or snow. At a higher Kelvin value, cool light can light up more details when on a clear road but produces glare on wet or reflective surfaces. Understanding color temperature will help in the choice of the right kind of headlight for driving conditions and comfort." We never have ANY precipitation in Phoenix so I don't have to worry about contrast or wet surfaces. I wanted what the car came with, but that's not what this is. It does work, so I have to give it at least 4 stars, but I deducted one because of the *Intense* & *White* wording it erroneously uses. UPDATE: It's been five months since replacing one of the lights on my 2014 Model S. So far the light is still strong & has not flickered its way to being completely off like the old one. I'd been living with that for a whole 2 years, so it was time. I still have that one gripe from before. It's not as white as your old ones from the factory. I've seen on the TMC forums that some people prefer this slightly off-white look to it. Not me. I miss the old OEM factory white straight out of Tesla factories.
M**N
Authentic Philips D3S HID Bulbs
Authentic Philips bulbs work great in my wife's 2014 Impala LTZ. Genuine Philips bulbs have the QR code and scratch-off code that you enter online to confirm authenticity. These were the OEM bulbs installed in the car so I made sure to replace with genuine equipment. Much easier to install than I anticipated, took me about 25 min to replace both bulbs. When installing, be very careful to not touch the bulb and filament material.
H**E
Glad I bought this one over off brand versions
I have a 2014 Dodge Durango citadel. I wasn’t sure if I wanted to buy this bulb because of the price compared to off brand versions of the same thing. I’m very glad I bought this one though. It is identical to my cars original bulb so I at least knew it would work properly. Based off of reviews of the offbrands it seems like you risk getting odd colors which just wasn’t worth it to me. Including not knowing how long it would truly last. This one fit perfectly and works just the way it should. The coloring is identical to my other side and that was also very important to me. A bit off topic of the bulb, just in case someone has the same car or issue - When I first finally got the new bulb in, it still wasn’t working. Come to find out the fuse for that headlight had also burned out. Most likely due to the headlight bulb starting to go bad, causing the fuse to short and blow. So, before thinking the new bulb is bad or there’s another issue, check your fuse box. If it’s bad, replace it obviously and still use the new bulb. Don’t put the old one back in even if it might still work. It’ll just blow the fuse again if you put in the old one and it’s going bad. This was also an issue I came across when it came to people using the cheaper bulbs. From what I saw the drivers side headlight going out is a common issue for Durango’s and the fuse being bad usually goes along with it.
G**K
Perfect OEM Xenon HID Headlight For Infiniti G35
This review is for Philips D2R Standard Authentic Xenon HID Headlight Bulb, 1 Pack. I had bougthen this bulb back in 2020 when the driver side headlight on my Infiniti G35 started flickering and finally went out a few months later. I wanted an authentic HID bulb for my car so I chose this Philips D2R C1 bulb because it has a Certificate of Authentication (CoA) affixed to the bottom of the box that I could verify on their website. Mine was authentic so that was a relief. I wasn’t sure if the new light would match my other light because it was “85126” and not “85126+” like the old bulb but I went ahead and installed it anyway. Replacing the headlight on the Infiniti G35 isn’t as difficult as many YouTubers make it out to be. There are even videos with people saying to take out the tyres!? Some say removing the tyres is not necessary but then they turn the tyres inwards, which is actually counterintuitive to me. I turned my tyres outward as far as it would go and it was wide open for me to reach in and do what I had to do. It took about 30 minutes to get the job done. The trick is to remember how everything fits in originally and use markers or photos to notate, if necessary. Another trick is to put the new bulb directly into the housing, lock it in place, and then attach the power connector. I had a difficult time when I attached the new bulb to the power connector first and then tried to lock them into position afterwards. Don’t do that! Just stick the new bulb into the slot, lock it in place with the clamp and then connect the power. Much easier doing it this way! Also, wear gloves to prevent touching the bulb. When I was done, the new light matched perfectly to the original passenger side headlight so I was really happy with it. Overall, perfect OEM headlight. It’s made in Germany and not China. I would recommend buying directly from Amazon and not a third party seller to ensure that you get an authentic Philips headlight. My original headlight lasted almost 10 years so I'm hoping that this one will last as long. I’d give it a 5.0/5.0 - 08/07/2023. 09/13/2025: I had to replace my passenger side low beam light and I followed the same procedure as the first time and it went smoothly. 1. Turn wheels outward. 2. Remove clips/screws to lower or remove fender liner to access bulb housing lid cover 3. Remove bulb power connector 4. Unlock clamp and remove old bulb 5. Insert new bulb and lock new bulb securely w/clamp 6. Reconnect power 7. TEST bulb 8. Close bulb housing securely and 9. Reinstall fender liner w/clips and screws. That's it guys, it should take 30 minutes to 1 hour MAX depending on how easy it is for you to remove the clips/liners and insert the bulb back into position before closing everything up. To see how the bulb should be positioned, just take a look at the other working light bulb from the outside and see what direction the ignitor is pointed (down). I've added more pictures (Sep 2025).
ترست بايلوت
منذ شهر
منذ شهر