

✨ Peel, Stick, Impress — Upgrade Your Space in a Snap! 🏡
Art3d's 10-sheet peel and stick backsplash features 12x12 inch subway-style 3D vinyl panels that cover 8.2 sq ft with 40% more area per tile than standard sizes. Made from premium heat- and moisture-resistant PVC, these glossy white tiles with gray grout are easy to install without grout or glue, never yellow over time, and are perfect for stylish, low-maintenance kitchen and bathroom upgrades.


| ASIN | B018U8RUTM |
| Additional Features | Peel and Stick |
| Best Sellers Rank | #65,698 in Tools & Home Improvement ( See Top 100 in Tools & Home Improvement ) #65 in Construction Tiles |
| Brand | Art3d |
| Brand Name | Art3d |
| Color | Mono White With Gray Grout |
| Customer Reviews | 3.8 out of 5 stars 8,936 Reviews |
| Finish Type | Glossy |
| Included Components | No |
| Indoor Outdoor Usage | Indoor |
| Item Dimensions | 11.81 x 11.81 x 0.06 inches |
| Item Form | Sheet |
| Item Type Name | Subway |
| Item Weight | 3.52 ounces |
| Item dimensions L x W x H | 11.81 x 11.81 x 0.06 inches |
| Manufacturer | Art3d |
| Material | Vinyl |
| Material Type | Vinyl |
| Number of Items | 10 |
| Number of Pieces | 10 |
| Pattern | Subway tile in mono white with gray grout |
| Product Style | Subway / Brick |
| Recommended Uses For Product | Bathroom, Kitchen |
| Shape | Rectangular |
| Subject Character | Subway |
| Surface Recommendation | Wall |
| Theme | Modern/Minimalist |
| UPC | 737080999381 |
| Unit Count | 10.0 Count |
| Water Resistance Level | Waterproof |
L**P
Easy upgrade, looks great!
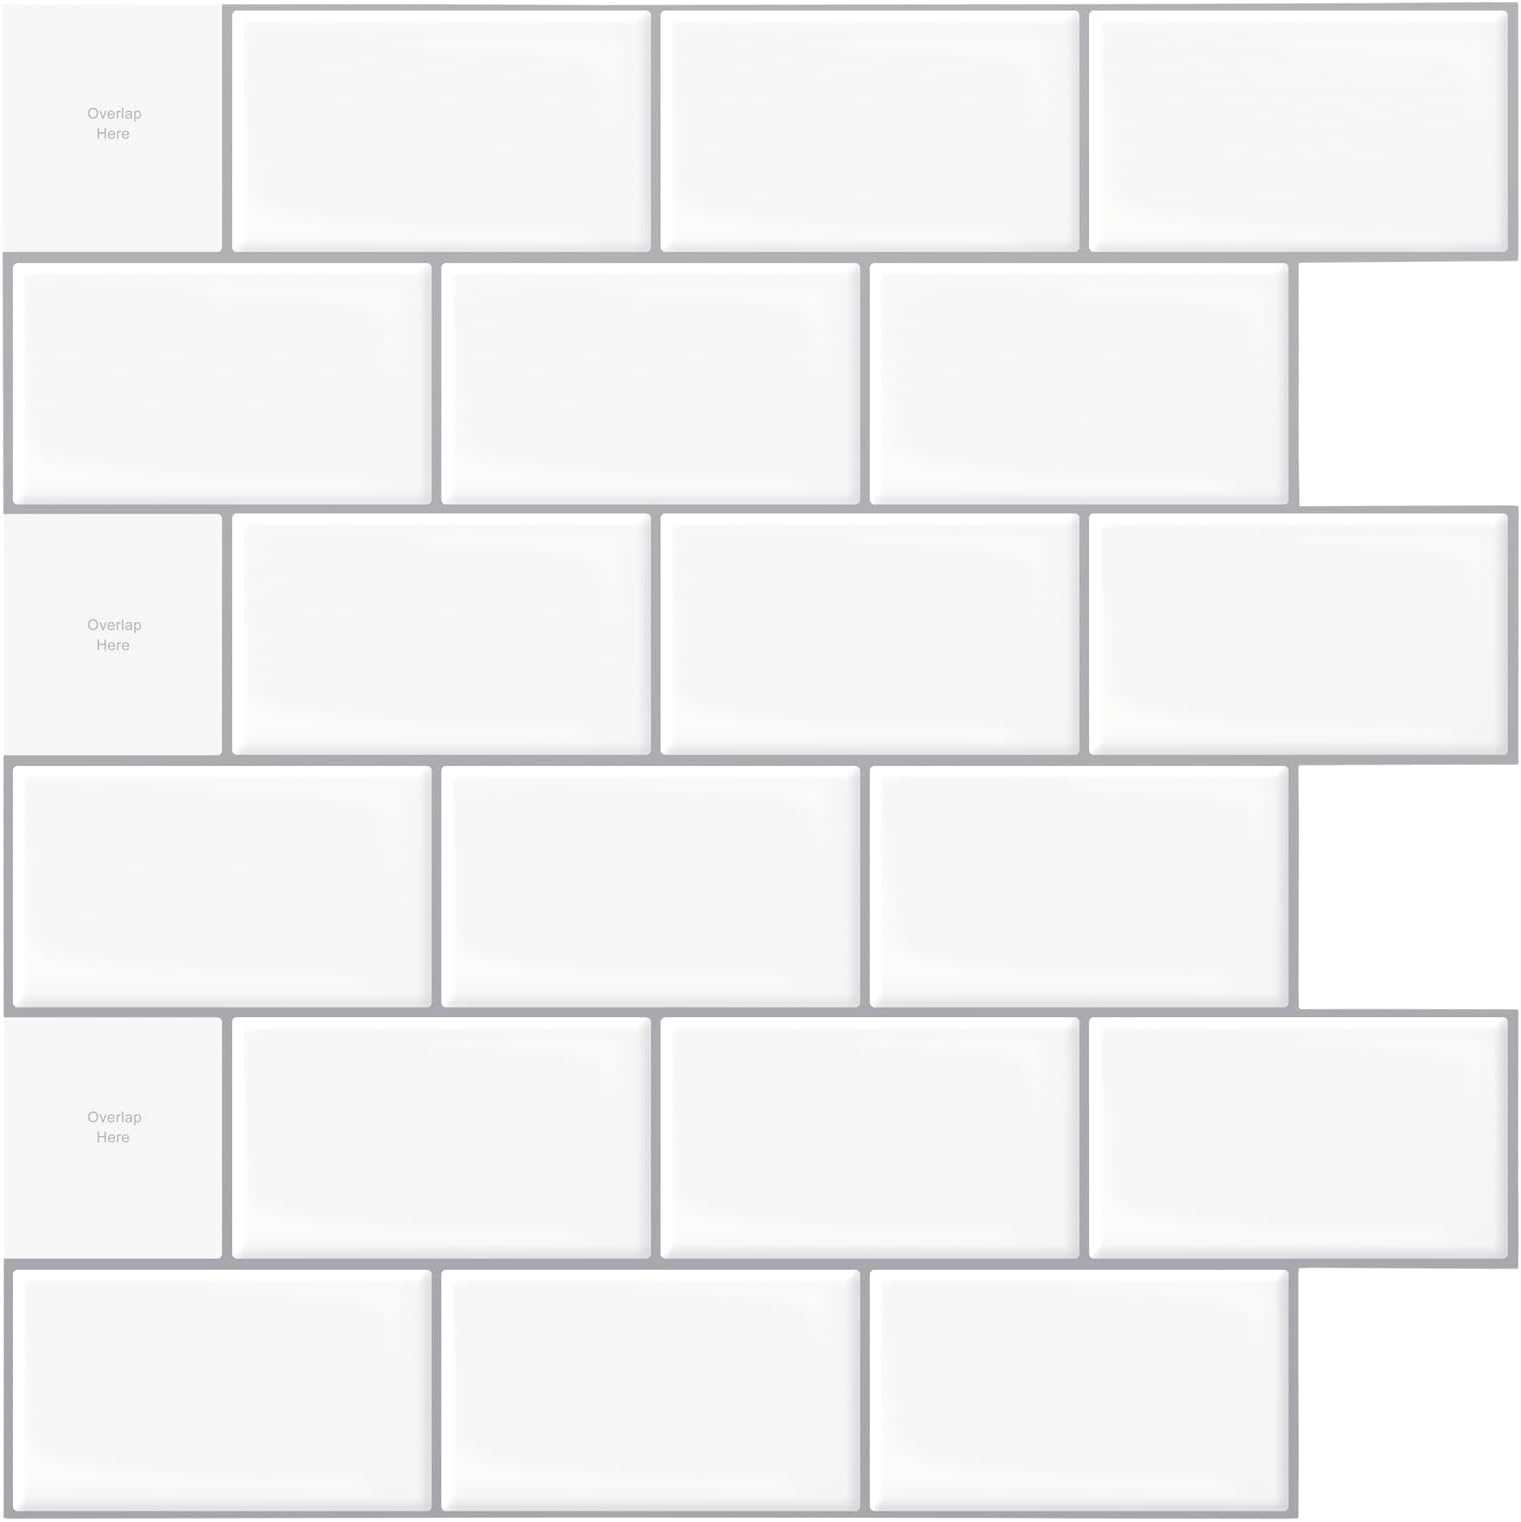
I would say that this is a quick and easy install IF you are good with wallpaper, home upgrades and crafting. I did my backsplash in about 3-4 hours, using an Xacto knife, cork-backed metal ruler, cutting mat and a burnisher. I would not recommend using scissors, you just can't get a straight line. The tiles go down easy and, providing you haven't burnished them down, can be moved a bit; but you have to pull them away from the wall really slowly and carefully (or they will tear or pull off your paint/wall.) The most important thing is measuring and cutting correctly. After applying, I burnished them down to remove air bubbles and secure. In doing the overlap, I also burnished those edges with my fingertip to make sure they were all flat. I'm really happy with the results and have already recommended the tiles to a few family and friends. The only cautionary note I would offer is to not attempt to do this unless you are familiar with similar projects. These take time, patience and exacting measurements and cuts. The adhesive is super sticky so there are no shortcuts or quickie applications. Hoping that they stay put until the real kitchen reno is done in a few years and that the don't yellow or buckle around the stove. Time will tell. For now, I'm very satisfied! Best of luck with your project!
L**S
GREAT QUALITY!
We all purchase a majority of our needs at Amazon. I must say this is a great quality peel and stick backsplash! I bought a few boxes. It adds such a sheik and modern look in the kitchen. It's super easy to apply. I also added it in the bathroom and it stayed on for a while, but it does peel off after time due to the steam on the walls. I placed them on the floor to see what it would look like and it looked really nice. The only thing is when cleaning bathroom floor the water that seeps in between the wall paper will create bacteria; so I don't recommend using it for the bathroom floor. Other than that you won't go wrong buying these. This is very cost efficient, and you'll still get the desired outcome.
H**R
One year later...
We put these on the kitchen wall a year ago and after figuring out a good method, they applied very easily and looked really nice! We applied a spray adhesive under them to make sure they remained attached to the wall. They did seem to stay attached well with this method but after about a year the stickers started separating at the seams (see photos). I don't know if they start to dry out and shrink over time or what happened but there were visible gaps between a lot of the sheets. We reordered the exact same product to replace some of these areas and were sent a package that had been opened, there were hairs in the package and the corners were bent on every single sheet in the same corner..it looked like the package had been dropped on the corner (see photos). It basically made that part of each sheet unusable. The new sheets were also brighter than the previous ones so they don't match seamlessly. I emailed the company and got a generic "We will reply in 1 business day" email in return. It was shortly before Christmas so I patiently waited, knowing how crazy the holidays are. But it's now been 4 weeks and I still have had no reply. I decided to cut up each sheet and use them the best that I could since I obviously wasn't getting a replacement. Several of the stickers ripped while pulling them off the paper backing which made that part unusable (see photos). We did not have this issue with our original sheets a year ago. I originally needed only 2 sheets to replace the areas of our old tiles but ended up having to use bits and pieces from EVERY SINGLE SHEET of the 10 pack because not one sheet was usable as a full sheet. I had to cut off and piece together parts of every one to make it somewhat usable. Not sure what happened between last year and now but the quality is terrible and customer service is apparently non-existent.
C**O
They will take paint off the wall if you try to remove!
I'm remodeling a horrific looking work bathroom on the cheap. I started with priming the bare sheetrock walls (no texture) and adding these tiles for some water resistance. The first thing to note is that since my walls are not perfectly straight at the bottom, the tiles were a little difficult to line up perfectly straight without a level. So a few of them are a little crooked and don't fit together perfectly, but these are not exactly for beauty, just a layer of protection so I'm not so concerned about that. They were easy to cut with a box cutter, and the backing is very good and sticky. So sticky that when I had to adjust a couple tiles, some paint came with it. Not a big deal in this bathroom but may be a big deal for a renter trying to leave no trace when they leave. They've been up for several days and no edges have come off, no tiles have fallen off. The only other thing I thought was weird was the rubbery texture. They might end up being a little hard to clean, but I did get some paint on a couple of them and it came off with some scrubbing. Other than that, they are good for what I needed and the price was right!
K**Y
Looks great, unless used around heat.
These were great and easy to install once I figured it out. We applied a thin laminate sheet to the wall before putting the tiles up, which made it so much easier to peel off and reattach if it didn't line up the first time. I was looking for a cheap way to update my backsplash and this worked perfectly. Fast forwarded a year, I definitely wouldn't recommend them in the kitchen, especially near heat. They have yellowed so bad behind my stove and toaster. Other than that, they are fine. I have had no issues with them starting to peel or shrink.
M**S
Beautiful peel & stick tiles!
I picked out these peel & stick tiles for a pantry Hubby is making for me out of an old hall closet. They look so amazing as you can see from photos! Project almost finished! Tiles are a little tricky to place, & once down, THEYRE STUCK! Adhesion is strong! He used a little windex sprayed on sticky part which allowed him some time for proper placement before these dried. Once dried it will peel off some drywall so the windex helped significantly with perfect placement, definitely buys you some time before they cure to your wall! Easy to install with the glass cleaner trick, otherwise you better place tile in exact position first time sticking down. I’m extremely pleased with my purchase & the look my pantry has at a fraction of the cost, mess, & time!
B**E
JUST GO FOR IT
UPDATE: Two whole years later and they are still going strong! Zero problems with the adhesive coming up anywhere and I wipe these bad boys off all the time to clean. I was worried because they run behind my stove and we boil a lot of pasta, etc. so I figured the hot steam would cause issues but NOTHING. Super impressed! A little bit tricky to figure out placement at first but once you get in the groove, it’s as simple as can be! Obviously, you won’t get the exact look of real tile/grout but these are close enough that nobody takes the time to notice. For installation, I bought a new utility knife and steel ruler like a few reviews recommended but scissors ended up being so much easier to handle. At no fault of the product, I had a little bit of difficulty since most counters are, apparently, not level at all. Simple fix if you have the same level of care from your builders: keep your scraps after you get done with the main pieces to cut and fill in any slanted gaps along the bottom. Then just add some caulk and even I don’t notice it (close-up picture is attached). I ended up using 3 1/2 packs and the total installation time was under 3 hours. I also bought additional adhesive but these things are sticky enough that it gripped well to our 30-year-old formica backsplash. I think using Krud Kutter before installation helped enormously since it removed the sheen from the surface to give it something to stick to. I was very careful and made sure to press every single seam down as I went but at the very end, I took a damp towel and went back over every seam. We live in the very humid state of Alabama and these have held up without issue for six months. We had an old phone jack in our wall that was next to a cable jack and an outlet and NONE of them were level or spaced evenly (again, go builders). I added a blank plate to the cable jack but since the phone jack stuck out like a sore thumb, I capped the wires and carefully placed the tiles over the opening. It took me forever to find the right angle and the right lighting to be able to see my coverup even the tiniest bit (I circled it in the picture attached) but you’d never be able to see it otherwise. Side note: I used the Giani countertop paint kit and my kitchen has been transformed in 3 days for under $200 and you just can’t beat that. Both items sat in my cart for months while I Pinterested how-tos instead of just doing it so if you’re on the fence, stop waiting for “one day” to come and just go for it. I finally love walking in our kitchen! Another side note: These go in and out of stock and I panicked when I had to order more. I ended up finding some listed on Amazon under “LongKing Subway Tiles” and they were the exact same tiles that worked perfectly!
A**R
Not that easy to apply
I bought this because I wanted something easier than applying ceramic tile, at least for the time being. As it turns out, this is not at all that easy to apply and get it to look right. I am in the process of taking it back off, as seen in the photo, because it looked terrible after I applied it. Removal is time consuming. This purchase was a big waste of money for me. Pros: 1. It sticks and stays in place really well. 2. It looks reasonably decent if you can get it positioned right. Good luck with that. 3. It is less messy to apply than real tile. Cons: 1. It isn’t easy to apply. It is brittle and the tiles easily tear along the grout lines as you apply it to the wall. Then the grout lines have an obvious break in them. The size of the tiles makes it hard to position them just right. Once it starts to stick, it is almost impossible to reposition it. A lot of my tiles broke up just from tearing off the back, before I ever got them on the wall. I am pretty handy with various home improvements and crafts but is just not a user friendly application. 2. It sticks really well so is hard to remove. A blow dryer or other heat source helps with removal but it still breaks up into little pieces and takes work to remove it. It isn’t going to come off as the 12x12 tiles that went on. 3. It is plastic and looks like plastic. It doesn’t really look like real tile. 4. It is not really much of a cost savings over just buying and applying real tile. You can easily apply tile over existing tile. Check out Youtube videos for ideas and don’t waste money on this.
ترست بايلوت
منذ 3 أيام
منذ شهرين