We remain fully operational. Our teams are working around the clock to ensure your deliveries continue safely.

قم بتنزيل التطبيق


معلومات عنا
حقوق الطبع والنشر © 2024 Desertcart Holdings Limited
قم بتنزيل التطبيق
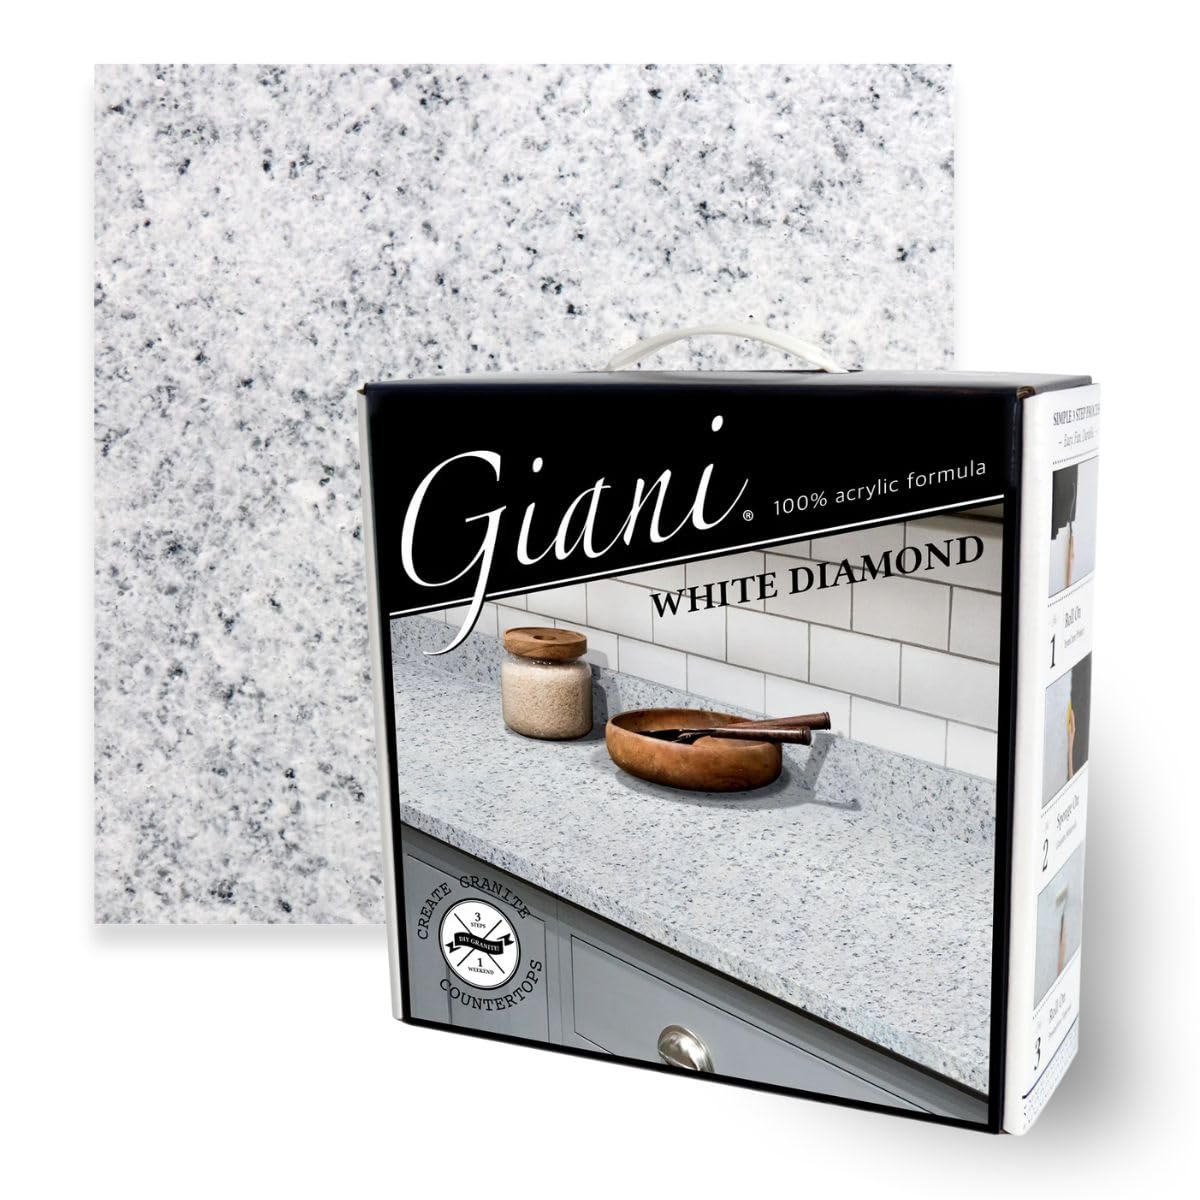
✨ Elevate your kitchen vibes with a luxe granite glow—DIY style! 🏡
The Giani Granite Countertop Paint Kit 2.0 in White Diamond offers a professional-grade, 3-step acrylic paint system that transforms various countertop surfaces with a durable, food-safe, high-gloss finish. Covering up to 35 sq. ft., this low-odor, water-based kit delivers a customizable cool-toned granite look, all proudly made in the USA for a weekend project that elevates your kitchen aesthetic without the hefty price tag.


| Brand | Giani |
| Color | White Diamond |
| Finish Type | Gloss |
| Item Volume | 500 Milliliters |
| Size | 56 Fl Oz (Pack of 1) |
| Special Feature | Low Odor |
N**E
EASY CHEAP COUNTERTOP TRANSFORMATION
I have used this TWICE! If you need a cheap way to make your countertops look amazing THIS IS IT! I have pictures of before and after and you can see that I used it before. The before I used about 4 years ago. And I did the black marble recently. This stuff is amazing and it has transformed my kitchen TWICE! It is very easy to use and I was able to complete it with two small kids. It took me a couple of days and a lot of patience but it got done and looks amazing! And you get amazing looking counter tops with minimal cost! I do have a tip for the black marble. I wasn’t confident in my first attempt at it but I trialed it and it turned out good! 1. Apply the base coat (black). Dry 2. Sponge white and brown marble 3. Sponge black marble (I applied the 3 while wet then dried) Dry 4. Apply top coat x2. Let first coat dry then do another second I have picture of the steps you can check them out.
R**N
Easy to do, looks amazing!
Just got done and waiting for the topcoat to dry/cure. Love it!!! Great inexpensive way to change the look. There is one before photo where the counter is black with brown and orange specks so you can see how well the iron core primer and mineral paints cover it up. This kit was easy to use, great instructions and lots of videos to watch. I chose the kit with the acrylic topcoat as I was looking for a less glossy finish. I also wanted the counters to lean more towards the white limestone color so I did 3 sponging layers of that mineral color total. For the seams and tops of the vertical pieces, I used a very small triangle cut off of the sponge that was provided and a pair of tweezers to get in there and sponge on the mineral colors. When it gets hit with sunlight, it's beautiful and has a nice sheen to it. When the undercabinet lights come on, it has a slight bluish cast. The glitter topcoat is a nice touch. It is subtle but makes it look even more like granite.
A**T
PHENOMENAL Customer Service!!
This is my third time using this product over the past four years. I had dingy laminate countertops that were not in great shape. Was looking for an economical refresh and this has been it! In the past I didn't have the best looking end result using the sponge on technique, (I was happier with some areas over others) so this time I tossed the sponge and decided to forgo the sponge on technique entirely. I simply primed, and mixed a bit of the White Limestone into the Inca Gold until I achieved the tan shade I was looking for. From there I rolled it on with a foam roller, and used a quality 2" angled sash paintbrush for the back splash. I have about 18 square feet of counterspace and squeaked by/pulled it off using one kit. Because I'd prefer thicker coverage, I ordered an additional can of Inca Gold and White Limestone for that reason. But that's just me. I have found that the areas along the edge of the countertops that get leaned against the most, while reaching into the upper cabinets get the most wear. Also, even after applying the top coat, when wet items are placed on the countertops, it leaves water marks. Until fully dry. Then they disappear completely. For the price, ease of use and OUTSTANDING customer service I would highly recommend this product. It will buy me time, until I can finally decide if I want butcher block or quartz kitchen countertops. Until then, this is a decent refresh. They DO sell an epoxy that would be more durable than the top coat that is included in this kit, but having no experience using an epoxy I will be staying within my comfort zone and using the top coat that’s included. Place painters tape around your sink and stove, keep damp paper towels or baby wipes at the ready, and I suggest wearing disposable gloves. A good product. 11/21/25 UPDATE: I stand by what I said in my initial review. In a nutshell, the customer service is great, and this product is easy to use. That being said, if you’re of average height like I am, and wear a belt with your jeans, leaning over the kitchen sink has put a considerable amount of friction against the countertop in that area. You can see the wear and tear, with the black primer underneath in the attached photo. Any area that gets leaned against the most will show wear and tear. While this is a good product, don’t expect it to last indefinitely. Also, it stains. I used the topcoat that it came with, and in addition, purchased an additional 16 ounces to protect it as much as possible. But at the end of the day, I hold onto my reasonable expectations, as this is still paint.
J**.
Beautiful Product!
I initially purchased this set approximately 4 years ago, so I feel like I have given this product enough time for an honest review. Overall, great product. Well worth the money and beats replacing old, outdated counter tops. The process from start to finish was time consuming as I had a pretty large space to cover, but it goes by quick once you get into the rhythm and start to see it all pull together. This kit comes with everything you need besides painter's tape. Now how for this counter paint holds up. I have put this to the true test and clean my counters daily with very MINIMAL flaking after 4 years. This could have been my own fault when applying the primer + seal since it was only in one small area. I was able to use left over paint a few years later to fix the flakes so you can't even tell where they were. Overall, this project took a few days from start to finish as I had to allow dry time so don't expect to have this finished relatively quick. For the price point and the quality of the product, I will recommend to anyone who is interested in sprucing up those outdated countertops!
U**N
Counter top looks fantastic
This has lasted great!! The paint quality is fantastic and as long as following directions it is easy to use. I ordered 2 kits not thinking we would have enough but the coverage was as advertised
R**.
Wow, it really works.
Ok, listen, I'm alive so it couldn't be too bad. I painted our kitchen cabinets and the brown counter top just did not look good. We want to sell so my husband didn't want to spend any more money in the house. Hmm. I have an idea! I'll paint them. So, its not that my husband wouldn't have "let" me paint them, it just would have brought him to a near heartattack throughout the process. So, I waited for him to go on a work trip and got right to work. Monday I painted the black coat, the 1st coat. I'm a genius I thought. It already looks great! That night I added the 1st sponge layer, the gray. What have I done? 😱 He is going to kill me. Tuesday I woke up and knew I had to move forward. Can't stop now. I added the 2nd sponge layer, like an off white. Better? Maybe? Worse? All I know is that this is not going to look like a countertop. That night I started the 1st of the last layer, the bright white. OK, maybe now that's a little better. I continued to work on adding more white for 2 days. It it time consuming and a lot of work. Before I added the top coat I made sure it was nice and smooth. I gave it 2 layers of top coat and then made sure it was smooth again, very lightly sanding any bumps, then that final coat. I did wait 3 days before adding culk. Re-culking really gives it the final touch it needs. I was so proud of it!! I love it. The husband? He loves it too. He was impressed actually. I wish they gave 2 sponges. It's hard to do all in one stretch. Having 2 sponges would allow you to finish one side and go back to finish the other. The raised back to the counter top sucks. Blending that area isn't easy. Going around the kitchen sink also sucks. It's not like you can go a week without using water. Makes it easy for the tape to come off. It's just a pain to go around. Trust the process. It may look awful during some stages but the end result really will look great. I'm hoping I didn't put stuff on it top quickly but it's hard to wait too long in your kitchen.
K**.
Do the research.
This was OK for me. I wasn't able to achieve the look from the box that I wanted, but it looked OK. It does dry very quicky and the paint is thick. Cleaning up was easy and it was nice to have everything included.
S**Y
Sold the house!
Turned out better than I expected! I was in the process of selling my house and I really, really didn't want to spend $$$$ for a new countertop, but the original countertop was really dumpy. Well, I gave this a shot and it transformed the entire kitchen! I am a DIY-er but this was an intimidating project to start. The instructions are very good, and there are links to videos to watch every step of the process. After watching the steps, it really seamed like a craft project and very manageable and very forgivable. Since there are many staging of sponging paint, you have lots of chances to fix mistakes and get the look you want. Everything you need is in the kit. I went overboard cleaning, sanding and rinsing the countertop to prep. The primer adherence to the countertop is key to the whole process so I took my time. The primer step is intimidating, you need to completely cover the countertop in black primer. There is no turning back at that point. But then you start the sponging layers. Each layer is in its own paint can and there was plenty of paint for my small project. After each sponge layer, I stepped back into the next room to make sure there weren't any inconsistent areas. Oh, and they included a 'primed' paper so you can practice sponging on a similar surface before you tackle the actual countertop. After all the layers of sponging, it was time to seal. Now, I rushed this step and the texture wasn't great. So I recommend using more topcoat rather than less, and making sure it's an even surface before you step away. There are different dry times between each step, and the whole thing took a few days. I was leaving with my first load of furniture, so the whole countertop had weeks to completely cure. When I came back, I was amazed at the results! It has the depth of a real marble countertop...it's not going to trick anyone, but it is a quality dupe. I'm going to use another kit in my new home, and I'm recommending Giani to anyone who needs to spruce up a countertop!
ترست بايلوت
منذ شهر
منذ شهرين