


Buy anything from 5,000+ international stores. One checkout price. No surprise fees. Join 2M+ shoppers on Desertcart.
Desertcart purchases this item on your behalf and handles shipping, customs, and support to KUWAIT.
✨ Refresh your bathroom vibe with DWIL — DIY luxury that lasts! 🛁
DWIL Tub Paint is a 35oz water-based acrylic refinishing kit designed for bathtubs, sinks, tiles, and countertops. It offers a semi-gloss white finish that covers 50-55 sq.ft per kit, dries to the touch within 24-36 hours, and fully cures in 7 days. Featuring low VOC and low odor, it’s safe and easy to use indoors. The kit includes all necessary tools for a professional-quality, scratch-resistant, and waterproof finish that revitalizes bathroom surfaces with minimal hassle.


| ASIN | B09WCZDX6L |
| Age Range Description | Adult |
| Best Sellers Rank | #60,258 in Tools & Home Improvement ( See Top 100 in Tools & Home Improvement ) #28 in Household Countertop & Tile Paint #110 in Tile Grout |
| Brand | DWIL |
| Brand Name | DWIL |
| Color | White |
| Color Code | #FFFFFF |
| Container Type | Can |
| Customer Reviews | 4.2 out of 5 stars 1,141 Reviews |
| Dry Time In Hours | 24 |
| Full Cure Time | 7 Days |
| Indoor Outdoor Usage | Indoor |
| Is Waterproof | True |
| Item Form | Liquid |
| Item Volume | 1 Quarts |
| Item Weight | 35 Ounces |
| Manufacturer | DWIL |
| Paint Type | Acrylic |
| Size | 35 Ounce (Pack of 1) |
| Specific Uses For Product | Bathtub,Countertop,Floors,Sink,Sinks,Tile |
| Surface Recommendation | Ceramic,Paper,Porcelain |
| UPC | 605765932933 |
| Water Resistance Level | Waterproof |
D**C
Total bathroom transformation!
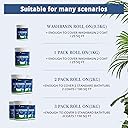
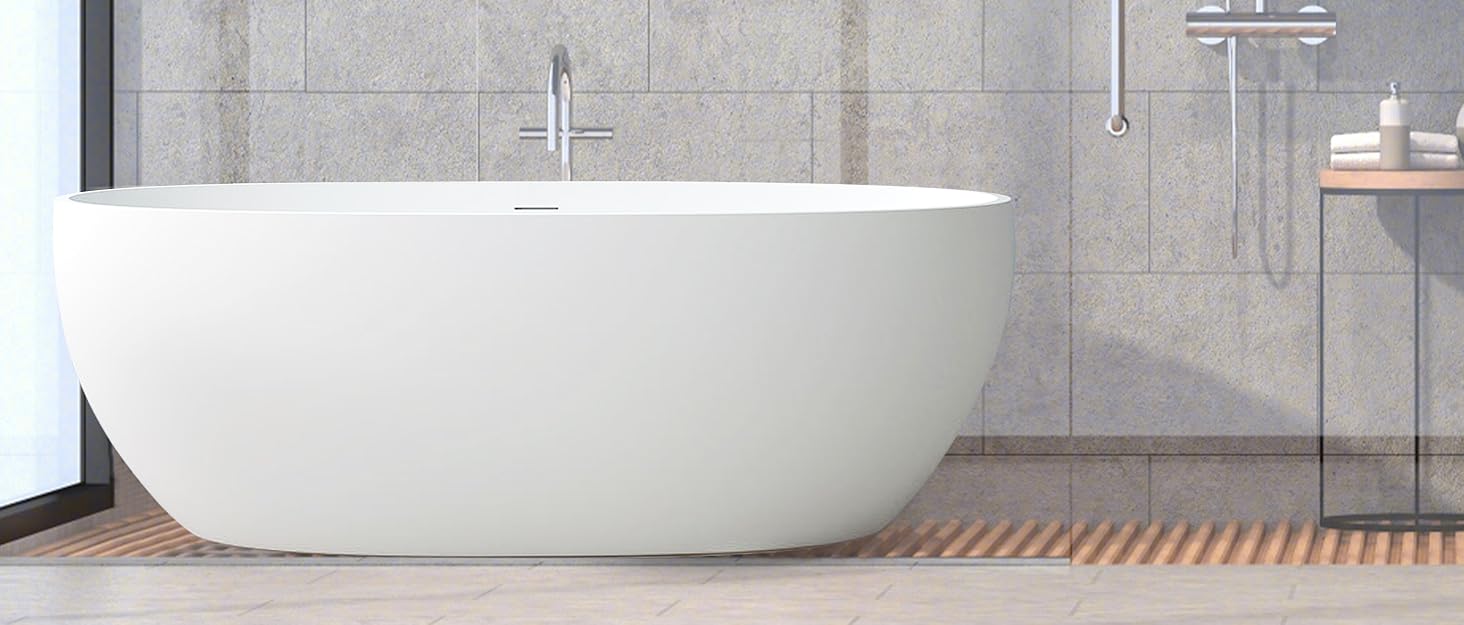
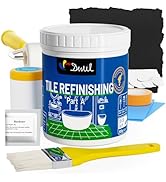
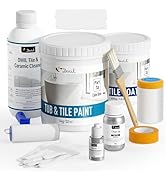
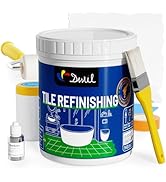
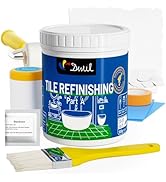
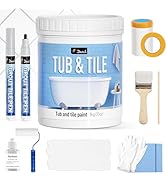
I had been putting up with the hideous “greige” tiles, sink, and fiberglass shower enclosure ever since we bought our house. After loads of research, I decided to try DWIL tub and tile paint. I don’t have a fan in my bathroom, and everything I read about all the alternatives out there (including the one that gets the most hype: rustolem’s tub refinishing paint) were epoxy based, and you had to have major respirator masks to use safely. When I found DWIL, I thought it might be too good to be true, so I decided to try it on the sink first and see how it went, and then decide if I’d do the tile, the floor, and the shower enclosure. Well, not only did it work, but it was almost easy. I mean, sure, I had to take time to tape everything off, and clean things well, but … that stuff is amazing. It took more coats than I expected to not see a little of the greige showing through, but the paint dried so quickly, I was able to go over areas with show-through within an hour of doing a coat. And if I dribbled paint on the floor (which I did a couple times), a wet rag would bring that up easily if it was still wet, or it would scrape off with a scrape razor. No problem.) The sink came out so well, I did the walls and floor and the shower enclosure. My entire bathroom looks completely different. I wound up redoing the ancient 80s wall tiles in the other full and half bath in the house. The shower enclosure took a lot longer, and a lot more coats were needed (I think I did 5), but again, it’s fast applying and drying, so it wasn’t that bad. I recommend buying better rollers - the ones that come in the kit aren’t great, but the paint brush that comes with it is fine. The hardening liquid that comes in the kit isn’t in a great container; I immediately transferred it to a small glass jar and would put the paint into a plastic paint jug so I could do smaller sections instead of prepping the whole can at once. (It’s possible to use the paint you’ve pre-prepped hours after without it hardening: just cover it tightly - the paint brush and roller too - with plastic wrap.) After the DWIL had fully cured, I painted the shower and sink with two coats of polycrylic to give it a bit more shine, but it’s not necessary. The walls and floor didn’t get the polycrylic addition, and they look fabulous too. We’re not planning to sell our house any time soon, but I know the investment of time and energy I made in refreshing our bathrooms with the help of DWIL paint will pay off big-time. They look modern and clean, instead of dull, old, and greige. A (relatively) easy and definitely affordable DIY project that anyone can do.
J**J
Best Tub paint IMO as a someone who has tried so many different products
This is the longest lasting and toughest bathtub paint I have ever used. Im a commercial painter by trade and have tried 4 different products including the one you pour on to get that smooth bath tub look. Well they all peeled or yellowed and didn't come out like I thought they would. This one leaves what we call a very tight stipple on the surface when dry but I actually prefer because if you think about it, who wants a surface that youre stepping on to be so smooth you slip on it when it's wet. You might also think its easier to clean the smoother it is but the other products dont clean half as well as this one. In fact I dont think anything sticks to the surface. I hardly do anything to it and it stays looking so clean...like not even ring of scum or sticky build up that I had a hard time getting off of other products. I cant explain it...it just stays clean. I got the light grey and its been almost two years since I painted it and it looks the same as when I first painted it. I put like 4 coats on in the time alloted. I guess it won't even stick to itself once it cures so get as many coats on as you can but putting on thin coats and allowing it to dry quickly instead of trying to make it cover in one or 2 coats...be patient and make sure you let it cure for however long it says and not get it wet. So keep it warmish in the bathroom so it dries quick and you can recoat. I've dropped things in it which I thought for sure would chip it but didn't unlike other products. I love that the color I picked matched nicely with the tile I chose and I got the wall color to match as well Im still just in awe at how well it has held up when everything else seemed to fail and it wasn't even close to smelling as bad as the others. It barely had an odor at all...but that could just be me because I've been in the trade so long. Im looking at it now and the stipple gives it a slight matte finish which I prefer. I recommend stripping whatever you applied previously if anything and give your tub a good sanding with 60 or 80 grit orbital...clean and repeat before applying. I might try using it on some tile in my foyer because I hate the color but like the tile look and dont want to go throught the hassle of removing it and for the price is absolutely fantastic
D**W
"Vanilla White" is YELLOW, and the White product is really White. Product itself seems great.
I needed to re-do the tile floor of a walk-in shower at a rental that I manage. I had had the floor and the whole surround "shot" by a commercial vendor a few years ago -- the surround still looks OK, but the floor was ruined -- cracking and chipping. I wasn't sure which color I should order, as the tile surround looked sort of a dingy white, and I was afraid that a pure white product might stand out too much. I couldn't find any pictures of the Vanilla White product, so I ordered that first, and FYI -- it was WAY too yellow for me -- nothing "white" about it. I ended up ordering a second kit of the regular white paint, and painted over the yellow, and the DWIL people were kind enough the refund half of my purchase price on the original order. Now, that said, I've been looking for a product exactly like this -- low VOC, easy to apply, and something that is self-levelling and hardens into a durable finish. I won't know for quite a while how durable it is (a year?), but for now, it looks good and seems really solid. If it holds up, this is a great product. Can it withstand somebody standing on a shower mat? We'll find out.
M**N
Extremely happy with the results
Packaging: came with a roller, brush, plastic gloves (which were very helpful), tape, tape with plastic attached (very useful), paint, and two hardening solution packs. I still needed to get extra rollers, a few paint trays, painters tape, paint stirers, liquid sander and scrubbing pad. Application: Went on easily. My first coat was a thin layer. I used the brush on the grout lines and then applied the roller. The difference was very visible. I think sticking with the roller for the first two coats would have worked better for a more even application (I also think a sprayer would have done the job perfectly) . Not sure if it was the grout or the curve of the tub that caused the roller to split, but you will need a few extra rollers just in case. Drying: I was working in a relative warm bathroom (my upper level is difficult to cool) so that may have impacted things. But boy, this product wants to dry! I sometimes accidentally touched a spot I had previously completed and the coating was dry enough that i didn't disrupt anything. It's best to work thoroughly in small methodical sections. I also ran into an issue with the paint in the tray forming skin layers. I wasn't aware of the formation until I applied more paint to the roller and then to the tub. It may be helpful to keep the tray covered with plastic to hopefully avoid this. Because of this, I used a new paint tray every time I finished a layer. It's difficult to clean them out completely and I didn't want old paint flecks/ skin causing issues with the next layer. Unfortunately there are still flecks that I couldn't get out. I don't feel terribly picky about it. Manage any drips immediately though. Coating: for my shower/tub project, one container made 2 full coatings. I ordered two containers because I wasn't sure what to expect. Glad I did. I actually liked the two coatings and hubs thought it was good enough. But I did see a bit of unevenness in my application in places. I used the second container to liberally apply a thicker third coat. That was exactly what it needed. A few paint brush touch ups at that point blended nicely and the product self- leveled. I absolutely love the result. We were going to go through an expensive rehab in the bathroom. This product changed our minds. The tub looks brand new and we saved ourselves several thousand dollars. I will say that our tub is porcelain with ceramic tile. The matte finish combined with the roller texture makes it look like a pvc cover up installation lol. Still looks amazing though. Tons better than the grimy mess it once was.
J**Z
Peeled off
Not recommended. Applied as instructed to shower fiberglass floor. Peeled off. Looking for something better.
H**M
For first time user review
Pros: absolutely white Cons: paint wears off pretty quick During the paint: The roller included does its job, the brush included kind of makes it look wood-like texture so just make sure you use the brush for the corners only! I think the paint dried in about 2 hours, although the instructions said to wait 48 hours, which we did before turned on the shower. After the paint dried: It dried nicely, but be careful when you decide to place a home depot bucket in the tub and it accidentally scrapes your bottom. Also, it absorbs stains easily. I'm going to have to redo the paint. Overall: I spent almost over $110 on buying two of these, it might be my paint skill, but I have to redo the paint or just do an entire renovation. I'm not super happy with the outcome. I was being a little cheap.
I**5
Good quality
Easy to use
K**N
Product review
Best product pertaining to what it’s supposed to do. I did a wonderful job on my shower in one of my bathrooms I would HIGHLY recommend it!!!!!!!!!!
J**.
A good facelift on a budget. A few drawbacks. Fairly easy to use.
I used a paint sprayer for a more even texture, then did a wet sand 1500 grit after the 7 day curing process to polish it up a bit and it’s holding great. Will update my review later if I run in to any problems. I did 3 coats with 2 hours inbetween. It looks great but keep in mind it will not have the same glassy feel like a brand new tub, but it’s certainly a nice face lift from what it was before. Make sure to wait the full 7 days before sanding, and DWIL doesn’t necessarily endorse sanding, I just asked a friend who understands these kinds of paint products.
J**E
Super easy to use!
Very pleased with how this turned out!! The product was extremely easy to use. My bathroom looks beautiful! The prep is a bit of a nightmare. The tiles I have are glazed ceramic so trying to get them sanded was a challenge in itself. Regular sandpaper in an orbital sander didn't work. Silicon carbide sandpaper didn't work. Diamond grit sandpaper did work but trying to find that for an orbital sander in store when you've already removed the caulk, repaired the grout and can't use the only shower in your house is a fun situation to be in! All in all, I'm very happy! Can't speak to the durability just yet but aesthetically, I love the results!
M**A
It works as promised
I spent a day refinishing my tub with the non-slip dark grey colour. I am a DIYer and have no experience with anything like this. The kit comes with everything you need. It's labor intensive, but it is well worth it. Give it a FULL week to set so go on vacation Or bath in the sink. Would purchase again. My tub was originally a gross cream color and it covered very well... with extra to spare.
J**E
Great low-cost solution!
If used properly, this works really well!! I did let if cure for over a week (painted and then went on holiday) and it totally transformed not just my tub but my whole bathroom. I'm also writing this review a year and a half later and aside from minor chipping due to metal objects fall on it, it's held up super well!
A**R
Not easy-peasy as you might think
So, I bought this product because I couldn’t find any other better options. So far I am happy with the result but I need to admit that for my personal perfectionist level 2 coats were not enough for full coverage. At the end I needed 2 cans of this paint (have no idea how 1 can be enough for two bathrooms as someone stated in previous comments) just for my one shower cabin which made me use 5 coats in total. I suspect that if I used primer before, I wouldn’t need so many coats. Supporting tools are great and were used, except paint brush (useless). To make a different colour (mint) I added some blue and green acrylic paint. Have to mention that in real life it looks much brighter and definitely more beautiful. Hope my honest review will be helpful for you.
Trustpilot
4 days ago
1 month ago