معلومات عنا
دعم العملاء
احصل على التطبيق

قم بتوجيه الكاميرا لتنزيل التطبيق
حقوق الطبع والنشر © 2024 Desertcart Holdings Limited

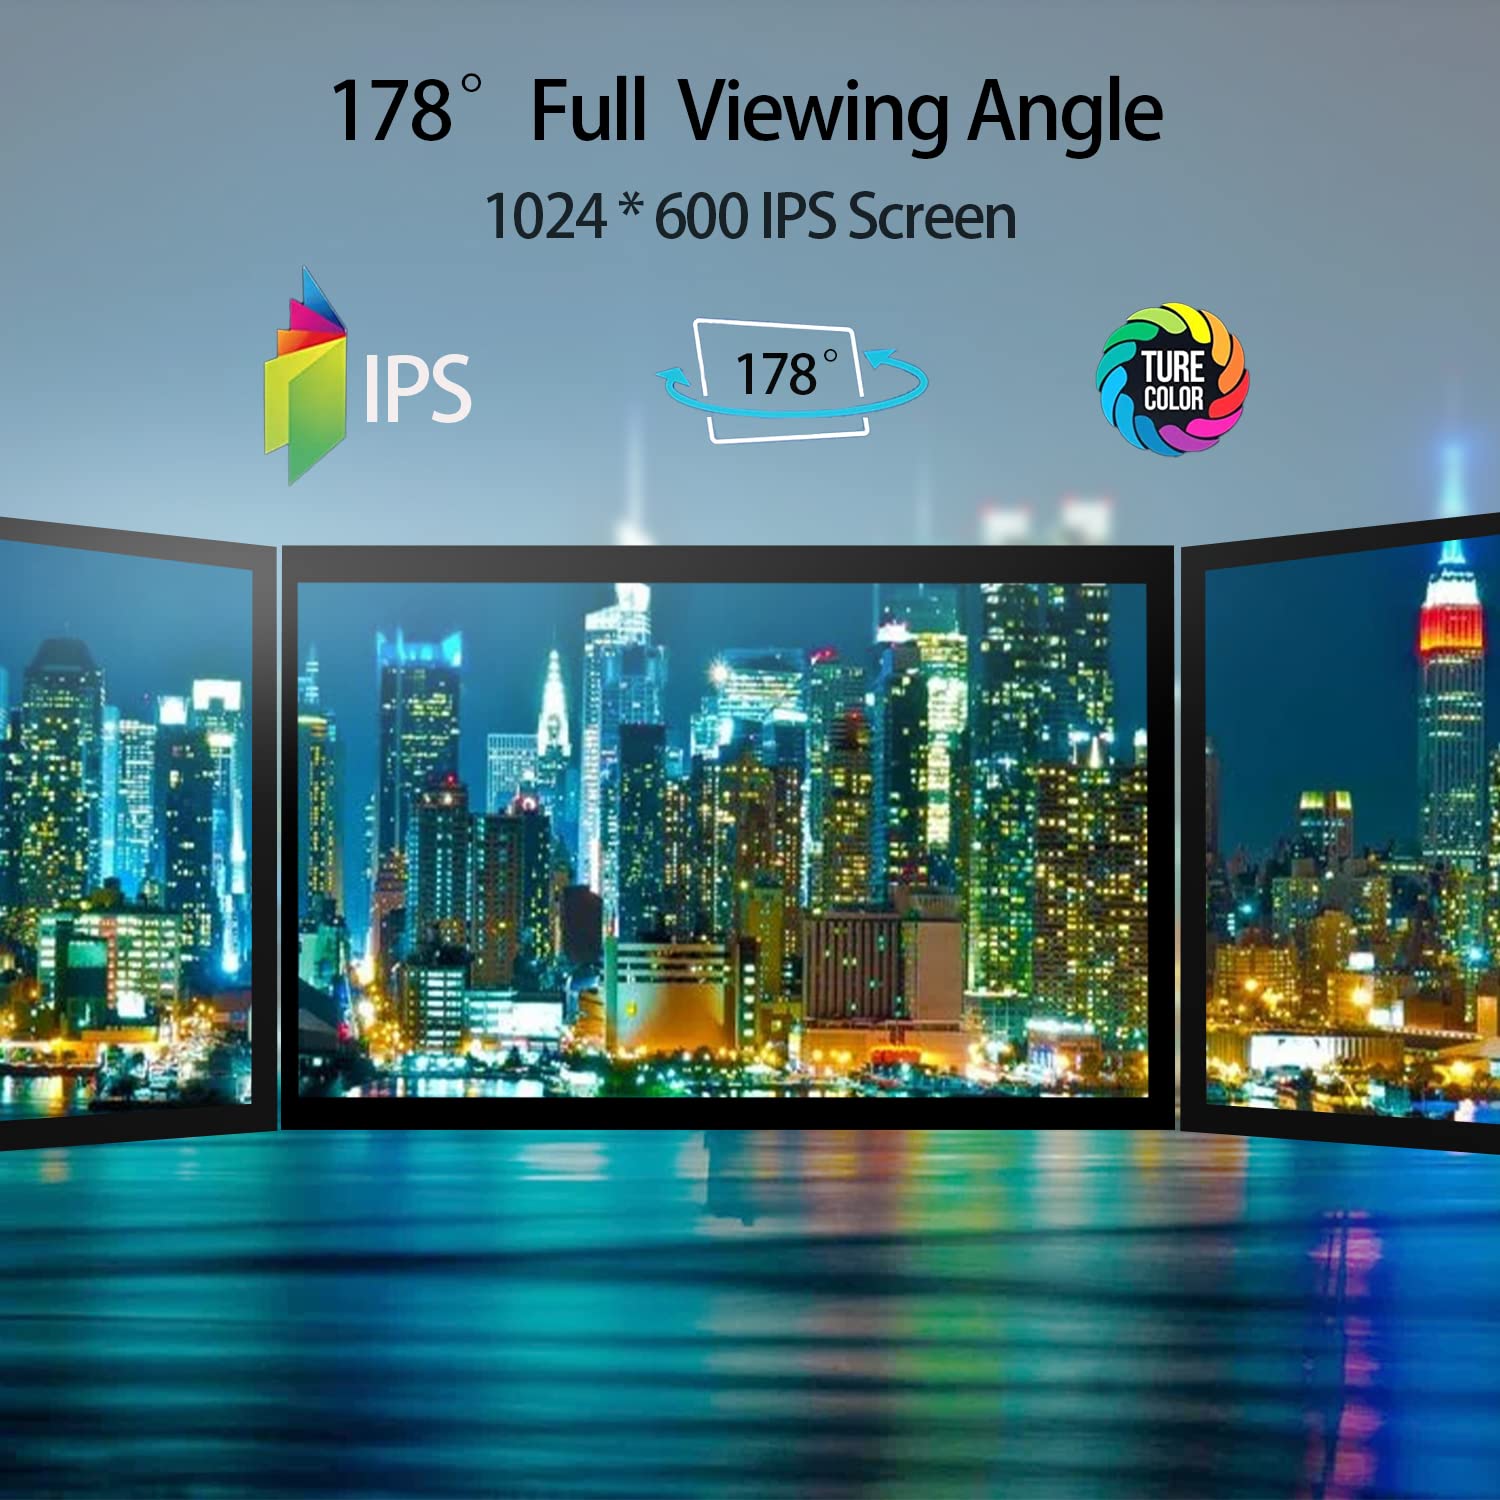


📈 Touch the Future of Display!
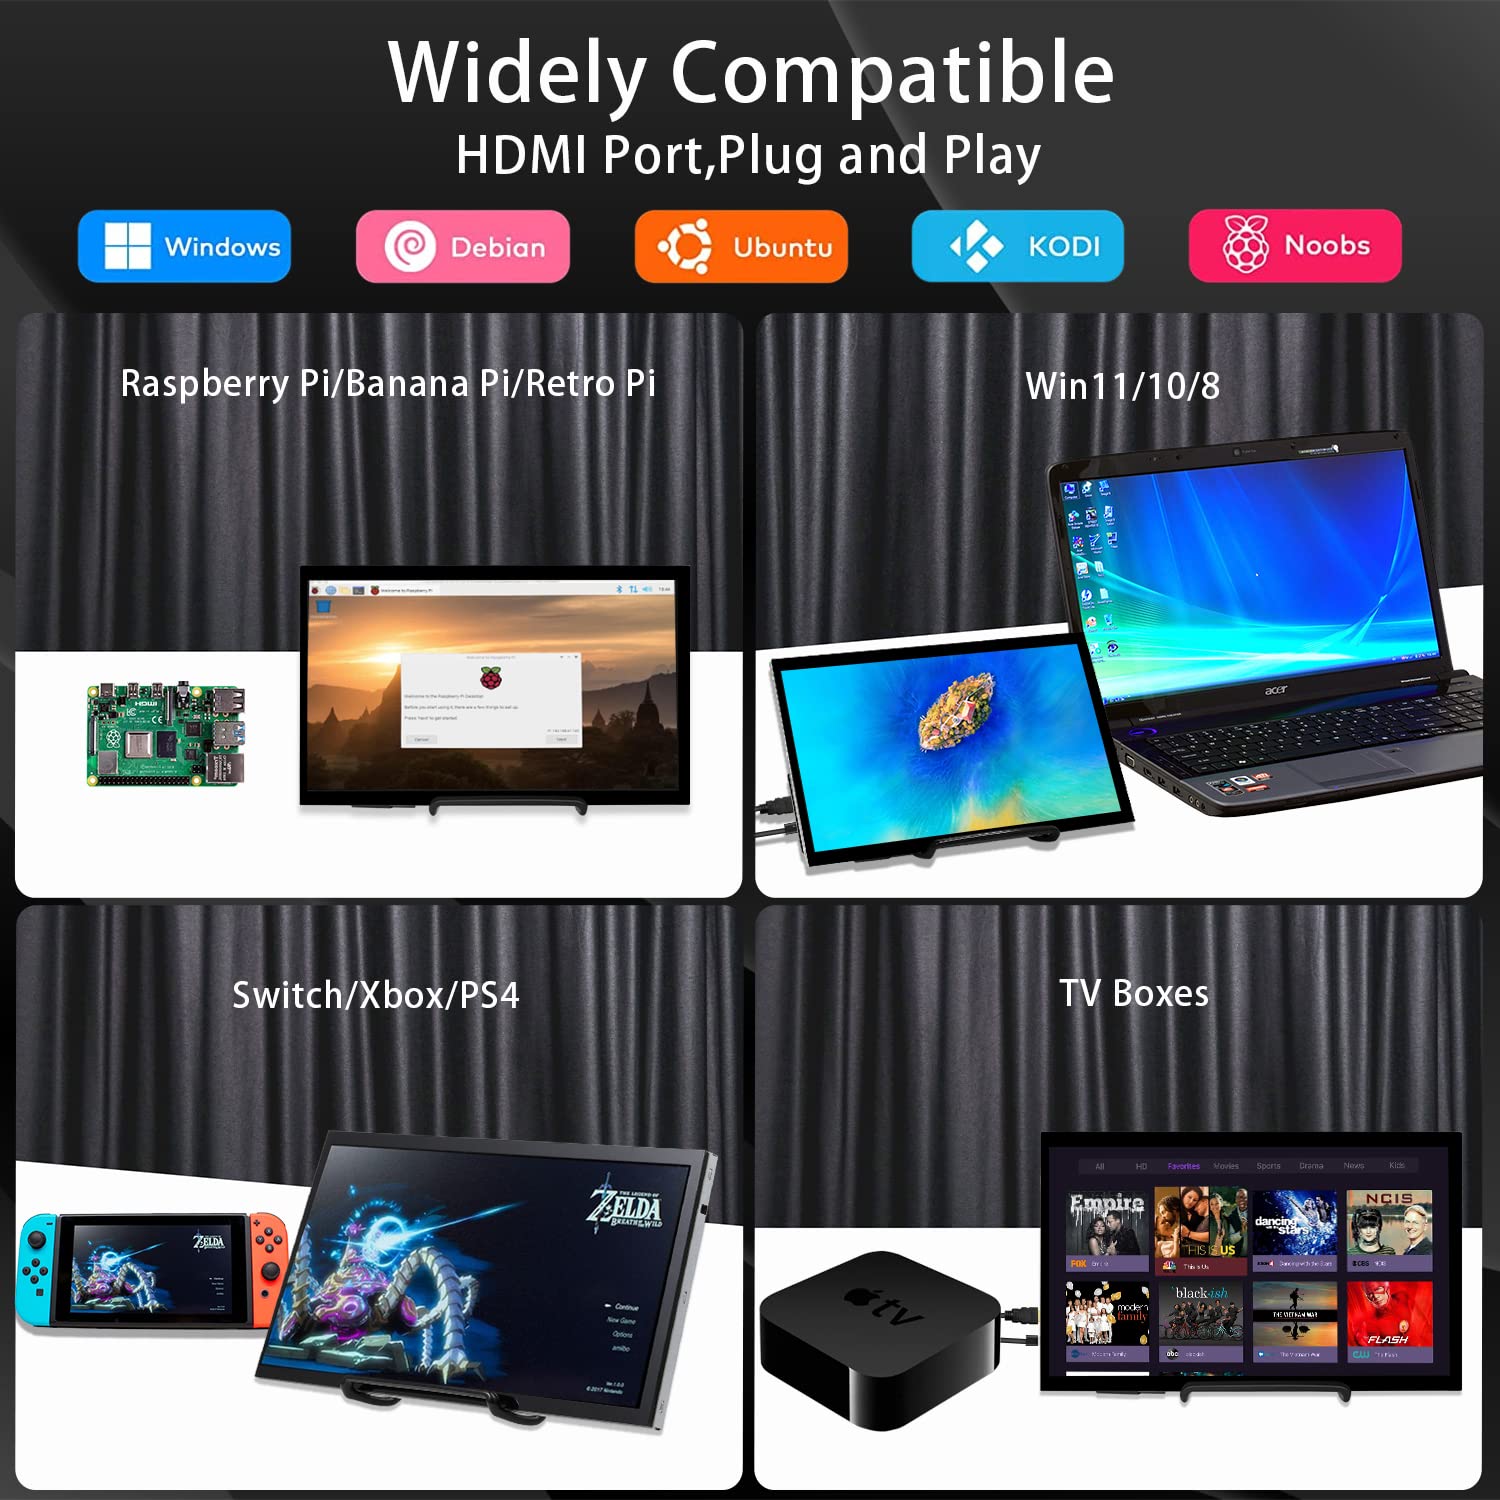
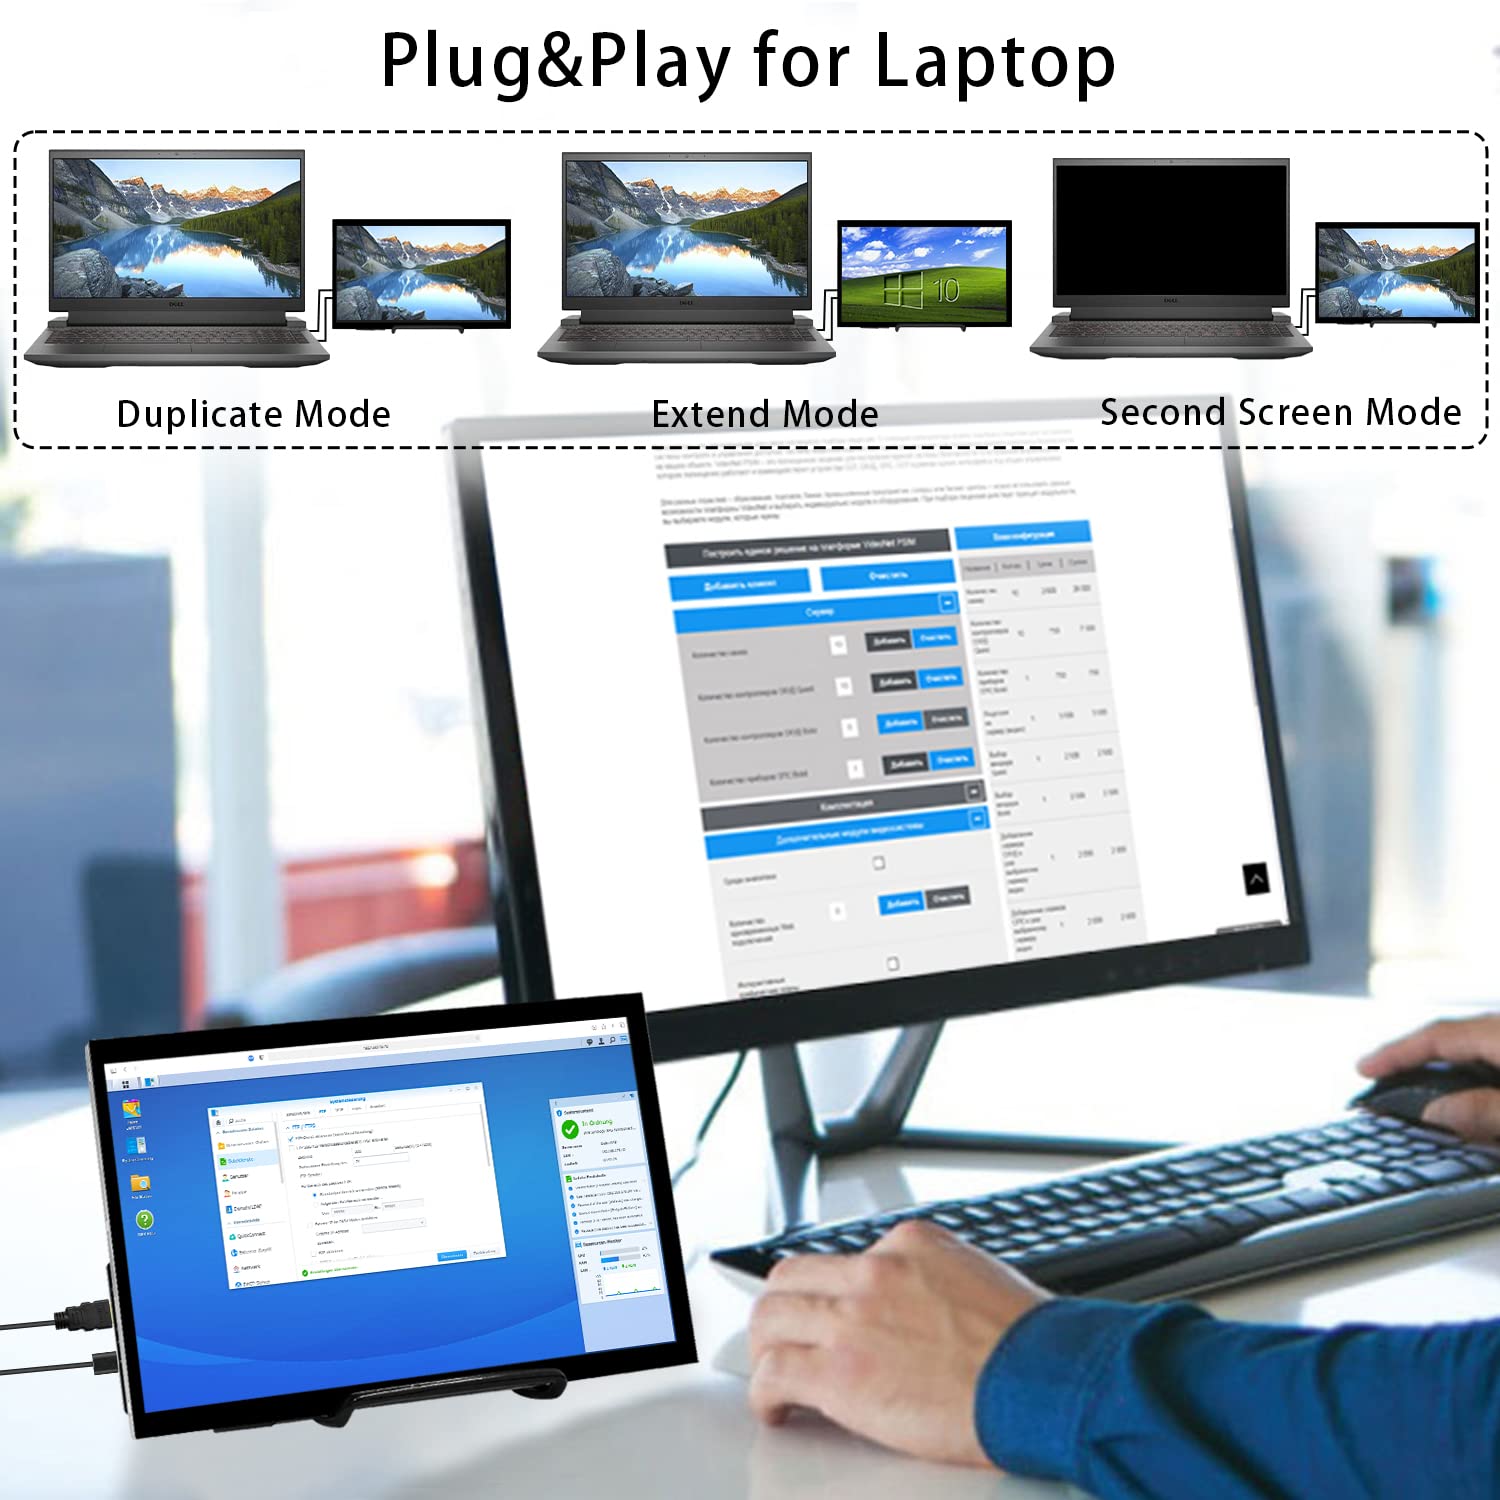
The HAMTYSAN 10.1'' Raspberry Pi Touchscreen Monitor features a high-resolution FHD IPS display, plug-and-play connectivity, and versatile compatibility with multiple devices and operating systems, making it an ideal choice for tech enthusiasts and professionals alike.
B**S
Works fine, Customer support went above and beyond.
Did not include advertised stand or HDMI cable, otherwise it connected to my mini PC without any issues. Update: Customer support reached out to me (not me to them) regarding the missing parts and rectified the situation to my complete satisfaction
R**K
Touch screen not working
Nice screen but touch screen doesn't work at all. Been that way since day 1. Easy setup with Orange Pi 3 LTS
E**.
Very nice touch screen for the Raspberry PI
I really like the fact that I can bolt a Raspberry Pi on the back surface of the display. Makes a nice package.
P**A
Poor materials. Failed after two mo ths
The screen worked well for two months of very light use and³then one day it didn't even turn on. The screen was handled with great care and still had the plastic on the screen. It was not dropped bumped scratched one bit. The return window has closed so I'm out of luck. Consider going with another brand that may use better and higher quality construction materials
M**K
Nice monitor for my Raspberry Pi
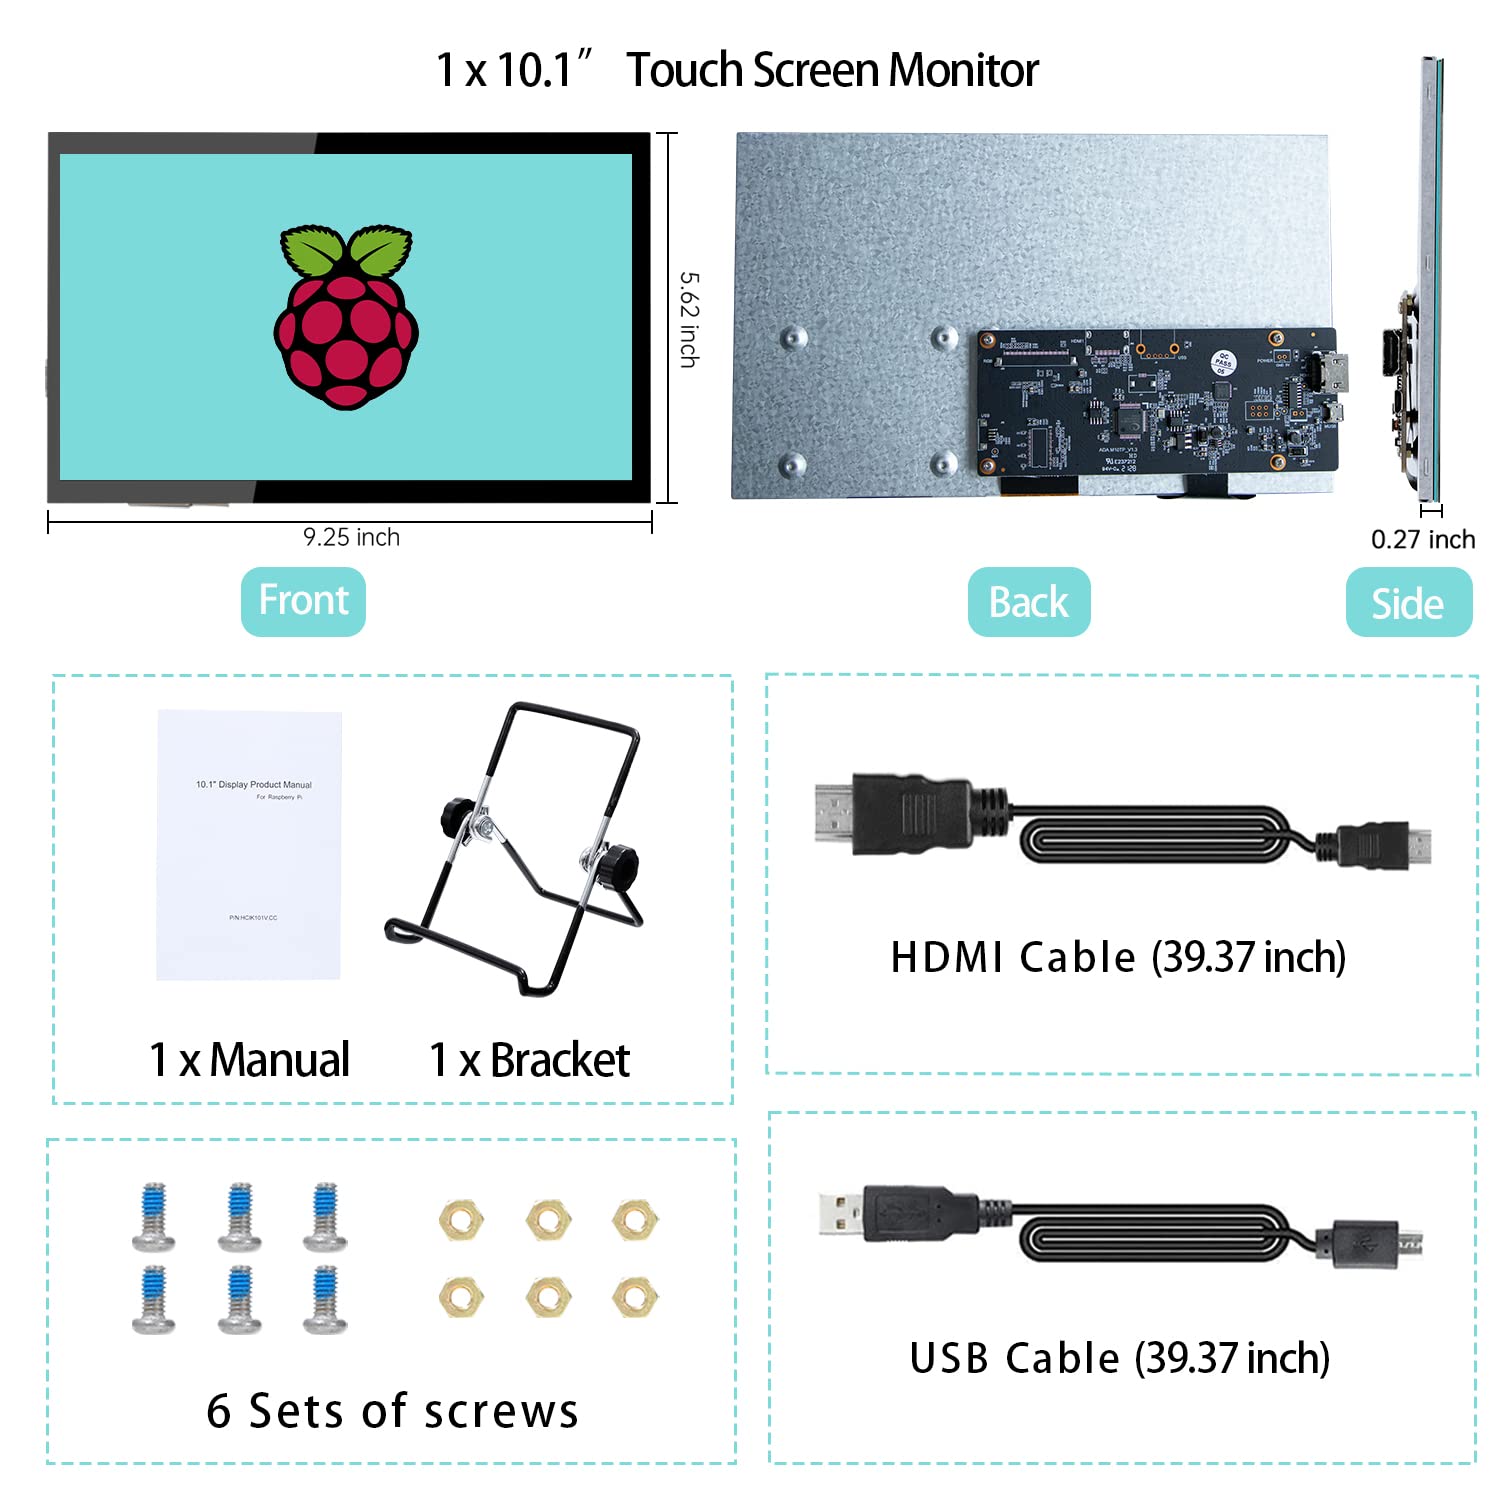
I picked up this monitor to turn my Raspberry Pi 3 into an all-in-one computer. Since this screen is a touchscreen, it turns my Pi into a tablet type computer. It won't replace an iPad or an Android tablet, but it works well for places where you use a Pi to control something and want a touchscreen for basic functions.You also need to understand that this monitor has exposed electronics and no enclosure for the Pi. So you'll need to mount it somewhere that protects the electronics or make your own case. I will probably design and 3D print a custom case.The monitor comes with everything you need to get an older Pi mounting and functioning. You mount the Pi on the back of the monitor with 4 screws (provided) and use 4 nuts as spacers (nuts are also provided). Look at how the monitor control board is mounted and use the same method for the Pi. It comes with an HDMI to HDMI cable that goes from the monitor to the Pi. If you have a Pi 4, you need an adapter or a different cable because the Pi 4 has two Micro HDMI ports. The monitor also comes with a MicroUSB to USB A cable. That goes from the monitor to one of the USB ports on the Pi. The Pi provides power to the monitor through that USB port and it receives the inputs from the touchscreen through that same cable. The cables are too long when using the Pi mounted on the back and you have a lot of excess cable. The extra length would be useful if you were using a different computer.While this monitor works great for a Pi, it would not be great on a Windows computer. I'm sure it will work, but it's too small and low resolution for most Windows apps.Once you have it up and running, there are a few things you will want to do to make it better. The first is to install an on-screen keyboard. I installed matchbox-keyboard. You can open the on-screen keyboard from the accessories folder. It doesn't automatically pop-up like on a tablet.The second thing to do is to set the Pi to use the native resolution of the monitor. I believe it defaults to 1920x1080. Everything looks slightly grainy and stretched. To set the Pi to 1024x600, you need to edit the /boot/config.txt file and make a few changes. Here are the lines I added:hdmi_cvt=1024 600 60 3 0 0 0hdmi_group=2hdmi_mode=87disable_overscan=1After saving those changes and rebooting, the screen looks much better with the Pi.The manual that came with it states the monitor needs 5V at 2A. Since the only way to power it is off the USB port, it's not going to get 2A. Most USB ports only put our 0.5A to 0.9A. It seems to run fine powered off the Pi USB port, so it must not really need 2A.The stand that came with the monitor works, but it's not very good. The monitor leans a little to one side and you cannot raise it up off the desk very much. Parts of the stand are bare metal, so make sure it doesn't contact the exposed circuitry on the back of the monitor.For this price point, I shouldn't expect a fancy stand or custom made cables that are the perfect length. At least it comes with what you need to make it functional.
W**E
Pretty Good
The resolution could be a little better but for a portable monitor the colors look great. This is one of the better monitors I’ve seen in terms of saturation and color space. Actually let’s be honest, 600 vertical resolution is terrible. At minimum it should be 800. A good smart phone has six times the resolution of this thing. 600 is just too low. And that shows as you can very much see the pixels even from relatively far away. The picture just doesn’t look great in terms of sharpness but I’m always willing to make the trade-off for the color. You would have to have a specific application where this thing would perform optimally with such a low resolutionIt is a bare monitor without an enclosure but it’s almost a hybrid as the entire back except for the inverter board is protected in a galvanized metal shield. This makes it a little more easy to use without mounting it in a case.The board is mounted on the back and that is Ryan exposed on one side with holes and standoffs for mounting a raspberry pi board on the other. One of the issues I have is that the ports face the outside of the monitor which is great if you’re plugging it in from an external device but if you want to plug it into the board mounted on the back of the monitor there is no direct way to plug in the cables so you end up with these cable loops. You could buy some right angle adapters but these still end up having to stick out of the side a little bit.The obvious solution would be to have multiple inputs on the board in the back. It’s USB micro instead of USB-C for Power but in this case I guess it’s OK. I tend to be very critical of things that are still using micro USB but I think in the case of this one I understand. It’s still made to be powered from the raspberry pie itself. There’s enough room on the back that you could actually mount a battery and have the entire set up powered for mobile use which is kind of cool.Still between the micro USB and the low resolution it makes me wonder if this isn’t an older unit that is just repackaged and Brandon is something newI am currently unable to get the touchscreen function to work with windows. I am not exactly sure if you need a specific driver but nothing came up in the device manager. It’s possible it only allows touchscreen for a raspberry pi. I guess that will remain to be seen.All in all I guess it’s OK but I really wish it had more pixels and they had given a little more thought to the mounting placement in the back. I will update when and if I get the touchscreen working.
ترست بايلوت
منذ شهر
منذ 3 أسابيع