

Buy anything from 5,000+ international stores. One checkout price. No surprise fees. Join 2M+ shoppers on Desertcart.
Desertcart purchases this item on your behalf and handles shipping, customs, and support to KUWAIT.
💡 Light up your space, no soldering required!
The JACKYLED 30 Pcs 3-Pin LED Connectors kit offers a versatile, solderless solution for 10mm 3-pin RGB LED strips like WS2811 and WS2812B. Featuring L-shape connectors for smooth corner bends and made from fireproof PBT material, this 12V 72W rated set ensures safe, gapless, and professional-grade LED strip installations. Ideal for DIY enthusiasts seeking convenience and reliability in lighting projects.


| ASIN | B0D17GZR9Q |
| Assembled Height | 0.5 inches |
| Assembled Length | 0.59 inches |
| Assembled Width | 0.26 inches |
| Batteries Required? | No |
| Best Sellers Rank | #6,828 in Tools & Home Improvement ( See Top 100 in Tools & Home Improvement ) #2 in Track Lighting Connectors |
| Brand | JACKYLED |
| Color | L Shade |
| Customer Reviews | 3.8 3.8 out of 5 stars (59) |
| Date First Available | June 18, 2024 |
| Included Components | 10 pcs L shape RGB sheet + 22pcs 3-pin connector clips |
| Item Package Quantity | 20 |
| Item Weight | 0.634 ounces |
| Item model number | JKCO01-1000001A |
| Manufacturer | JACKYLED |
| Material | Plastic |
| Part Number | JKCO01-1000001A |
| Product Dimensions | 0.59 x 0.26 x 0.5 inches |
| Style | Simple |
| Wattage | 72 watts |
A**Y
Good product
Works wonderfully. Very convenient, especially when having to go around corners.
M**7
Thumbs up
Perfect connectors for my LED lights
R**5
Loose contact doesn't make good contact with the wiring
I spent an hour trying to figure out what was wrong with my LED strips, I pulled out my multimeter and made the most unusual discovery, the same wires in these connectors didn't make contact! Very poor quality product. Turns out my LED strip was working perfect, but the functionality of this was terrible. It's not easy to install, even though it doesn't even make a snap contact, to unsnap and snap the wires is so difficult. Overall terrible product.
L**R
Requires work/modification
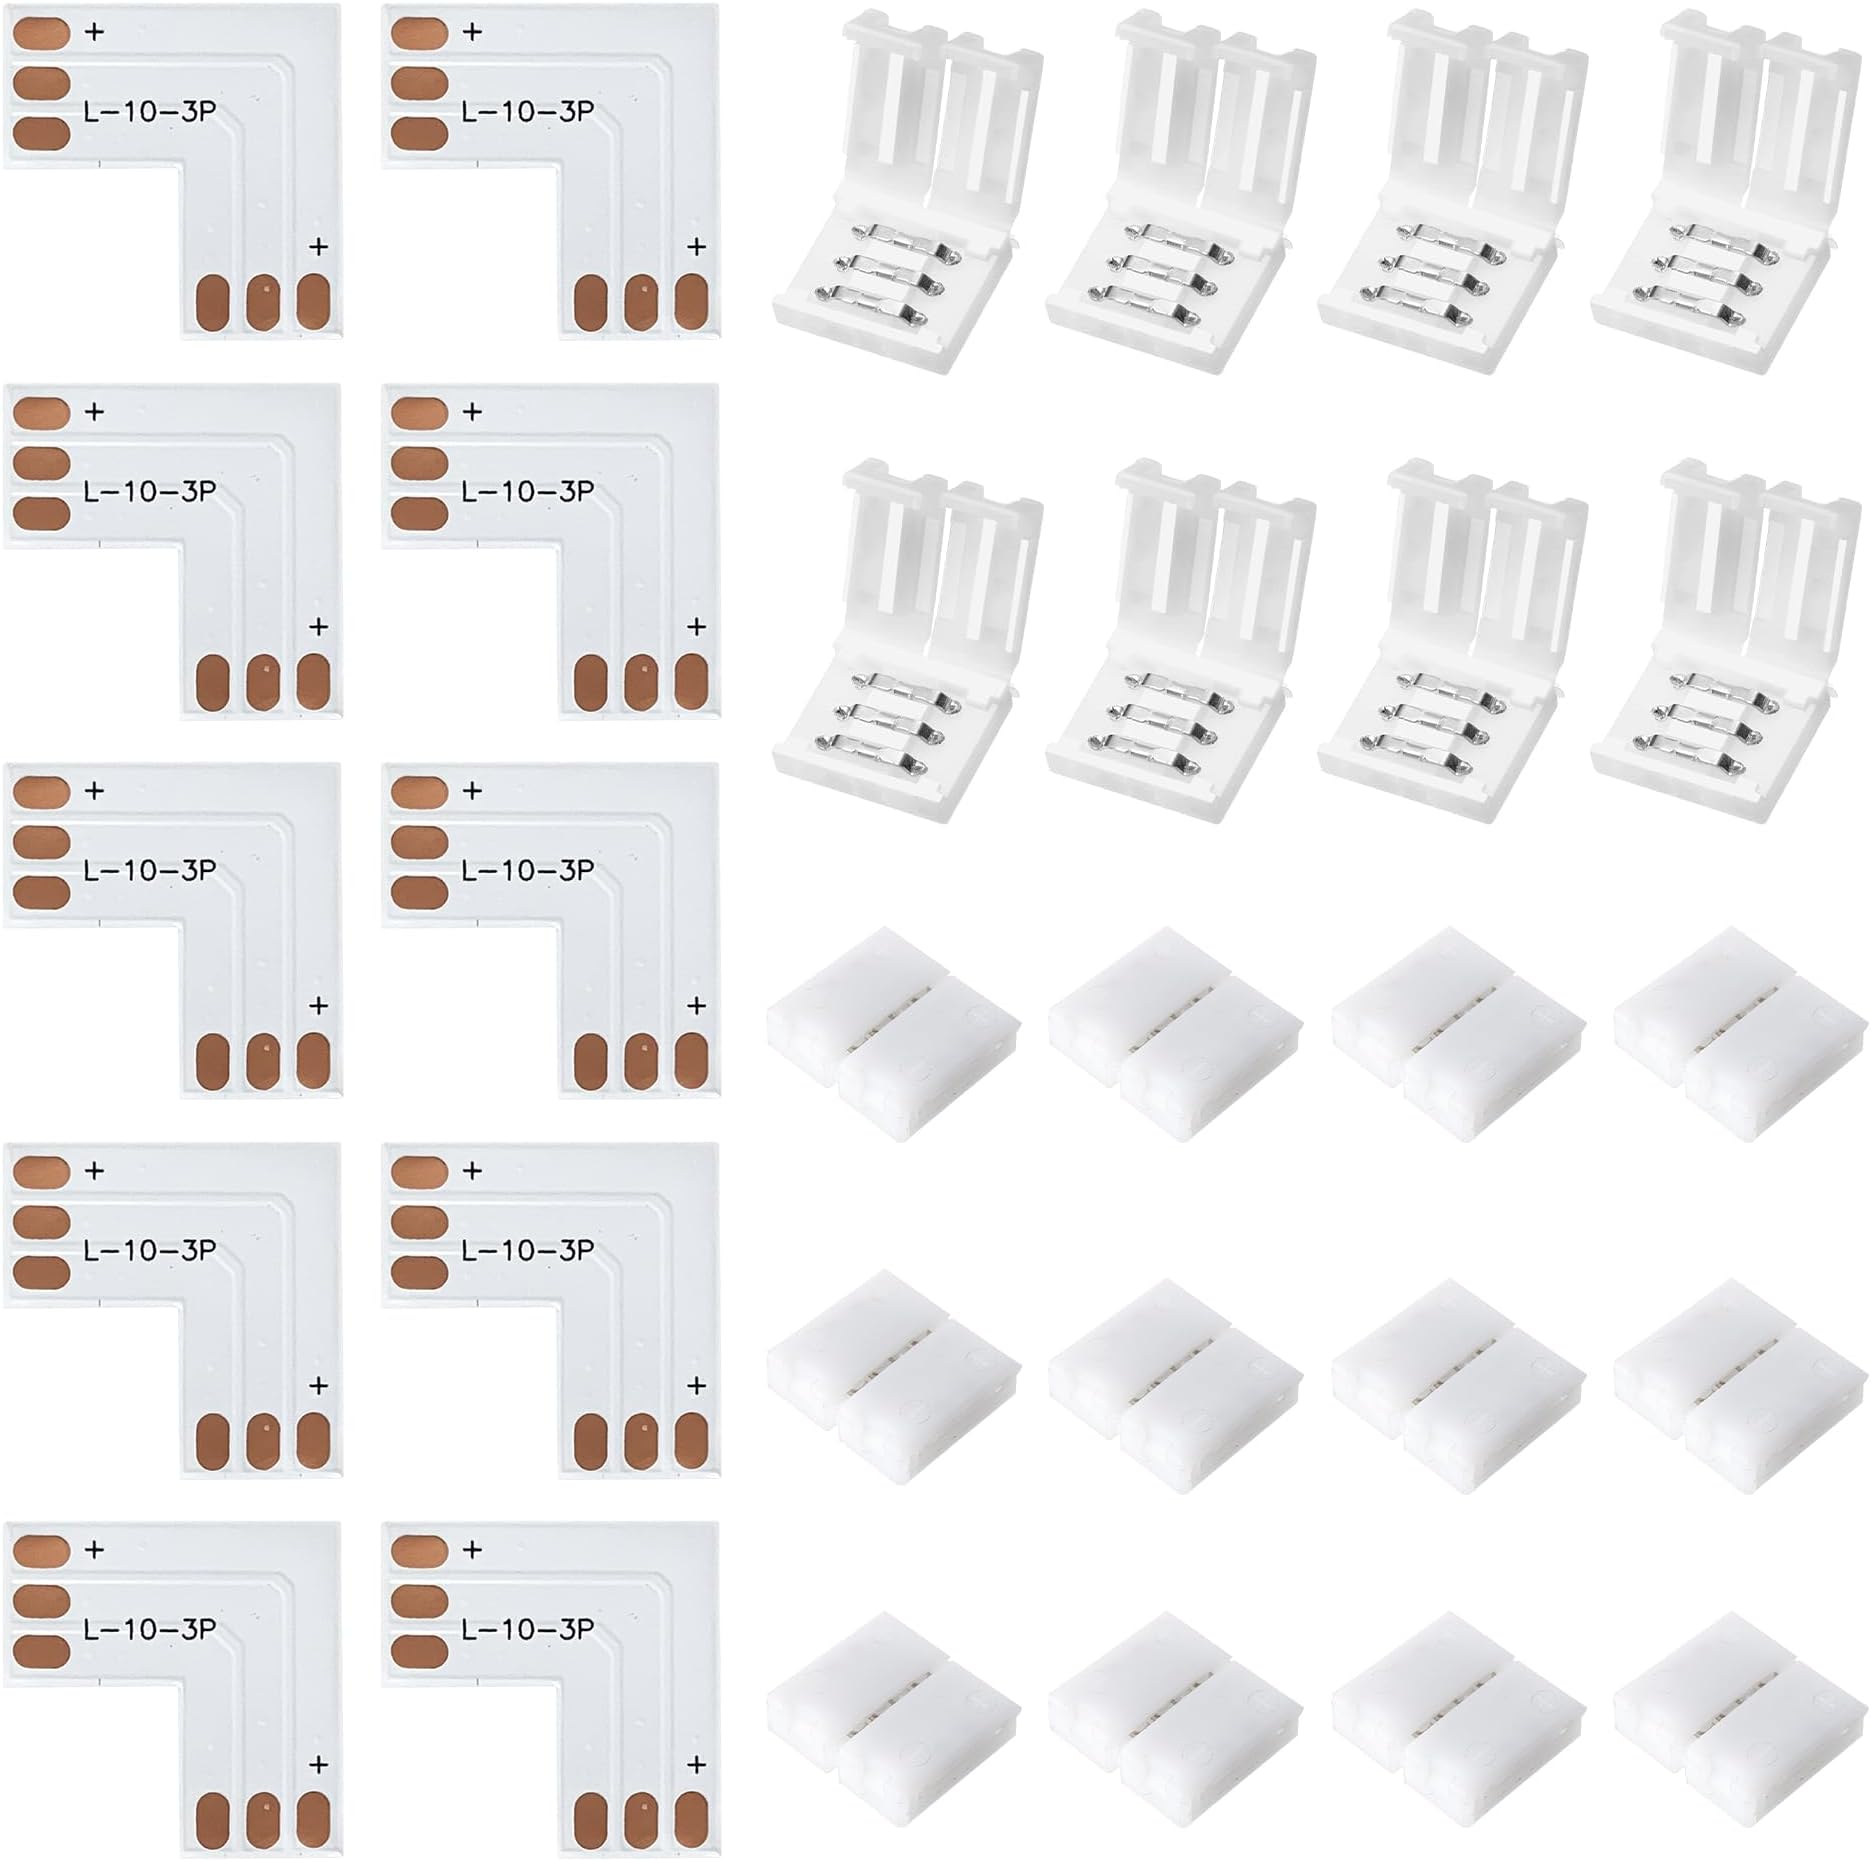
Okay, so to start this topic, I want to say that this could be a very good product, but at the moment, they have some work to do to really make it better. Here's my story and my workarounds to make this work. I initially started by just assuming that the electrical connections would be good. Looking at the design, it seemed to be a good product. I have a PhD in engineering, so I can usually identify potential issues, but I didn't see it here. I got my Govee lights about a 1/3rd of the way up and decided then to test and make sure it was all functional. At this point, I found that none of the connections were working. I had read the instructions and used the pliers to close the connections, but I still had no lights beyond the first junction point. At this point, I had 3 junction points. I got a pair of vice grips and started carefully squeezing the connection points, occasionally getting the next strip to light up, but as soon as I released the vice grips, the lights would go out. I started trying a number of things, but because things were on the ceiling and I was having to do physical origami, I moved to working on a section where I could be at a table. Once at the table, I used a multimeter (continuity) to test the connections. There are three connections: 24v, ground, and the signalling. All three have to be present. If the signalling line is off, you get red or another color. What I found is that the Govee lights have a coating on the three connnection points. Also, the 90 degree angle in this package also appeared to have a coating. I got out my soldering station (I said I was an engineer), and started tinning the leads (tinning means that you put a small layer of solder on the copper pad). I tinned the 90 degree connectors and the ends of the cut Govee lights and got a much better behavior. It was not perfect, but it moved things along much more quickly. It is important that the layer of solder be very thin. In some cases, the cut point in the Govee lights were on top of a soldered connection that was quite thick. I used a soldering iron and some solder removing mesh to remove most of it, leaving a thin tinned area. ** Warning ** do not solder or cut the Govee lights while power is applied. I know this from experience. In most cases, I was able to patch in a new segment of lights (this set allows this also) So, once tinned and connected, I went back to the vise grips and did the squeeze job on them. Before putting up the lights, I was able to test on both sides of the connection that there was continuity between the adjacent test points on either side of the junction. This made the rest of the job much easier. So, recommendations: 1. Measure out and cut your Govee lights and connections on the ground. Ensure that everything works before putting them on the wall/ceiling 2. Tin the areas with a thin layer of solder on the 90 degree connectors provided in this package and the ends of the cut Govee lights 3. Use a pair of vice grips to do the smashing. You can control the pressure on the vice grips with just small adjustments on the tool. 4. Have patience 5. Once up and you can see an issue, use a continuity checker (multimeter) to ensure a connection between the 24v and the ground on either side of the junciton 6. If you have lights, but they are not the designated color, then focus on the center pin 7. Once things are up and working, put a small piece of doublestick tape behing the 90 degree junctions
R**L
LED Connecters
Great product.
D**I
Work great
Once you figure out how they work they work great.
B**5
They work....kindof
So I have mixed feelings on these. Do they work? Yes. Are they cheap price wise, also yes. I have to major gripes with these though: 1) the pins don't line up with than any of the strip lights I bought. I have 3 different brand of lights and each brand of lights the solder strips are exactly the same width. The solder points on these are different than all 3 of my light brands, while yes you can get them to still connect you have to be very very accurate on your alignment otherwise it will be crossing over solder points and you risk frying your lights. 2) these are super thin and tear pretty easily. I put lights up around my exterior windows for year round lighting and on 3 separate occasions as I went to install them after making all my solders in the garage they tore on installion meaning I had to go back and redo it. I figured out on my last strand a trick to reduce the risk of tearing. I already was putting hot glue over all my solders to protect it from the elements but I then started covering the entire 90degree elbow in hot glue, front and back, just to create some rigidity in them. It's ugly but it will be behind a light defusing cover so it won't be seen. Not the best solution but it helped with install and reduced the risk of tearing. So, final thoughts. Yes they work, but barely. If you got patience and steady hands for the soldering you can make it work, otherwise find ones with wider contact points.
D**E
Pretty crappy actually...
This is crap. Doesn't work with Govee. I even tried the connector without the 90° piece, still doesn't work. Then I tried using the connector on soldered points. Still didn't work. True waste of time and money, just fold your LED strips
ترست بايلوت
منذ أسبوعين
منذ يومين