We remain fully operational. Our teams are working around the clock to ensure your deliveries continue safely.

قم بتنزيل التطبيق


معلومات عنا
حقوق الطبع والنشر © 2024 Desertcart Holdings Limited
قم بتنزيل التطبيق


🌿 Transform your walls, transform your vibe.
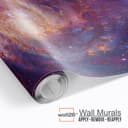
The wall26 Natural Landscape mural is a large, self-adhesive wallpaper measuring 66x96 inches, divided into four easy-to-handle panels. Designed for indoor and outdoor use on flat, dry surfaces, it features exclusive, high-resolution nature photography. Its peel-and-stick technology allows for repositioning without residue, making it ideal for renters and style changers seeking a bold, immersive decor upgrade.
| ASIN | B074DTRBRZ |
| Batteries Included? | No |
| Batteries Required? | No |
| Best Sellers Rank | #2,186,497 in Tools & Home Improvement ( See Top 100 in Tools & Home Improvement ) #60,077 in Wall Stickers & Murals |
| Color | Artwork - 08 |
| Customer Reviews | 4.8 4.8 out of 5 stars (9) |
| Date First Available | July 31, 2017 |
| Finish | Unfinished |
| Installation Method | Stick,Self Adhesive,Peel |
| Is Discontinued By Manufacturer | No |
| Item model number | WMR-WP-X-CB33-66x24x4 |
| Manufacturer | wall26 |
| Number Of Pieces | 4 |
| Part Number | WMR-WP-X-CB33-66x24x4 |
| Pattern | Tree |
| Shape | Rectangular |
| Size | 66"x96" |
| Special Features | removable |
J**H
Gorgeous photo-quality mural but hard to install
Five stars for image quality but minus 1 star for installation difficulty. The image is really well done, but for success I suggest the following: 1) If your wall is even lightly textured, sand and smooth it before attempting this. Otherwise, aligning the panels will be a real challenge and keeping a straight-line edge will be nearly impossible. The paper sticks too quickly and easily. Repositioning is not as easy as it sounds, and a lot, lot harder than with traditional pasted wallpaper. 2) Prime the wall with semi-gloss paint. Let the paint dry for several days to be sure it has fully cured. 3) Use a Laser- level or a straight edge to draw a straight line on the wall for *every* piece you will put up. The print stretches a bit during installation and you will find it "walked" if you don't keep an eye on that straight line. 4) At the starting point, butt the left edge into the corner if possible. Don't go around the corner more than 1/8". Less is even better, because the print is on heavy-weight paper and getting the corner + top edge + bottom edge properly aligned without excessive wrinkling is nearly impossible. 5) Split the excess length between the top and bottom (ceiling and floor) so that you have enough room to adjust the match-up as you put up each section. With several decades of wallpapering experience, I expected this project to be reasonably easy. It wasn't. In part that is because we attempted to install it over a "sand textured plaster" wall. We had prepped the wall by putting up Norwall's LPP2 Heavy Duty Wall Liner. We primed that with 2 coats of Zinsser GardZ and let it dry for 2 weeks before putting the mural up. Many of the little gritty bumps in the plaster *still* were visible, and those bumps take up space which made alignment a real challange as we laid out the mural. The good news is that the type of scenic view we chose had enough "forgiveness" in the print so that not-quite-exact alginment still looks OK. (See photo). The design has an overlap of at least 1/2" (on ours, anyway). Normally, you would use a straight edge to cut through the overlap, remove the extra layers, then mate along the seam. We have not done that (yet), mainly because I have little faith that the "mating" process will align well thanks to the irregularities in the underlying surface. I'd buy another one of this brand's products, but next time would do whatever it takes to totally smooth the wall surface. I think in that case, it would be much easier. For me, though, the easiest option would be to buy it *unpasted* and do the traditional wallpaper method, something I know how to do very well.
B**E
It looks just like the picture
Love it. I m gonna buy a second one
ترست بايلوت
منذ شهر
منذ 3 أسابيع