معلومات عنا
دعم العملاء
احصل على التطبيق

قم بتوجيه الكاميرا لتنزيل التطبيق
حقوق الطبع والنشر © 2024 Desertcart Holdings Limited
![𝟮𝟬𝟮𝟓 𝗡𝗲𝘄 𝗨𝗽𝗴𝗿𝗮𝗱𝗲𝘀 Z55H Battery, Compatible with Sony Headset Battery for WF-1000XM4 • Truly Wireless Earbud Headphones Battery+ Tools [2PCS]](https://m.media-amazon.com/images/I/71FmurVYxhL.jpg)


🔋 Power Up Your Sound Experience!
The 2025 New Upgrades Z55H Battery is a high-performance replacement for Sony WF-1000XM4 and WF-1000XM3 earbuds. With a capacity of 70mAh and a voltage of 3.85V, this lithium-ion battery ensures reliable performance and longevity, supporting up to 1000 recharge cycles. It comes with a full refund policy within 30 days and a one-year exchange guarantee, making it a smart choice for audiophiles seeking uninterrupted sound.


| Battery Weight | 65 Grams |
| Unit Count | 2.0 Count |
| Battery Cell Type | Lithium Ion |
| Recommended Uses For Product | WF-1000XM4 |
| Battery Capacity | 75 Milliamp Hours |
| Compatible Phone Models | WF-1000XM4 WF-1000XM3 z55h |
W**O
Not difficult if you take your time
Much like most people the batteries in the Sony earbuds have less than two years of life. In fact Sony replaced my earbuds where the replacements only lasted a year before the runtime was <1.5 hours.While I watched the Youtube videos and read some Reddit threads, what I eventually did to open the earbuds was to use a small bar clamp with the jaws wrapped with electrical tape to prevent marking the earbuds. In short I need the force which was more than I expected to get a seam going on the earbud.Once a seam was open I was able to use the kit's guitar pick to run around the seam to break the glue bond.After the earbud was open partway I popped the two boards apart with a spudger, which was not included in the kit. Then I open the ribbon cable connector using the pry tool provided, removing the cable with a finger nail and the edge of the pry tool. Note the ribbon cable is glued down, thus getting the spudger under the cable to release the glue is required. Also the Youtube videos show using tweezers to remove the ribbon cable... I certainly don't recommend this given the ribbon cable is too delicate. Best to ease the cable out, and later back in.The battery on both earbuds were firmly glued in place where the most difficult task was getting the old battery out of the earbud. Thus first I used the spudger to break the glue bond between the card on top of the battery ensuring to reposition the glue back around the electrical contact. Then using the spudger I was able to break through the glue at the edge of the battery. But glue under the battery required some twisting of the battery with long nose pliers before I was able to lift up the battery with the pointed end of a spudger.Reinstallation was straight forward where I tested both earbuds before applying glue.The enclosed glue is ideal for the task. Once dry it is easy to remove any excess, though taking care to only apply a small amount in the first place is very appropriate. In fact Sony didn't seem to have glue all around the earbud. Thus I submit there is no reason to go overboard unless you are planning to get the earbuds damp (note not wet).I used two clamps also with electrical tape on the jaws to hold the buds closed until the glue cured. Be careful to ensure there is enough force or there will be a seam. Though maybe leaving a seam has utility given I suspect in 1-2 years the replacement batteries will also be subject to replacement given what appears to be a defective Sony design.
H**R
Everything you need!
My headphones is not holding charge since last winter... This kit has everything you need. Go find the tutorial from ifixit, follow it and you are all good to go
P**R
This is the one you want for Sony WF1000xm4 repair
I have the WF1000XM5s. Candidly, I think they're a step down. The only issue is that my xm4s were experiencing the dreaded battery issue that has come to plague them. My understanding is that this stemmed from a bad firmware update some time ago that has since been corrected. Nonetheless, it destroyed the batteries.My left battery wouldn't charge above 60%, but worse is that it would die in 20 minutes. I was ready to toss these until I watched a few YouTube vids on replacing the battery.Some advice: Lots of the vids will show you fully taking apart the XM4s. No need to do this! Heat the shell of the earbuds lightly, then slowly pry it slighly open. From there, you can use the included flat pick (looks like a guitar pick) to separate the board from the battery. From there, carefully use the included screwdriver to lift the battery out. Put the new one in, press the board back down to the battery, and use the included glue to put a small bead around the bud. That's it! So much easier than the YouTube directions. I was able to do both buds in 15 minutes.Even better? The buds now charge to 100% and last as long as new!
C**R
Did the job
The most important part: the battery replacement worked and now I don't have to pay hundreds on new headphones. Adhesive worked great and was easy to apply. The included tweezers were so flimsy I couldn't use them to hold a tiny ribbon cable so that was not really needed. I had to use a magnifying glass on a base while I worked to see what the heck I was doing. There was a ton of stuff in the package that was not really needed.
J**R
XM4 earbud battery replacement
Batteries look and fit like original. Replacement was surprisingly easy, took 3-4 min each. Only used plastic spudger, flat screwdriver and glue from kit. Hair dryer to fat end of earbud until 140F, squeeze along the sides/seam toward middle of fat end and used fingernail to separate shell. NO NEED to disconnect any ribbon cable connectors! Just use blue spudger to slowly lift little circuit board from top of battery, leaving most of sticky glue on the board. Pry battery up/out with screwdriver (or toothpick, whatever). Pop new battery in and press things back together. Glue holds well, left shell painter's taped along edges for 2 hours. All good.
ترست بايلوت
منذ 5 أيام
منذ شهرين
![SONXIAVIVO 𝟮𝟬𝟮𝟓 𝗡𝗲𝘄 𝗨𝗽𝗴𝗿𝗮𝗱𝗲𝘀 Z55H Battery, Compatible with Sony Headset Battery for WF-1000XM4 • Truly Wireless Earbud Headphones Battery+ Tools [2PCS]](https://images-na.ssl-images-amazon.com/images/I/71FmurVYxhL._AC_UL116_SR116,116_.jpg)
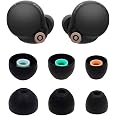
![JNSA Replacement Memory Foam Ear Tips Noise Canceling Foam Ear Tip Compatible with Sony WF-1000XM4 / 1000XM5 Earbud Headphones, [Fit in Case],L/M/S 3 Size 3 Pairs,Black (Foam4XM4B3P)](https://images-na.ssl-images-amazon.com/images/I/61Nj3QTz8kL._AC_UL116_SR116,116_.jpg)