🏡 Keep Your Home Flowing with Style!
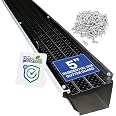
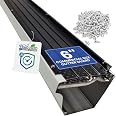
The FlowGuard Gutter Cover System is a USA-made, high-strength aluminum solution designed to keep your gutters free from leaves and debris while allowing heavy rain to flow freely. With a 50-year warranty and easy installation, it promises durability and peace of mind for homeowners looking to eliminate gutter maintenance.
| Manufacturer | Flexxpoint Gutter Cover, LLC. |
| Part Number | RESB-100 |
| Item Weight | 10 pounds |
| Country of Origin | USA |
| Item model number | RESB-100 |
| Is Discontinued By Manufacturer | No |
| Size | 102' |
| Color | Black |
| Material | Aluminum |
| Item Package Quantity | 1 |
| Number Of Pieces | 27 |
| Batteries Included? | No |
| Batteries Required? | No |
J**D
Great value! High quality product works great!
I purchased and installed this product in late summer 2014 after sitting through an exhausting presentation from one of those "leaf proof" systems that would have cost over $10,000 for roughly 200' of gutter. After the salesguy left and I stopped laughing, I went to Amazon and ordered this product and so far I'm delighted.My house is in the northeast US and is surrounded by 70-80' trees. Falling leaves have been no problem and even those that took up temporary residence on top of the guard, blew off in a day or so and I have not had to do any "cleaning" of the gutter covers at all. We had several heavy rain storms and I found that the holes in the guards can handle a surprising amount of water, even in corner areas where you have a lot of water concentration from two roof surfaces. I had no issue with water gushing over the edge, and since the underlying gutter always remains clear of debris, the water flows smoothly to the downspouts and away from the house even in a prolonged downpour. As for the winter snow, I've had no issues with snow or ice piling up on top of the guards any more than would have occurred on an unguarded gutter, and since ice and snow can no longer accumulate INSIDE the gutter, the sunlight can melt the accumulated snow on top of the guard more quickly, and runoff from the melting snow and ice flows smoothly to the underlying gutter which always remains clear.As far as the installation is concerned - you'll need to be comfortable being on top of a tall step ladder or extension ladder or find a friend who is. There is a lot of two handed work (e.g. holding the cover in one hand while you use the drill in your other hand) which you can't perform if one of your hands is white knuckled onto the ladder. I used a power drill for the screws, and you'll need a decent pair of tin snips to cut the guard to fit into any angled/cornered sections of the guttering. The cuts are simple and you can use the hole patterns in the cover system to insure your cuts are neat and straight. The product fit perfectly into the top of my guttering and was fairly easy to affix with the self tapping screws provided. The product sits just above the gutter mounting brackets so there is no need to make any "adjustments" to your gutter brackets - just drop in the covers and screw them in place. In a few places, my guttering had been "pinched" to be a bit narrower than normal or were "drooping" a bit wider than the standard 5" width, but it was pretty easy to spread the gutter out or push the sagging portion in before installing the screws. I would also note that for areas in the guttering that were sagging a bit, the cover actually helped provide additional support to the gutter, since the outer edge of the cover is affixed to the gutter and then the rear edge of the cover attaches directly to the house (fascia) which helps to pull up and straighten any sags in the guttering. I found it helpful to install the outer row of screws first for each section of cover, and then install the screws along the fascia board, then move to the next section of cover. Some of the rear edge screws are a bit of a challenge in areas where the gutter is installed high up under the last row of shingles, thus making it difficult to get your hand under the shingles to hold the screw while using your other hand to hold the drill. I'm guessing there is a gizmo at your local hardware store that would hold the screw directly on the end of your drill bit, so you might want to explore that to make it a bit easier. Once I worked out those installation details, it was pretty straightforward. It took me about a total of 10 hours over 2-3 days to install 200 feet of the product and much of that time was spent moving the extension ladder from one spot to another, and trimming and fitting pieces into the numerous corners in my guttering.
B**W
Professional grade for DIY
First off, if you are debating other brands of gutter guards, or, if you're wondering whether you should just hire a contractor to install a brand you can't buy, then stop! These are the perfect choice.These Flowguard gutter guards are just as good as professionally installed types, and cost so much less. Plus easy to install yourself (read on for my personal experience).So I have a large ranch home with a walkout. A few years ago I hired a contactor to install seamless gutters and gutter guard over the entire 100' rear length of my home. It was 2 stories high and I did not want to be up on ladder cleaning those. The caps cost me an extra $1500.This year I hired contractor to replace the front and side eaves with seamless gutters. I asked them to quote caps for these too. It would be a little more than last time so I thought since it's 1 story I would do it. I bought 6 different types of gutter guards. None of them were of comparable quality to the professional ones I had on so I returned them. Then I found these Flowguards on Amazon and ordered a box to try.These are almost exactly like the pro ones I have. Same thickness, same screw spacing, color, and quality. The pros are 8' vs these 4' lengths. No biggie. The pros are completely flat without ridges, and these have 3 parallel ridges. No problem, except the corner where I had to meet at 45° with the pro's. Just cosmetic.So happy!! Love these! Wish I would of found them several years ago. So much cheaper. So easy to install. I did 102' in 3 hours.INSTALLATION HELP:Buy yourself a 6" magnetic 1/4 nut driver for drill. It needs to be that long to reach over 5" gutters and under shingles. Use a short magnetic nut driver first and put the longer into the short one so you can switch between front screws and back screws easily.The back should be a little higher than the front so they can slope some. Directions say either level or have back higher, but I recommend just installing higher in the back, and you might need a pick or screwdriver to help slide the back up before putting a screw in once in a while.Go for it! They got you!
S**Y
LIFESAVER
No matter how often I cleared leaves, seed pods, and whatever other debris from my gutters, one good thunderstorm and they'd be clogged/overflowing again. It was a constant battle that caused a ton of stress because the waterfalls that resulted made their way into my basement. Overnight storms would wake me up at night because I'd be so worried my basement was taking in water. Not fun!I had old gutter guards installed from before I bought my house, but they were made of a much flimsier material (mesh?) and had long since started to cave under the weight of wet leaves. They were no longer doing anything to help.On the other hand, these gutter guards are sturdy, true to size, easy to install, and much cheaper than professional installation options. Despite having multiple (fairly severe) storms since installing, there has been no accumulation of leaves, etc. in the gutters and I have had NO water in my basement. I would HIGHLY recommend these to anyone looking for quality gutters. I should have bought these years ago for the peace of mind they provide!
Trustpilot
1 month ago
3 weeks ago