🎵 Revive Your Sound with LinaLife!
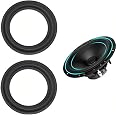
The LinaLife 2pcs 4 inch Speaker Foam Surround Repair Kit is designed for DIY enthusiasts looking to restore their audio equipment. Made from high-quality rubber, this kit includes two 4-inch perforated rubber edge rings that are durable and easy to install. With step-by-step instructions and free technical support, you can effortlessly replace damaged surrounds and enjoy professional-grade sound quality at home.
| Brand | LinaLife |
| Manufacturer | LinaLife |
| Product Dimensions | 10.16 x 10.16 x 10.16 cm; 59 g |
| Audio input compatible with the item | Auxiliary |
| Audio output mode | Surround |
| Speakers Maximum Output Power | 100 Watts |
| Noise Level | 0.03 dB |
| Power Source | ac |
| Batteries Included | No |
| Batteries Required | No |
| Material | rubber |
| Mounting Type | Flush Mount |
| Manufacturer | LinaLife |
| Country of Origin | USA |
| Item Weight | 59 g |
V**T
Quality Repair Materials
Perfect fit for my speakers. They are performing as good as new. The quality of the repair will be dependent upon cleaning and prepping the old surfaces and using quality cement.
B**8
As good as new! No more crackle and buzzing.
Replacement worked perfectly for repairing a pair of old Boston Acoustics Subsat Six satellite speaker 4" woofers. Easy to install after removal of old deteriorated foam surround. Read someone else using the $2 Aleene's Tacky Glue for crafts as the adhesive and can confirm it does work! Using the tacky glue allowed me time to reposition the new foam if necessary. You don't need to buy the $8 special adhesive that is claimed to be designed for speaker repair. I removed the old foam off the paper speaker cone by using a razor blade to gently scrap it off. I left the old adhesive on the cone as it was not practical to remove without damaging the cone. It was pretty thin and dried up so was not an issue for adhesion of the new foam surround. To remove the old foam and adhesive from the metal speaker frame I used a small 1/4" flat head screw driver as a scrapper. This scrapped the metal ridge seat with the old foam and adhesive completely and ensured I did not damage the paper cone. Then cleaned off the both the paper cone and metal surface with isopropyl alcohol and it's ready for attaching the new foam surround. It took me approximately 45 minutes to install the new foam surround. Give the repair at least 12 hours to dry before testing it out.
R**E
As Described But Not For Paper Cone Speaker
My mistake. These are not for paper cones which are a 'foam' material and I had to purchase from an online speaker repair and supply site because nobody on here sells them. I believe these surrounds are butyl rubber for speakers that aren't old fashion paper cones. One star off for lack of clarity in the description which would have saved me aggravation. The pic is of the proper type of foam ring for a paper cone speakers.
R**T
Good price for DIY speaker repair
Should be an improvement over those old foam surrounds.
T**H
You get one, not two
The listing says you get two, but you don't.
Trustpilot
1 week ago
3 weeks ago