
MCE Technologies 1TB Internal SSD Flash Upgrade for MacBook Pro Retina (Mid 2012 - Early 2013) - Includes Installation Kit!
Product ID: 40582581
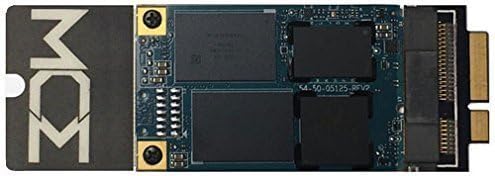
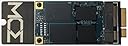
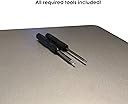
IMPORTANT: ONLY ITEM PURCHASED FROM MCE TECHNOLOGIES IS GENUINE AND MADE TO MCE SPECIFICATIONS AND CARRIES MCE WARRANTYMCE 1TB Internal Flash SSD Upgrade for your 13" or 15" MacBook Pro with Retina Display (Mid 2012 - Early 2013) with Toolkit and Illustrated Installation Guide! Your MacBook Pro 13" or 15" with Retina Display (Mid 2012 - Early 2013) is a high performance machine requiring the very highest performance flash drives available today. The MCE 1TB Internal Flash Storage Upgrade Solution for the Mid 2012, Late 2012, and Early 2013 MacBook Pros with Retina Display replaces your original flash drive and, at 540MB/s Read and 520MB/s Write speed, is designed to take advantage of the super-fast SATA-III 6 Gbps flash architecture present in those machines. Included with the upgrade are all the tools necessary to perform the upgrade as well as an illustrated installation manual. Everything you need to perform the upgrade is included! Plus you get US based Tech Support and a Five-Year Warranty!Compatibility:Please verify that your MacBook Pro with Retina Display is either a Mid-2012, Late 2012, or Early 2013 Model. Late 2013 models and after are NOT compatible with this SSD. To find this information go to the Apple menu at the upper left of your screen and select "About This Mac". The next screen will indicate the model of MacBook Pro you have. If it is not apparent there, select the "System Report" button on that screen and the next window will show "Model Identifier" near the top. Make sure your "Model Identifier" is either MacBookPro10,1 or MacBookPro10,2. If it is then this SSD is compatible with your machine.MacBook Pro (Retina, 15-inch, Mid 2012) Model Identifier: MacBookPro10,1 MacBook Pro (Retina, 15-inch, Early 2013) Model Identifier: MacBookPro10,1 MacBook Pro (Retina, 13-inch, Late 2012) Model Identifier: MacBookPro10,2 MacBook Pro (Retina, 13-inch, Early 2013) Model Identifier: MacBookPro10,2
P**G
Bought new item but its package already open.
I am very unhappy since I waited for this item for a week and when it came the package is already open. The unit has a rubber wrapping around close to the pin. It is a defect or refurbed to me. Seller please do right thing to customer so that we can trust you.Modified:I got quick responses back and forth with MCE and finally I satisfy with their explain and accepted this item and changed star on this. However, I don't feel good with the ESD bags cut off. Here is the MCE response:"The packaging you received is correct. We trim our ESD (Electrostatic Discharge) bags depending on the type of SSD we are shipping in order to be more form fitting. Then we apply our (yellow) ESD sticker to seal the bag.With regard to the SSD itself, we updated the overall design of the SSD late last year due to the availability of higher density V-NAND chips and more efficient controllers. Remember that your MacBook Pro is from year 2012 or 2013 and a lot of advances have been made in the meantime with regard to SSD technology. This is also why the SSD is thinner than the original unit that came with the MacBook Pro. In fact, if it weren't for the connector's width, our engineers tell me they could've made it even thinner. The rubberized material near the connector protects sensitive components underneath from contact by fingers (which can leave oils) as well as from common dust that can enter the inside of the MacBook Pro through its ventilation system.I can say with confidence that you received a brand new unit that has only been active for a few minutes during our testing process where we format the SSD and load the SuperDuper cloning software onto it. You can expect to receive many years of reliable service from the module."
H**O
Fortunately, I did not have to remove the battery ...
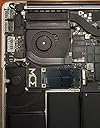
I have purchased this memory module to upgrade my daughter's MacBook Pro (Retina, 13-inch, Late 2012) with 256GB SSD, model A1425. Though I rated it as 5 stars (because the item works perfectly after the upgrade), there are some concerns with the vendor and with the product itself. First of all, this memory module is not in one piece. The memory module itself MZ-M5E1T0 appears to be a regular Samsung EVO 1TB SSD, but there is an adapter at the connector and another adapter at the end to make the module longer (please see the picture attached). I did not pay attention to it when I purchased it.The package includes the memory module with two adapters, the enclosure case with the spare screws and one screwdriver, two another screwdrivers, USB3 cables for the enclosure case, and the installation instructions. There is no any software included.Now what was wrong:1. The vendor included the wrong installation instructions, not related to the model A1425. Here is the link to the correct instructions:https://www.ifixit.com/Teardown/MacBook+Pro+13-Inch+Retina+Display+Late+2012+Teardown/112252. Because of the above, the included screwdrivers did not match the screws on the laptop to remove the battery. Fortunately, I did not have to remove the battery (please see below).3. The left part of the memory module is very thin. So, even if you put a screw there, it is still slightly on loose. I would recommend to use the screw with a washer to make it tight.This is the procedure, I used to replace the memory (it is not standard - please use it at your own risk):1. First, I discharged completely the battery on the laptop. I played some video until the laptop shutdown itself. Then I pressed the power button and on the screen appeared the icon, asking to connect the power adapter. I continuously pressed the power button (for about 10 min) until this icon stopped to appear on the screen. Now I assumed that the battery is completely discharged and I don't need to disconnect them (according to the instructions).2. Remove 10 screws, securing the lower case to the MacBook Pro (use the included screwdriver). Please note that two of them are 2.3 mm (they are in the middle of the edge, nearest the clutch cover). There is a blue paint in the holes for these screws. Another 8 screws are 3.0 mm.3. Follow the included instructions to remove the lower case. Lifting from the edge nearest the clutch cover, lift the lower case off the MackBook Pro. Set the lower case aside.4. When I opened the case, I found a lot of dust inside. My first intension was to vacuum it. But in the past I had a case when I vacuumed my old TV inside, it stopped working after that (I think because of the static electricity). So, be very careful with that. Also I periodically touched the metal case of my desktop to discharged myself, but the best way is to use a static discharge wrist strap. Instead of vacuuming, I used tweezers to carefully remove some dust. If you want to do this, please try not to touch any metal parts on the motherboard.5. Now disconnect the cable, coming from the SSD case to the motherboard (see the picture) - just pull it straight up.6. Remove the case with the SDD by pressing on the frame (see the red arrow) and pulling it up.7. Remove the single screw securing the SSD to the case.Slightly lift the leftmost side of the SSD and firmly slide it straight away out of its socket.8. Now insert the included adapter labeled "This Side Up". Insert the adapter completely into the socket. Now insert the new MCE SSD drive at about a 30 degree angle into the adapter (it should be no resistance). Now lower the left side of the drive down and use the same screw , removed in the step 7. As I mentioned above, I would recommend to use this screw with a washer to make it tight.9. Now put the case with the new SSD back to the slot on the MacBook Pro and insert the SSD cable to the motherboard. Please be very careful with this and do not put a lot of pressure. Otherwise, you can break the connector.10. Replace the bottom cover of the MacBook Pro and replace the ten screws, removed in the step 2.11. I put the old SSD in the included case.11. The rest of the work was done by my 14 year old daughter. As we did not have any backup, she re-install the Mac OS from the Internet (I don't know how she did - she is smart) the version Lion, I bought for her sometime ago. Then she upgraded it to the free version Sierra. To reinstall her Final Cut Pro, she connected the case with the old SSD to the MacBook Pro and copied and pasted the application icon Final Cut Pro from the old SSD to the workspace on the MacBook Pro. To my surprise the software Final Cu Pro works fine even after disconnecting the old SSD.
U**Y
good option to increase memory on older Mac
Works well and pretty easy to install, especially if you have been inside a MacBook before and are not intimidated. It is a little pricy compared to other options for other machines, however, there are few options for this version. Supply and demand...
V**O
Five Stars
Easy swap into a mid 2012 Macbook Pro Retina. Lots of space and fast performance!
M**A
Time delivery !
The product is ready
A**E
Works as Advertised.
This hard drive comes with almost everything you need to Upgrade your MacBook SSD. Installation was easy and quick. My only complaint is this included tools, to remove the screws, aren't the right size. SSD drive works as expected and a nice upgrade to a 256gb drive.
Trustpilot
1 day ago
2 weeks ago