Desertcart purchases this item on your behalf and handles shipping, customs, and support to KUWAIT.
✨ Bring your grout back to life — because clean is the new confident! 🧼
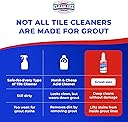
Clean-eez Grout Cleaner 2 Pack offers a professional-strength, chlorine-free liquid formula designed specifically for ceramic and porcelain tile grout. Each 32 oz bottle features an easy-control flip top cap and comes with an innovative stand-up brush attachment to tackle tough stains and restore your grout’s original brightness. With over 15,000 positive reviews and a #5 rank in tile grout cleaners, it’s the go-to solution for millennial professionals seeking efficient, reliable home care that fits their busy lifestyle.

| ASIN | B0721NFGC4 |
| Best Sellers Rank | #4,312 in Tools & Home Improvement ( See Top 100 in Tools & Home Improvement ) #8 in Tile Grout Cleaners #61 in Household Floor Cleaners |
| Brand | Clean-eez Cleaning Products |
| Brand Name | Clean-eez Cleaning Products |
| Customer Reviews | 4.2 out of 5 stars 15,377 Reviews |
| Item Form | Liquid |
| Item Volume | 32 fluid ounces |
| Item Weight | 4 pounds |
| Manufacturer | Clean-eez Cleaning Products |
| Material Feature | Natural |
| Material Features | Natural |
| Material Type Free | Chlorine Free |
| Model Number | 8541814367 |
| Number of Items | 2 |
| Part Number | 707581876795 |
| Scent | Natural |
| Size | 32 Fl Oz (Pack of 2) |
| Special Features | Low Odor |
| Specific Uses For Product | Floors,Grout,Tile |
| Surface Recommendation | Grout,Grout-eez,Porcelain |
| UPC | 707581876795 |
| Unit Count | 64 Fluid Ounces |
N**.
I was skeptical. Now I think this may be the best grout cleaner I've ever used.
I treat most reviews with a mild skepticism, especially if they're generic and waxing lyrical on a products virtues and ignoring its shortcomings. That said, my grout has probably not been cleaned in at least the three years I owned the house, and probably a good five more before that. It was very dirty, bordering on black in many areas. With some picky guests coming in less than 10 days I decided to give this product a try. it was certainly less expensive than calling the steamer guys who hit me up for five hundred at the last house. After a few trial runs of several tiles, I found the sequence that seemed to guarantee success. Preliminaries: 1. Find a handle to screw the brush into. You don't want to be on your hands and knees scrubbing the grout. 2. Have some nitrile throwaway gloves (drugstores have them) to save your skin 3. Fill a plastic pail about 2/3 of the way full with warm water (the warmer the better) 4. Have a good quality sponge on hand that you can throw away. One sponge for each day you're working on the floors. 5. Find some colored objects that you can use as markers to denote where you've been, and the location of your next set of tiles. 6. Set up a timer (I used a smartphone) for 6 minutes and have it ready to go 7. Open several windows; it was 95 in the Texas heat, but you will only notice the smell after you're wondering why your lungs hurt. It's not toxic, but like all cleaning products it will evaporate and you need some air. Turning on fans helps also. The Method 1. Pick an area no larger than about 5 ft x 5 ft (you have to move very fast to cover any larger area, and the results show it), 2. Lay out the colored pieces to mark off your area. 3. Assuming you've prepped the bottle for dispensing the cleaning fluid, open up the folding nozzle and hold the bottle so that the nozzle is nearest the floor. 4. Squeeze the bottle very gently as you move it rapidly along the grout line. After a few trials, it went very smoothly 4. I used a top-to-bottom, then side-to-side approach to fill in the square of tiles (all vertical grout lines in the square, then filled in the horizontal grout lines). This worked with the flow of the cleaning agent since it usually filled in some of the horizontal grout lines anyway. 5. Hit the 6-minute timer that you set up earlier. 6. When the timer goes off, start at the grout line you began with and push/scrub evenly and firmly with the brush. The dirt seems to come out by magic. 7. Don't hurry, but don't pause. Finish scrubbing all of the grout lines in your square. 8. Go back to the first grout line and use the sponge and pail of warm water to rapidly clean up the dirt that came out. 9. You may need to change the water about halfway through each sponging session. I know I did, to good effect and without the dirt adhering again. 10. To see the results, you'll have to wait about 8 to 12 hours for the grout to dry. Some sections that were extra dirty you can hit again right away. 11 I used paper towels (3 full-size ones under each foot, changed several times) to clean up the excess liquid and pick up anything missed by the sponge. The results are in the before and after pictures.I did this for each section I worked on before going on to the next section. 12. Move your markers and go onto the next section. I was able to do almost the entire downstairs with the two (2) provided bottles. And we love the results. It looks like a new floor. One possible improvement would be to slightly narrow the openings of the bottle's nozzle to reduce the amount of fluid being dispensed.
Q**I
Mighty punch for little product!
I'm pleasantly surprised by the ease of use and cleaning! It is strong scented and I did get a bit of a headache but I think that was more due to the space I decided to clean all at once! Well be using through my home for grout cleaning and maintenance.
W**M
30yo tile glow up
Pleasantly surprised! Low scent , works with minimal effort compared to what I was doing before and in a shorter timeframe, doesn't trigger my asthma AT ALL! That alone makes it amazing. My tile and grout is over 30 years old, hasn't been sealed in who knows how many years, we live in a humid area (Carolinas) and our entire family uses this shower, so it's wet a lot, and we have terrible water quality too. It gets mold/mildew/water stains very quickly and usually takes a lot of work to clean it, what's in my shower builds up every week, it's exhausting. I had been using regular bathroom tile cleaners but they just didn't work as well and the fumes trigger my asthma. I also had to clean them with those one day and then bleach the stains on another day for it to actually look clean too. Again, triggering my asthma. I left this on per the instructions which I think was 10 minutes, then put my broom handle on the scrub brush that came with it (it doesn't come with a handle so keep that in mind), and scrubbed with it. Not effortless but nowhere near the exertion using other cleaners. It also got it way whiter than my regular bathroom cleaners. I have only used it once so far and while it didn't get rid of some deeper stains, I'm wondering if a few more times might get those stains out. My plan is to get it cleaned and finally seal the grout to help prevent this. I may need to bleach the stains still but we'll see. I'd still be thrilled with this cleaner even if it couldn't get the stains completely out. I wish the flip top lid spout could be fixed in place - I kept accidentally closing it while trying to use it.
A**.
Game changer
Worked great! Grout looks brand new. Easy to use. Need to wash floors, tiles well after using due to sticky residue but so worth it. Definitely recommend
J**N
Decide after it fully dries
I am impressed! Did not have much hope because have used so many products to no avail. But to keep the peace after 41 yrs I just go with the flow. Followed directions and did not look good, so repeated in the worse areas. When it dried looked great. Now there are a few spots that did not come up. So I will go over those few areas, thinking maybe I just did not get that area as well? Looks better than when professionally cleaned. Mostly back to original grout color- stove sink area get a lot of foot traffic and gook from cooking. Thank you
B**N
More effort then it's worth
So... I hadn't really deep cleaned the kitchen floor in about 3 years. It was pretty bad. Pros: it does work.... with several caveats. See cons. Cons: *Caveats: -You do need to check the type of tile you have first. It only works with porcelain and ceramic tile. A lot of the people complaining that it messed up the tile finish probably used it on the wrong tile. -the grout can't be sealed/waxed first (you can wax it after if you want) Main issue- it definatley takes elbow grease to get it looking really good. It came with the scrubber attachment (pole not included) but I bought a scrubber drill bit head (not from this company) which I really wanted to use. That reduced the scrubbing, but forced me to kneel which was tough even with a knee pad. The other big problems I have with it is: #1 it's liquid, so it goes everywhere not just the grout. It would be helpful if it were a gel or something with a little more viscosity. Because it's hard to "stay in the lines" you waste a TON of product. I literally went through 1.5 bottles for my medium sized kitchen. #2 it suuuuuuucks wiping up the dirty chemical, then wiping down with water. You basically have to mop twice, once to gather all the chemical up, dump the water, then go over it again with clean water. I honestly don't own a mop, and only use a Swiffer mop (admittedly why my floor is so dirty). So I just used like 30 old rags, which also sucked. #3 you have to do small sections because you have to scrub it off in 10 minutes (then wipe down with water). So unless you have a teeny tiny space, you have to go in small sections. I started at like 130 pm and finished around 5:30pm with no break. I wish I could just put the grouteez down in the whole kitchen THEN wipe it down all at once, but it would take probably 1.5 ish hours to scrub from front to back (not to mention stepping in a swamp of chemicals since it's so liquidy). Since it shouldn't be on longer than 10 minutes, that's really not an option. #4 did I mention I am exhausted? #5 when the tile is super dirty it is very easy to see where you stopped and started, but in low traffic areas it can be hard to tell what you've completed. Which sucks because when the grout is wet, it still looks dirty. This caused me to go over areas that I already went over because I wasn't sure... AND again.... the product is so liquidy that it runs down the tiles you just finished. Overall, I would not do it again for 3 more years... But it really does look good. I still have 2 bathrooms and a laundry room to do (not sure I have enough product) I will probably just use the scrubber brush with the pole and apply all the product at once and just try and scrub really fast, because going section by section is really time consuming. FINALLY, even with rubber gloves my hands were all shiny and numb afterward... So people with sensitive skin be careful, and open a window. I will not be using this product again for a REALLY long time, but it definatley works and my kitchen does look pretty amazing.
K**R
Works and is easy!
I am embarrassed to post the pictures because of how bad the before picture is. But you have to see it to believe it! The pictures were taken 15 minutes apart. 5 minutes to let it soak. Scrub a bit. Used water and a shop vac to clean it up. The difference is amazing! Takes a small amount of effort - but very small amount of effort compared to anything else that actually works! 100% recommend to anyone who needs to clean grout.
J**R
Great cleaner
Works great really cleaned my grout in both of my bathrooms
I**N
Works well
Actually works really well
J**N
I am impressed!
Better than expected!! I bought it again!!
D**E
Five Stars
Cleaned my grout with ease.
L**K
This just doesn't work! WASTE OF MONEY!
It doesn't clean the grout at all. After "cleaning" the grout with this product, there was almost no difference in the grout. I went over the grout with an inexpensive kitchen cleaning spray, and the grout was back to the original colour. DON'T WASTE YOUR MONEY!
C**O
Product review
Was disappointed with this product. Had higher expectations.
Trustpilot
1 week ago
2 weeks ago