


🌟 Your Backyard Oasis Awaits!
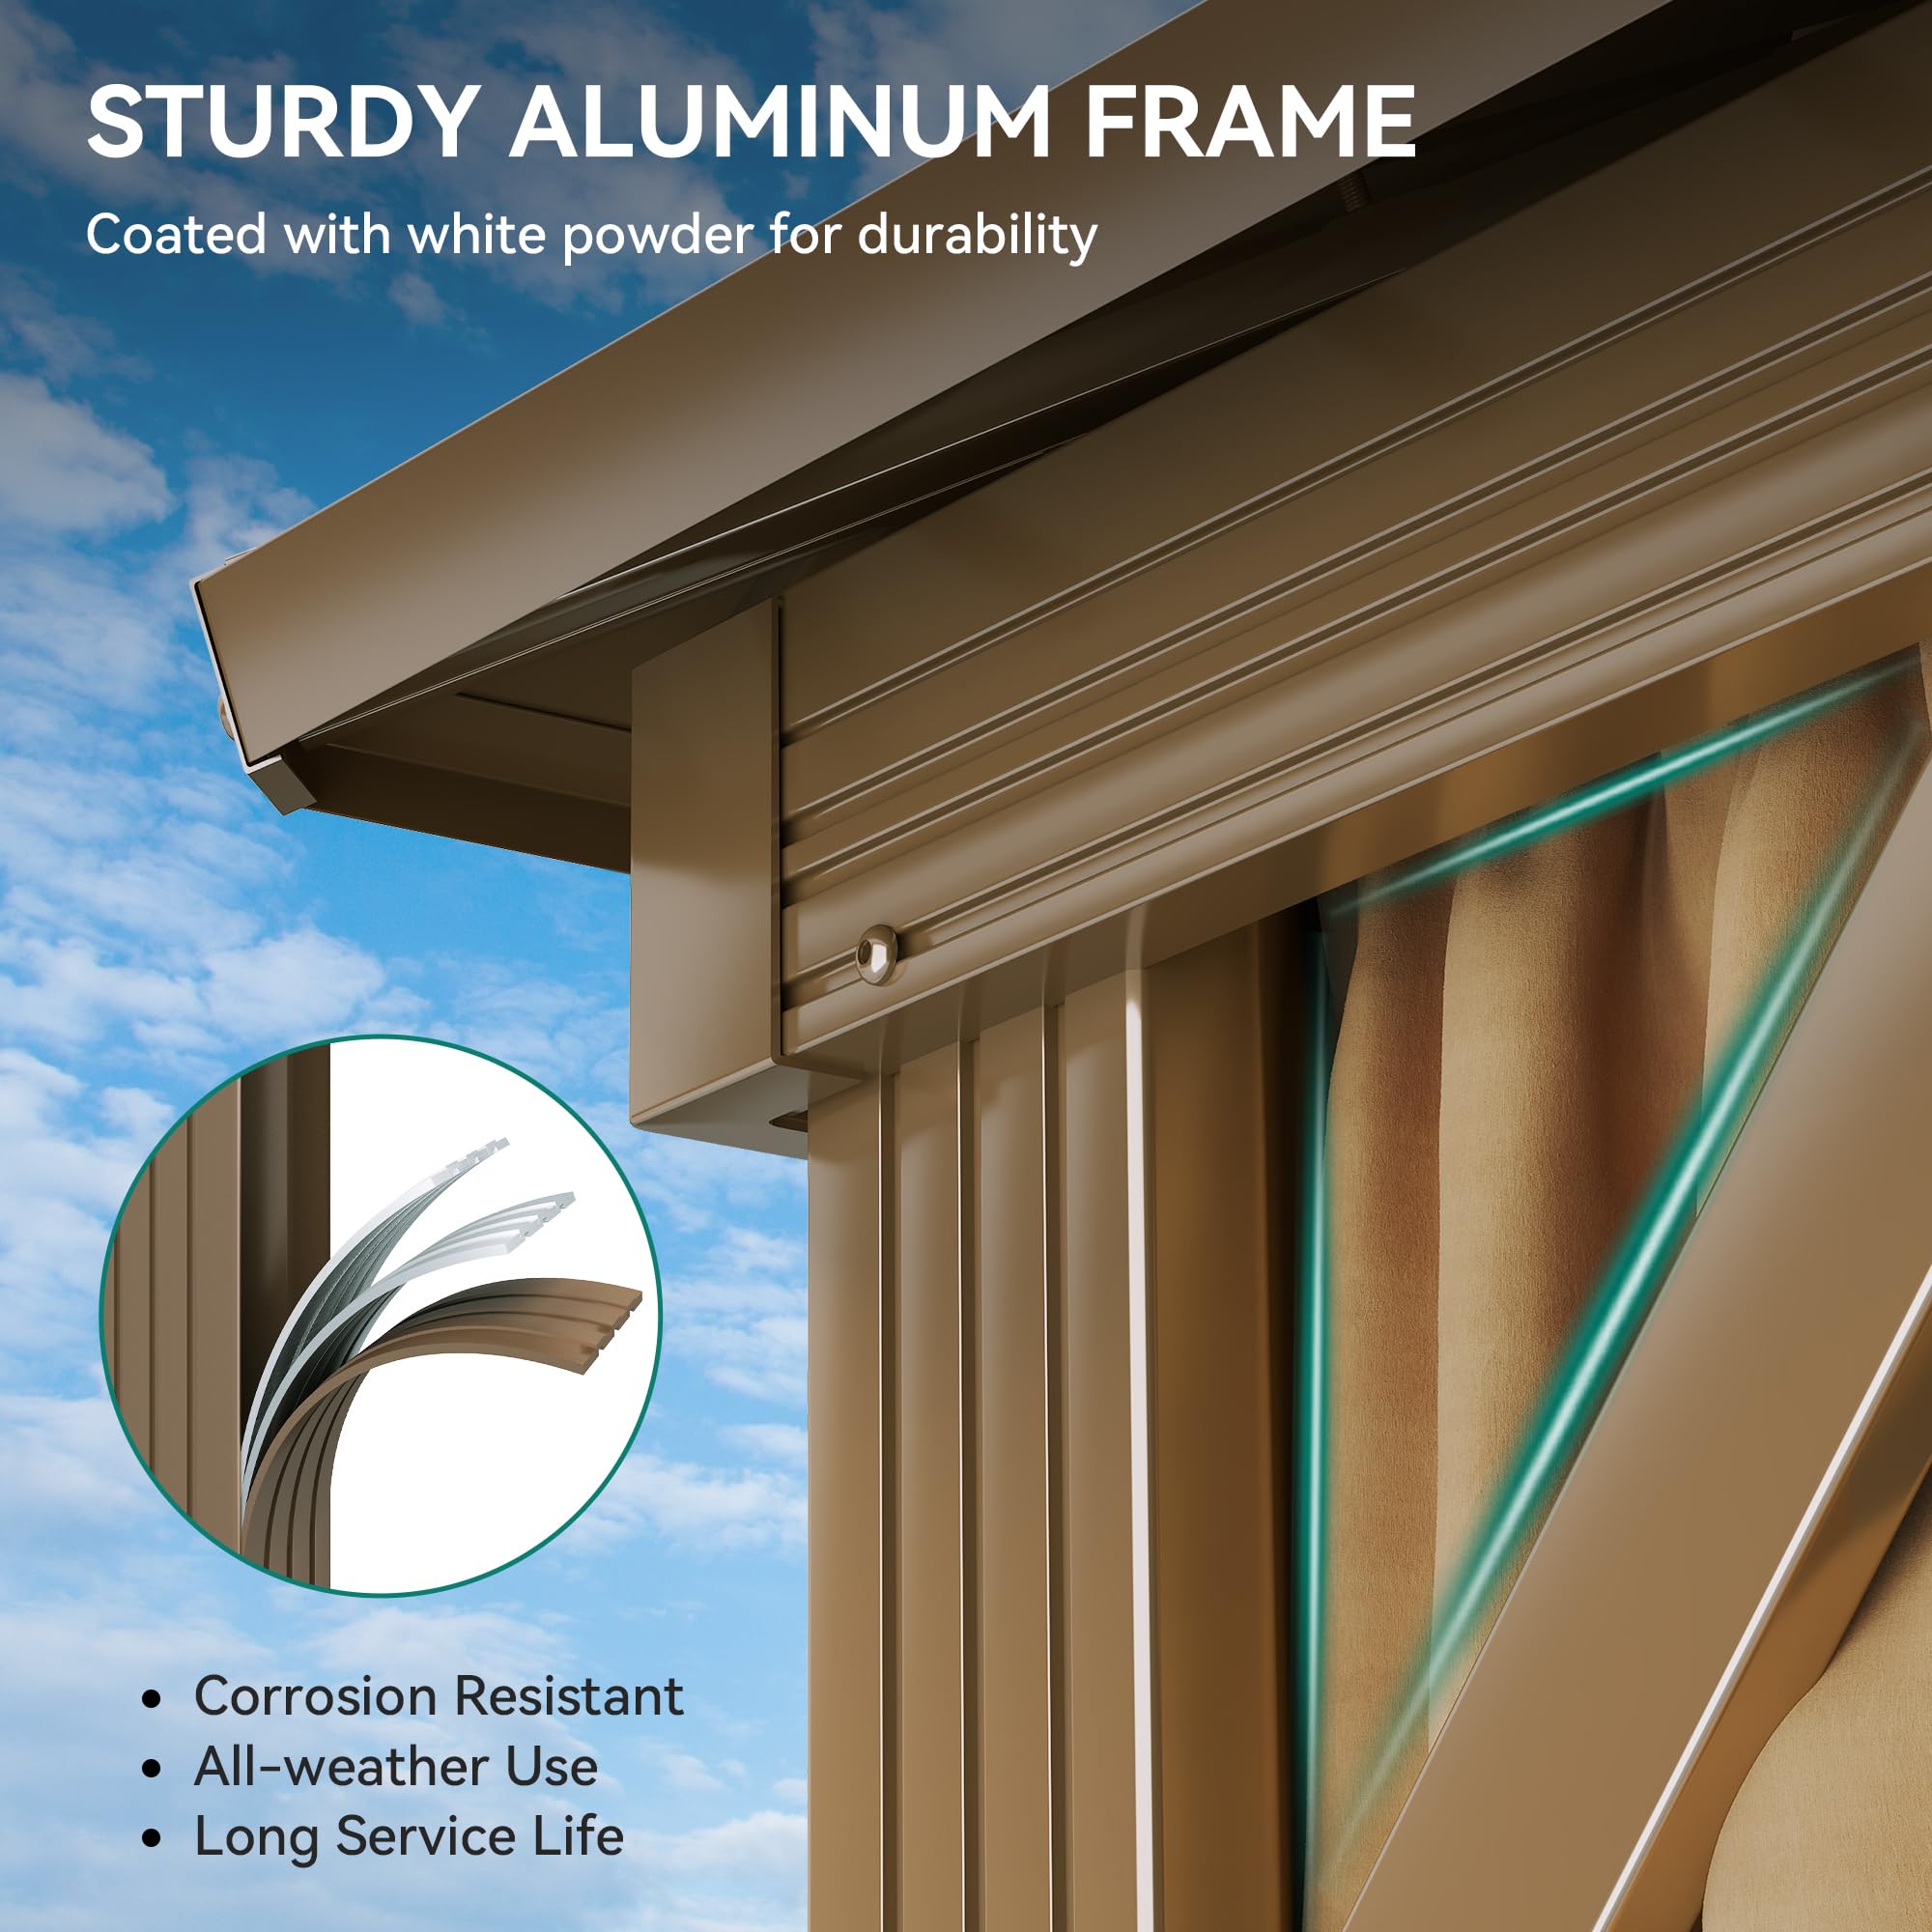
The YITAHOME 10x10ft Hardtop Gazebo is a robust outdoor structure designed for comfort and style. Featuring a unique double combined roof for enhanced airflow, durable aluminum frame, and double-layered sidewalls for protection against UV rays and rain, this gazebo is perfect for hosting gatherings or enjoying quiet moments outdoors. With ample space for 2-4 people and easy assembly instructions, it’s the ideal addition to any patio, backyard, or lawn.
| Item Dimensions L x W x H | 120"L x 120"W x 116"H |
| Item Shape | Square |
| Color | Bronze |
| Style | Garden |
| Frame Material | Aluminum, Alloy Steel, Iron |
| Material Type | Galvanized, Aluminum |
| Required Assembly | Yes |
| Ultraviolet Light Protection | UV Resistant |
| Occupancy | 4 Person |
| Water Resistance Level | Waterproof |
C**D
Awesome gazebo but instructions are not 100% accurate. Important info noted in my comments.
This is an awesome gazebo! It is very sturdy & looks great. It was a little difficult to put together in the beginning only because 4 of the parts labeled on page # 4 of the instruction manual were incorrect. I was searching for the B10, B11, B12, B13 pieces for a long time until I realized they were mismarked on the part section of the manual. The parts were actually E10, E11,E12, & E13 as shownon the diagram. The instruction manual is pretty well done because it has a list of labeled parts on the left side of each page & detailed diagrams on the right side of the page. Each piece is labeled with a sticker coordinating with the instruction manual (other than the 4 pieces I mentioned above). One other tricky step is installing the curtain hooks on page 6 & towards the end of the manual. The instructions don't really indicate that you must equally divide the specified amount of hooks on each the left & right side of the walls & there are 2 rows. So do this very carefully or you will have to take pieces apart many steps later or may not even realize it until you are at the very end. I suggest laying out all the pieces in alphabetical order (there are a lot) & inventory the items to make sure you have everything before you start. This also helps familiarize yourself with the pieces. I put 99% of the gazebo together myself & only needed help once lifting the center roof support section. I am a 5'10 female with some building experience. I wanted to surprise my husband while he was out of town for a week and wanted to do it solo. It took a total of about 14 hours for me to put it together spread over 3 days. You will want a dolly to move the 5 large boxes (well over 100 lbs each) & make sure you have a lot of room to lay out the parts. *** The instructions & screws are in a tan bag that looks like it would be the curtains ***. I couldn't find the instructions (thinking it was a bag of curtains), so I contacted the manufacturer who sent me a PDF of the instructions. This ended up being super helpful because the paper instruction manual I eventually found in the bag, were very light & a little hard to read at times. Having a PDF was helpful for zooming in on details. You will also want a medium & tall ladder. The last few steps require reaching over the first tier of the roof to the 2nd, which is surprisingly high. I also ended up removing some of the vents previously installed so I could reach the upper level more easily. The vents could be put on last. Make sure you put the curtains (outside track) & the screens (inside tack) on the correct track or you will have to tack them down & redo them. I would NOT use an electric drill as you could easily strip the screw heads or cross-thread the screws. I would also suggest that if 2 people are doing this, each person have a copy of the instructions, one person mainly run pieces/parts to the other to install. It worked out that my husband was out of town because I am sure we would have gotten into multiple arguments during this project... Just take your time & follow instructions very carefully. Extra screws/washers were included were included, which was very helpful because I dropped a lot. A magnet bowl came in very handy. The materials are very nice & it was pretty easy to do. Overall, a great gazebo & we really love it!!! I just wanted to share these tips which would have really helped me. Highly recommend!
T**N
Excellent gazebo!
This is a great product and well worth the price of purchase! The gazebo was delivered very quickly and came in two separate deliveries, one day apart and totaled three heavy boxes. One box jad damage and later found one curtain rail bent, which I was able to straighten without much effort. I was very impressed with the quality and construction of the gazebo. The entire structure is metal (very impressed), parts were labeled, and fit together very well. Instructions were all images and no text but were easy to understand. When you get to attaching the roof panels make sure you are also attaching the “top brackets” as well. Also, don’t over tighten the top cap panel as it will dent, water will collect and leak. Only structural flaw was a broken nut weld. All in all it took 8-9 hours for two people, and the hard part was hanging the curtain and screen. Would highly recommend !
R**Y
Beautiful gazebo worth the assembly time and effort
This gazebo is lovely, but assembly is quite a process. The directions are simply pictures, and the video is not much better, although we did turn to it for help sometimes.It took about 10 hours for 4 people on 4 ladders at times to assemble this, adding a few extra Allen wrenches, a rubber mallet, and just occasionally, an electric screwdriver, none of which were provided.The boxes arrived from Fed Ex, 2 on the first day and the third on the second day. We disassembled the first two boxes and arranged the pieces according to sequence of install. The third box contained all the roof panels and was too heavy for me to maneuver, so we waited until assembly day to organize those. I also took all the screws out from the shrink wrap and labeled them into small Tupperware containers, which really made access to them easy.The frame went together fairly easily, but lining up some of the end pieces to the holes and screws was sometimes a struggle. We often used the provided screwdriver to insert into the hole we could see to find the missing hole and jerked them carefully to alignment. There were 2 holes that were outlined but not punched through, so we had to do that, and when we got to the roof there was a bent track we had to straighten out.The roof directions included slipping R and R1 clips onto the section of the roof panel that was to be inserted into the track. After multiple attempts with those clips flying off in all directions, we removed them and have not seen a negative consequence. They are poorly designed and seemingly useless.Getting the roof panels to align with the screws and fit securely into the tracks was the hardest part. We ended up replacing the W screw with a little longer one that really helped get all the pieces secured.The directions are particularly lacking on the roof assembly, best to watch the video in slow motion for those.The curtains and netting are nice, but awkwardly connected at the corners and blow around in even a slight wind when zippered to block the sun, so I will be adding some weights to the bottom of those.It’s blowing between 30-40 mph right now and I haven’t yet anchored the gazebo to my flagstone patio, but it hasn’t moved.I’d conclude that it takes a lot of effort, but is worth it.
Trustpilot
3 days ago
2 months ago