

🔧 Solder Your Way to Success!
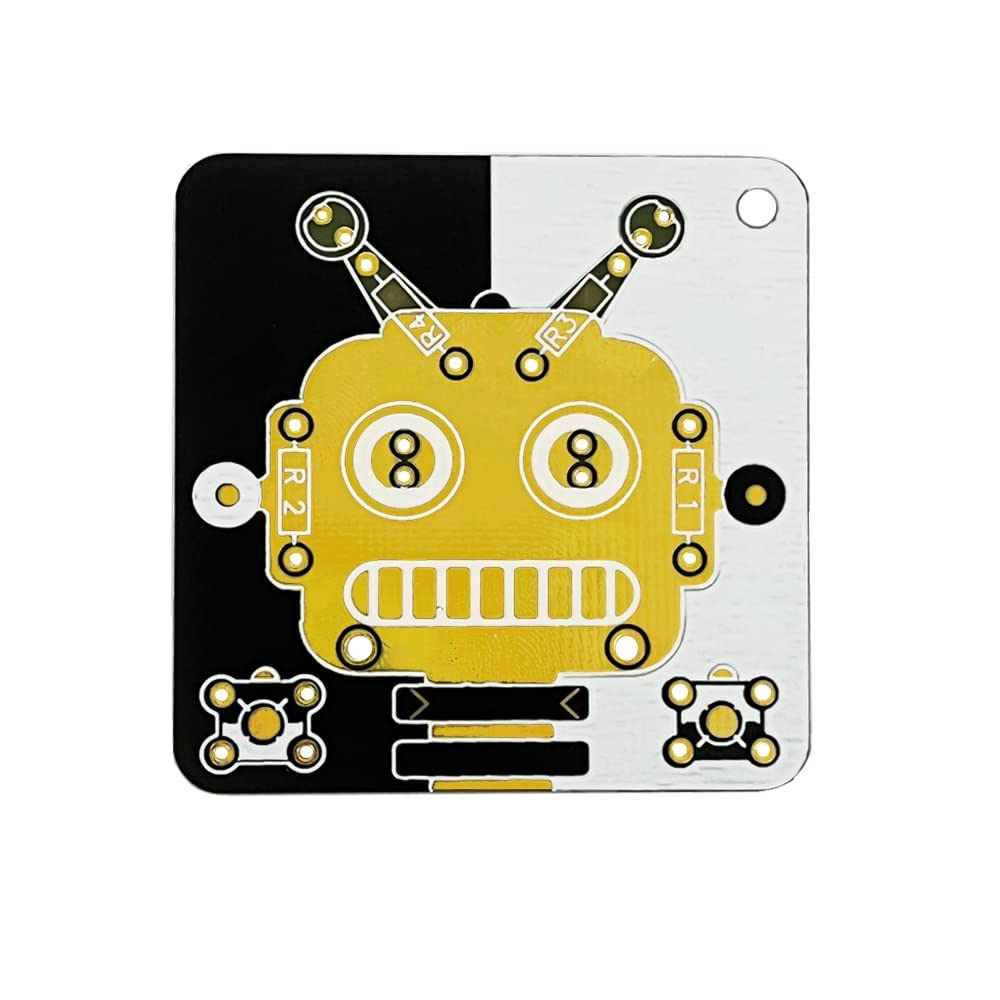
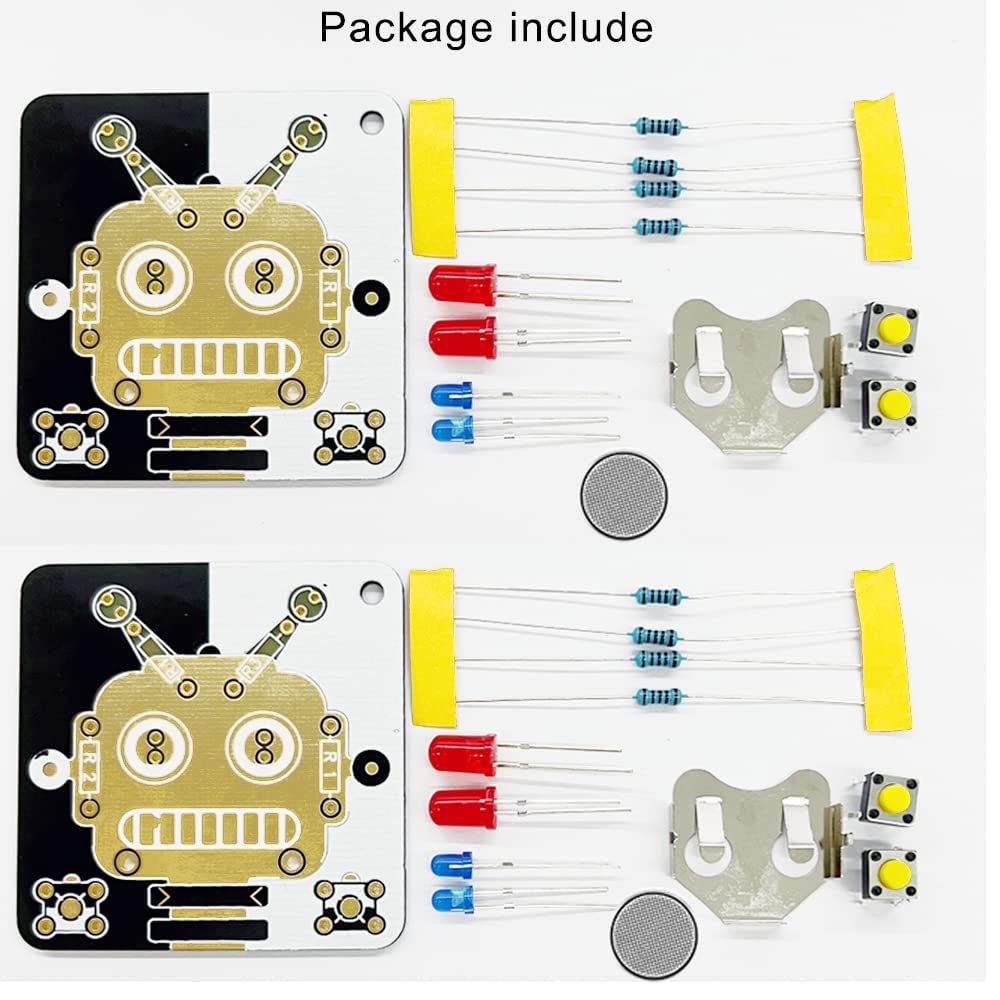
The Treedix Solder Practice Projects DIY Electronics Kit is a beginner-friendly welding practice kit designed to make learning soldering skills engaging and enjoyable. With high-quality components and an intuitive design, this compact training board is perfect for students, DIYers, and anyone looking to enhance their electronics knowledge. It features a customizable key switch and is suitable for various applications, including training, project design, and holiday gifts.
| Manufacturer | Treedix |
| Part Number | TRX8-115 |
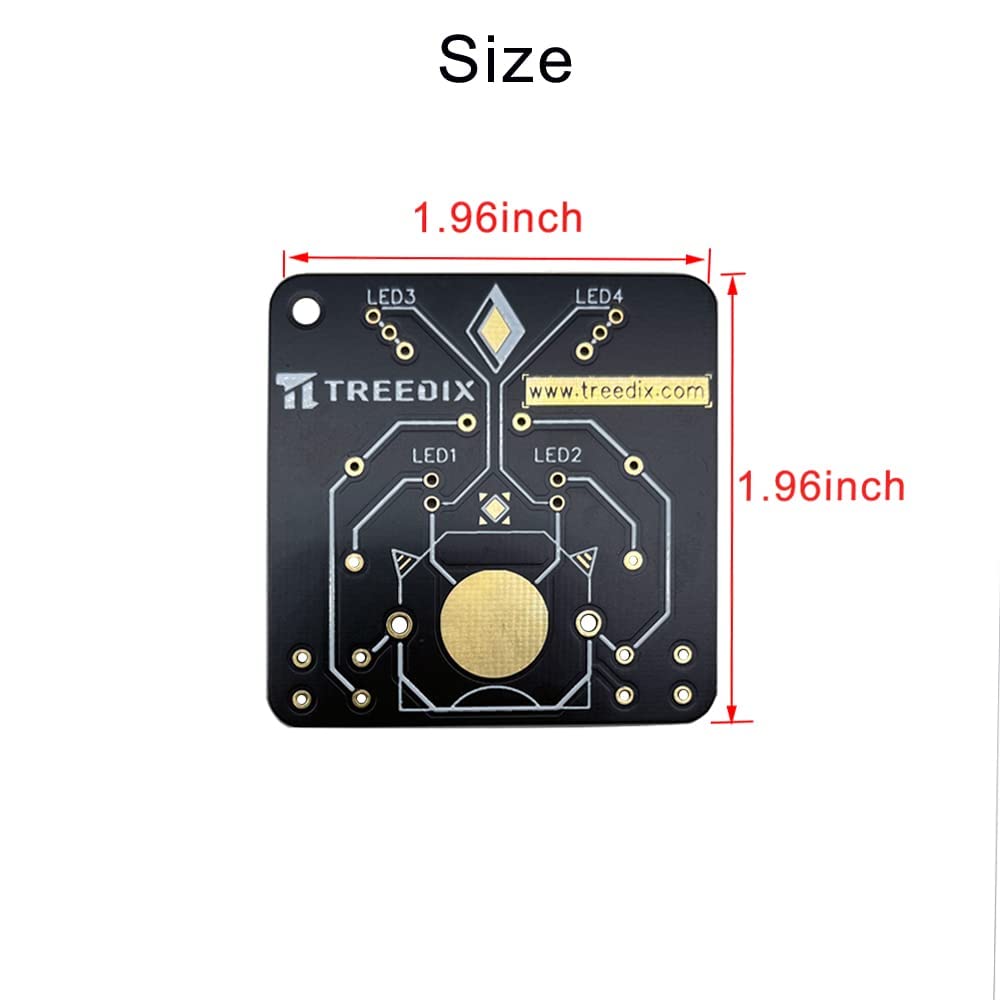
| Product Dimensions | 7.1 x 7.1 x 1.2 cm; 40 Grams |
| Batteries | 1 CR2 batteries required. (included) |
| Item model number | TRX8-115 |
| Style | DIY Kits 5 |
| Power Source | Battery Powered |
| Included Components | No |
| Batteries included? | Yes |
| Batteries Required? | Yes |
| Battery Cell Type | Lithium Manganese Dioxide |
| Item Weight | 40 g |
H**G
Excellent kit supported by some very good customer service
***UPDATE***My original review is below. Shortly after requesting a return I was contacted by the seller and they immediately shipped replacement headers which, considering they were shipped from China, arrived very quickly. Communication from Treedix has been extremely good. Consequently my review has gone from one star to five.The kit comprises two printed circuit boards which are supposed to join together using two pairs of 12-pin headers. As you can see in the photo the male headers are as you would expect but what should have been the female headers (the green ones) are actually screw connectors and there's no way in the world that they will connect to the male headers. Consequently the kit is impossible to complete. The instructions are also a bit of a challenge being written in something that can only loosely be described as English. This is going straight back to Amazon. On a more positive note, the circuit boards appear to be of good quality.
A**S
Great fun, awful instructions
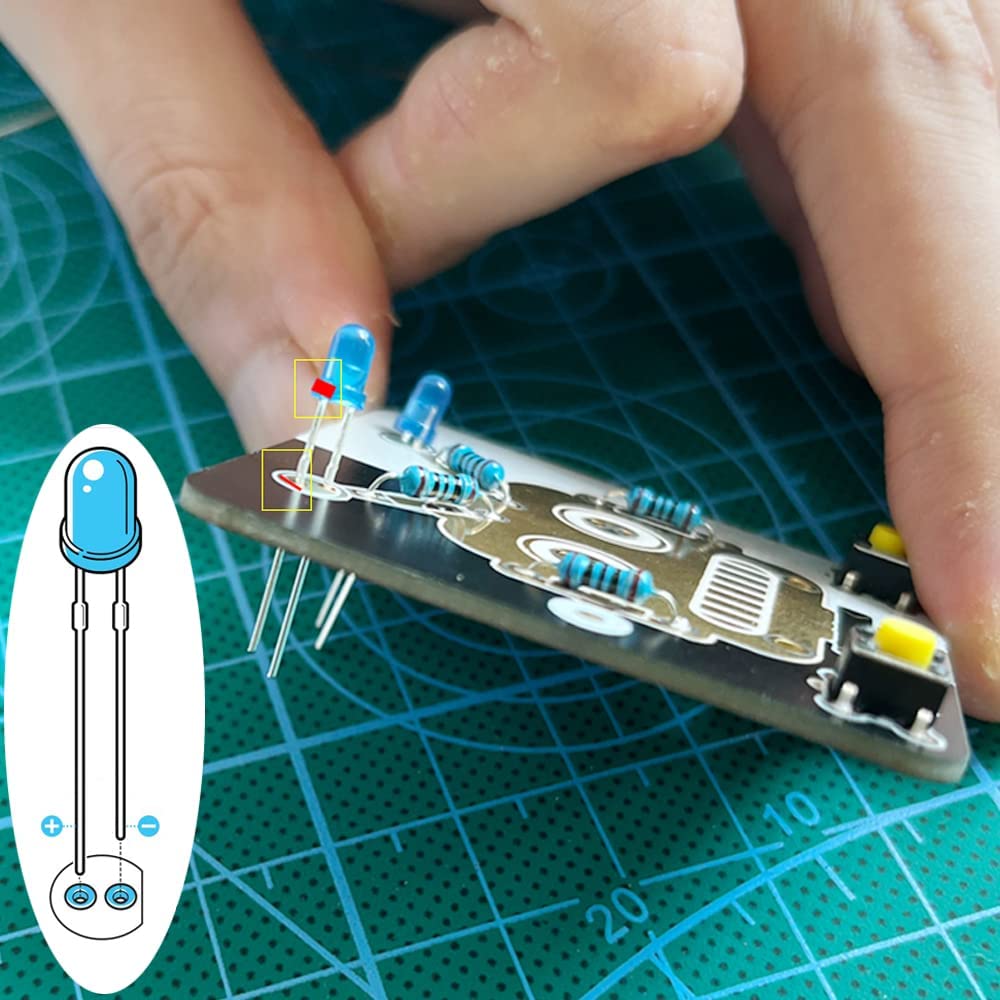
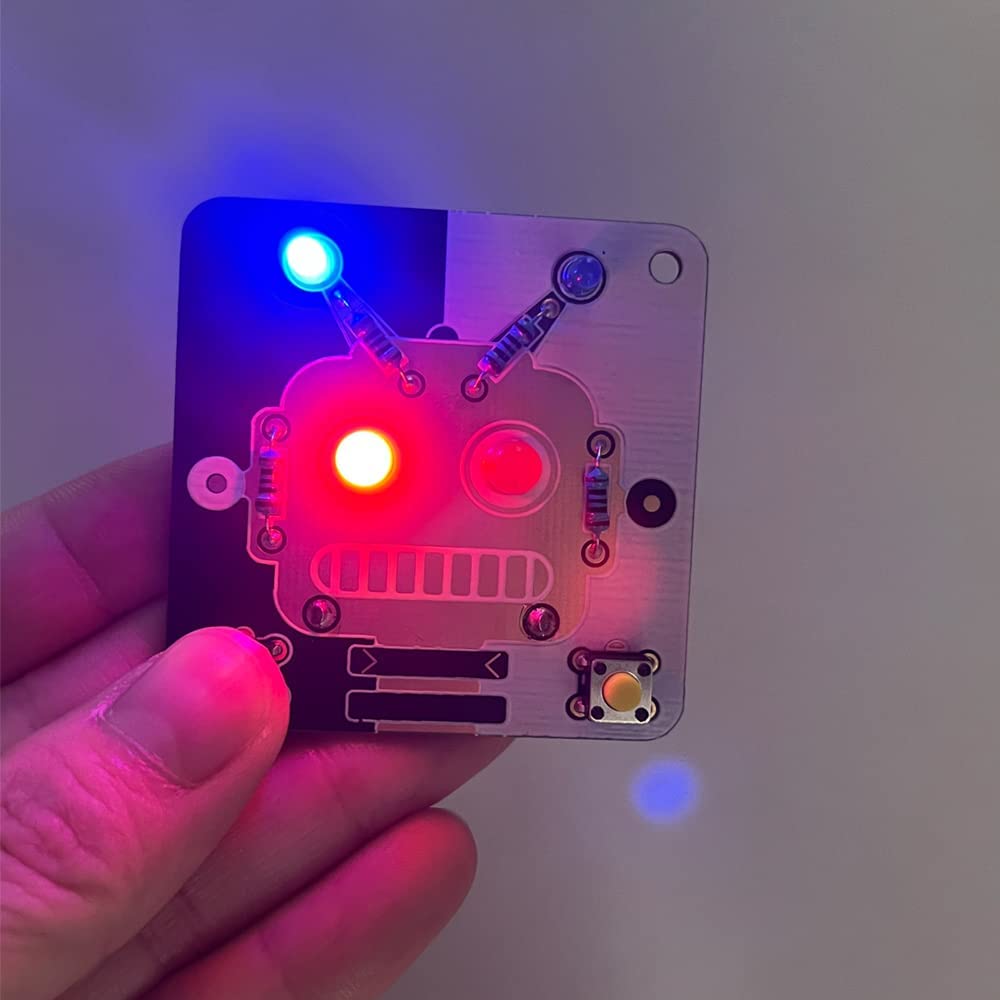
The media could not be loaded. Bought for soldering practice and the kit did not disappoint.The kit was complete with everything expected but the instructions are POOR. These instructions seem badly translated from not-English (soldering is "welding", resistor is "resistance"), printed with fuzzy photos. Not what's needed for a beginner's kit.YouTube has videos of somewhat-similar-but-not-really kits that were helpful. One tip was to solder ONE leg of each LED first with the board face down, then pick up the board and reflow that solder to push each LED down into a neater position. Then board face down and solder the other leg.You get to practice:- Soldering 30 x LEDs through holes. Snip off the legs (the instructions don't cover this - I used scissors).NB the "silk screen" printing on the front of the PCB (top of the top board) is your ONLY clue for which way around to solder the LEDs, long leg anode (+ve), shorter leg cathode (-ve). Match the flat (negative -ve, cathode) side. The LEDs on the lower half are the opposite way around from the top half! Flat side down for top half, flat side up for lower half.- Soldering surface-mount components (there are 2 x microchips to control the circuit)- Find out what a BALL SWITCH is (it rattles)! The difference between "gold" and "silver" legs is almost imperceptible, but it is there. The gold leg also has a small symbol (circle and a line) just at the top of it's leg. With the text on the board the right way up, the ball switch goes near the lower left of the bottom board. Gold leg with symbol points up, silver leg points down.- Make a three-way switch work!- Solder a resistor, 2 capacitors (who knows what for) and a "diode" (even less idea)- Solder on a micro-USB port! Reassuringly easy.It remains a mystery what the two buttons do. These buttons seem to switch "modes" but only one mode = "turn it upside down and the LEDs fall", which is all I want. There are "Hour, minute, second, ms" square LEDs that I have no idea about the function.If you're new to soldering like me, I recommend a little silicon mat to prevent burns to the surface, a new tip on your soldering iron because mine was so badly oxidised it didn't work (or a new iron..a £15 one set to 370 degrees is far superior to my old one), and "Tip tinner" paste makes tinning the tip way easier than trying to do it with solder. And don't use a sponge to clean the iron tip, because it just leaves sticky bits on your iron - use wire wool. Finally, a flux pen run over the surface just before soldering also seems to make things easier. And magnifying goggles! That's a lot of kit, but it works for me.Took me about 2 hours. Showed my boyfriend, "What's it for?". I still don't know.
C**R
Treedix Solder Practice Projects DIY Electronics Kits Circuit Boards Trainning Board with Battery
It was smaller than I expected but there were two faces and two kits in the test kit.
A**Y
Kids love it
Kids love it, been teaching my daughter to do these kits and she’s becoming a pro at soldering definitely a must for soldering beginners
S**S
Great product
My child’s first soldering project couldn’t have gone better! Now it’s on my father’s desk and he couldn’t be prouder! 3 generations all soldered together through this wonderful product. Life has come full circle.
S**L
Better clear instructions
This project is extremely bad when you solder the copper just lifts and the micro chips just shorts the legs I've had to throw them out a very bad project I will never ever buy it again the instructions are dizmal
A**F
Tolles geschenk
Mein Sohn fand es klasse. Dürfte gerne größer sein, aber um sein Interessa em löten und der Elektrik zu vertiefen war es super
A**O
Non perfetto
La confezione contiene pezzi sbagliati. In particolare i connettori che dovrebbero unire i due pcb sono passaggi ad L invece di essere passaggi lineari.
M**L
Nach Fertigstellung keine Funktion
Sieht echt super aus, perfekt um es auf zu hängen, leider funktioniert es nicht egal welches Licht ich anpeile, es wurde sauber gelötet. Für den Preis eher rausgeschmissen bzw. Geld für die Mülltonne ausgegben
Trustpilot
1 week ago
1 month ago