


🪄 Unleash Your Creativity with Bertha!
The Arrow Sewing 702 Bertha Sewing Cabinet is a robust and stylish solution for all your sewing, cutting, quilting, and crafting needs. With a cherry finish and ample storage, it accommodates machines up to 22-9/16" wide, ensuring a perfect fit for popular models. Its portable design with wheels allows for easy movement, while the spacious layout provides a dedicated workspace for your creative projects.
| ASIN | B0027Z7N4M |
| Additional Features | Self-Propelled |
| Back Material Type | Metal |
| Base Type | Legs |
| Brand | ARROW SEWING CABINETS |
| Brand Name | ARROW SEWING CABINETS |
| Color | Cherry Finish |
| Customer Reviews | 4.3 out of 5 stars 98 Reviews |
| Door Style | Cabinet, Cabinet |
| Frame Material Type | Wood |
| Global Trade Identification Number | 00650873007028 |
| Included Components | Shelves |
| Installation Type | Freestanding |
| Item Dimensions | 23 x 43.5 x 31 inches |
| Item Dimensions D x W x H | 31.1"D x 8.75"W x 23"H |
| Item Weight | 140 Pounds |
| Manufacturer | Arrow Sewing Cabinets |
| Manufacturer Part Number | 98702 |
| Material | Wood |
| Material Type | Wood |
| Model Name | Bertha Sewing Cabinet |
| Model Number | 702 |
| Mounting Type | No |
| Number Of Shelves | 1 |
| Number of Doors | 2 |
| Number of Drawers | 8 |
| Number of Pieces | 1 |
| Product Care Instructions | Wipe with Damp Cloth |
| Product Dimensions | 31.1"D x 8.75"W x 23"H |
| Required Assembly | Yes |
| Room Type | Indoor |
| Shape | Rectangular |
| Size | 88 3/4" W X 40" D X 30 1/2" H |
| Special Feature | Self-Propelled |
| Style Name | Modern |
| Top Material Type | Metal |
| UPC | 650873007028 |
| Unit Count | 2240.0 Ounce |
R**K
Excellent Sewing Cabinet The product arrived in excellent condition and ...
Excellent Sewing Cabinet The product arrived in excellent condition and a little faster than expected. The material, although "mdf", was surprisingly well manufactured. All joints fit perfectly after applying the hardware. There was no warping or mis-shapen pieces. Once assembled, the clean style was appealing and the cherry finish was attractive. It is a strong and beautiful piece of furniture! HINT1: use a high-quality wood-glue to all contact surfaces prior to engaging hardware connections. HINT2: Follow steps and do NOT attach doors or wheels until final "Lift Mechanism" (while cabinet is upside-down) attachment is complete (Note: under screws attaching machine board to lift "wings" may require you to use different "pilot holes" as mine did not match. Simply place board symmetric (with described cardboard maintaining gap around entire board) to the "wings" and screw in place (this is the "ONLY' possible change that you may run across from the printed directions). ***ALSO, please use the 'Video" provided here at amazon for assembling the cabinet. The young women do an excellent job of guiding your assembly! HINT3: Use WD-40 to lubricate lift wheels (steel) and where they contact the "rail" of lift mechanism (while riding "up" and "down"), then clean surrounding area of excess lubricant. This step will ease the resistance of lowering and raising lift for your machine (it really is a good lift).
M**S
Great sewing table
An allenkey is given for assembly but never used. Needed is several different size Philips screw drivers. Some instructions are not clear enough. And pictures are dark. Once built, it is very sturdy and extremely helpful for quilting.
R**1
A very nice sewing cabinet.
This is a nice cabinet, I really enjoy it. The assembly was not easy. First, my husband and I are 70, I have severe shoulder problems and my husband has arthritis in his left thumb. Assembly took about 9 hours over two days, if you are healthy and younger, probably 4-5 hours. The instructions are not the best but we also watched a YouTube video. The worse part of assembly is the incredibly tiny screws, and they are many (trying to hold the tiny screws with an arthritic thumb was very trying, trying to hold the screws without an arthritic thumb was also very trying). Put the hinges on the doors before adding the baskets, the baskets cover the screw holes. The magnets are very weak and do not hold the doors closed. The cutout was cut too small on one corner of the cabinet so the acrylic insert would not fit. My husband used fine grained sand paper to sand down the acrylic insert instead of trying to make the corner larger on the cabinet. The process does take two people. Overall, now that we are finished with the assembly, the cabinet is really nice, sturdy. The wood is not real oak but it does not look cheap. I am happy and I do recommend this cabinet.
M**E
Warning: Can Cause a Divorce
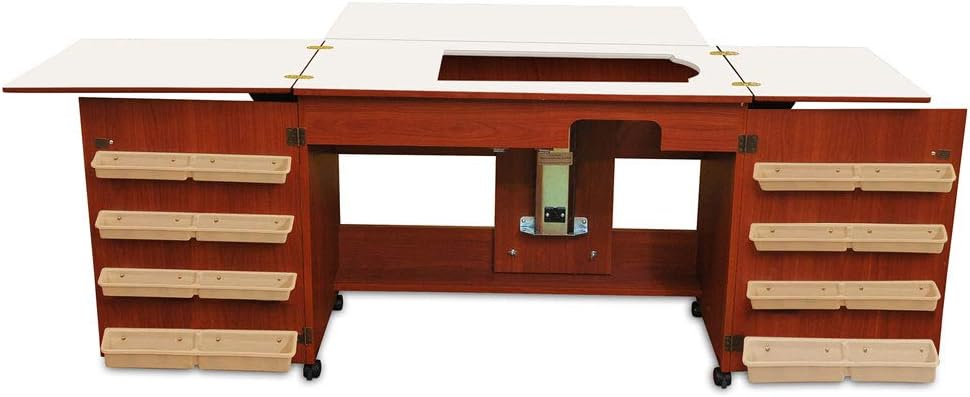
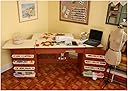
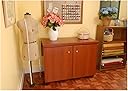
This thing can cause a divorce. I'm a millennial and thought it would be easy enough to assemble myself - I imagined the directions were written for the elderly and I could skirt past the parts that needed extra muscle. Nope, I had to call in my husband for some difficult parts - like flipping the thing over twice and drilling on the doors. This is when he took the liberty to analyze every step and question all my work. Not good for a marriage when the directions are bare-boned in the first place. After ordering a whole bunch of unnecessary-around-the-house tools that added up to $100, and taking time to learn how to operate a drill and wrench off YouTube, I was prepared for allocating two hours to assemble this beast. Wrong - think maybe 3 or 4 evenings, if you pace yourself. There were several times my husband was sent off pouting and I was left feeling like a jerk with a drill in my hand. OMG - They didn't pack in all the screws we needed....so frustrating!! Home Depot trip? Add another night for assembly. You'll need a very very large space to open everything out and assemble, especially with two bodies in the room. Don't expect to play music in the background, you'll need every ounce of concentration. I had to take the unit apart twice because the directions were "backwards and unclear," (is this even possible?) and I had drilled a couple items upside down or inside out. The video kind of helps but that too, is dated and unclear on some parts, you'll definitely need to follow the instructions because the video skips some steps and explanations. I nearly panicked - Don't forget to save cardboard and styrofoam to "lift" the front of the cabinet...why the styrofoam is needed is beyond my understanding because it didn't accomplish anything, which is another opportunity to start arguing with a husband. In the end, I am admiring my cabinet, it's functional and tucks away. I bought this for a Bernina 830 for my California vacation home - I needed something that could help transform a premium ocean view space for visitors who may stay over. Since it's not my full time residence, I didn't want to invest in a Koala. The machine fits and holds steady. I was weary of operating the lift but after several attempts, you'll warm up to how it operates. My husband said, "next time, we are getting a preassembled Koala." He did mention that this Arrow cabinet was high quality for the price. But...it's your labor they are counting on for this to be a success. In the end, this led me to another interest in a hobby other than sewing, and that is, woodworking. But after stripped screws, missing pieces, and arguments with the hubby, I decided quiet and peaceful sewing is just the perfect hobby for a happy marriage and a sound mind.
H**7
Time consuming assembly
The Bertha sewing cabinet is well built, but it was hard for us old folks to assemble by ourselves. The video and instructions were mostly helpful, but also caused a problem. The plastic shelves on the doors should be installed LAST. We had to take them off three times because they were in the way of a later procedures, such as hinges. The lift mechanism broke when we used it for the first time. We ordered a replacement lift mechanism which was promptly received from Arrow. This one works. The magnets holding the doors closed are not functioning properly. We probably need stronger magnets. We are pleased with the cabinet now.
E**H
In spite of the negative comments regarding the poor assembly instructions
In spite of the negative comments regarding the poor assembly instructions, I ordered it anyway, trusting that my husband and I would be able to put it together. It took us about 4 hours using the video step by step directions. The biggest complaint was some of the pre-drilled holes were too small and the screws stripped out constantly. Other than that it was fairly straightforward. The cabinet is attractive and just as described. I bought it mainly for the quilting features. There is not much storage, just those little plastic bins on the doors. So far I am enjoying using it, especially being able to sew flat. My Janome MC 6300 chassis does not have a free arm. As for the insert, after balancing my machine on the lift platform, we took some measurements, made a cardboard template, and, after making sure of the fit, took it to TAP Plastics and made one for less than $40 in 1 day.
R**M
Product is great, Assembly instructions very poor for the money I paid for this product.
Product turned out to be exactly what we wanted once it was all put together. Assembly took 3 hours and a little thinking on my own to make it all work. Assembly instructions were poor for the money I payed. Mostly the pictures were so poor you could not tell what they were showing. Magnets for doors do not match pre-drilled hole pattern so one is left to drill their own pilot hole so as not to split out the wood and guess which hole may be the correct one to start with. I suggest the manufacturer actually follow their own step by step instructions carefully and they will quickly see what needs to be corrected and improved. Instructions need to be written for the type of customer that has no real hands on experience. Myself I assemble custom machinery everyday so figuring this out was ok and I had all the tools to make the job as easy as possible.
J**E
Back to basics
I love the airlift, easy to use. It moves around around smoothly and when all extensions are open the working space is just what I needed. However, very disappointed that there is no insert to fill opening when machine is in storage position. I called manufacturer but they never got back to me after my initial request. Assembly was difficult and it took two able men to actually complete the job.
R**R
Great pice of kit
I bought this for my wife's Christmas and she was delighted with it. It's very sturdy and built to last I'm giving it 4 stars as the assembly instructions are dire, and all the screws/fittings were lumped into two bags.. and there are a LOT of different sized screws. Apart from that I can't fault it build wise.
A**R
I haven't actually put the cabinet to use yet but it looks good (all the doors and tops line up)
I conquered the assembly instructions over a period of 24 hours (stop and start) . I had three small screws left over at the end. At least half the assembly time was watching and re-watching the video and reading and re-reading the printed instructions. It would be helpful if each of the small bags of screws and bolts had some sort of identifying code on them ie. Bag A or Bag 2. I haven't actually put the cabinet to use yet but it looks good (all the doors and tops line up), the lift works as described, and it arrived even earlier than promised. I'm glad I ordered it.
A**R
Four Stars
Very nice unit
Trustpilot
2 months ago
1 week ago