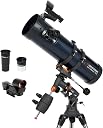
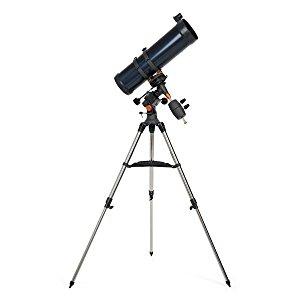
Desertcart purchases this item on your behalf and handles shipping, customs, and support to KUWAIT.
🌌 Unlock the Universe — See What Others Miss!
The Celestron AstroMaster 130 EQ Telescope combines a powerful 130mm aperture with a precision German Equatorial mount and user-friendly TheSkyX software, offering beginners and enthusiasts alike a portable, easy-to-setup instrument for stunning views of planets, moons, and deep sky objects. Its durable steel tripod and dual-purpose design make it ideal for both night sky exploration and terrestrial viewing, delivering an immersive astronomical experience that’s ready right out of the box.


| Asin | B000MLL6RS |
| Best Sellers Rank | #60,442 in Electronics (See Top 100 in Electronics) #5 in Telescope Reflectors |
| Box Contents | Telescope |Optical tube | Tripod and mount (preassembled) | 20mm eyepiece with built-in erect image corrector | Standard 10mm eyepiece | Red-dot finderscope | Manual |
| Brand Name | Celestron |
| Coating | Aluminum;Silicon Dioxide |
| Compatible Devices | iPhone, iPad, Android devices |
| Customer Reviews | 4.0 4.0 out of 5 stars (3,405) 4.0 out of 5 stars |
| Dawes Limit | 0.89 Arc Sec |
| Exit Pupil Diameter | 1.44 Millimeters |
| Eye Piece Lens Description | Barlow |
| Field Of View | 0.67 Degrees |
| Finderscope | Reflex |
| Focal Length Description | 650 meters |
| Focus Type | Manual Focus |
| Global Trade Identification Number | 00050234310451 |
| Importer Contact Information | A&S Creations, 6/7, Ground Floor, West Patel Nagar New Delhi-110008 |
| Item Dimensions D X W X H | 88.9D x 48.3W x 30.5H Centimeters |
| Item Type Name | Telescope |
| Item Weight | 7.71 kg |
| Manufacturer | Celestron, Celestron Acquisition, LLC 2835 Columbia St Torrance, CA 90503 |
| Manufacturer Contact Information | Celestron Acquisition, LLC 2835 Columbia St Torrance, CA 90503 |
| Manufacturer Part Number | 31045 |
| Model Name | Astromaster |
| Model Number | 31045 |
| Mount | Equatorial Mount |
| Number Of Batteries | 1 Lithium Metal batteries required. (included) |
| Number Of Items | 1 |
| Number Of Packs | 1 |
| Objective Lens Diameter | 130 Millimeters |
| Optical Tube Length | 610 Millimeters |
| Packer Contact Information | A&S Creations, 6/7, Ground Floor, West Patel Nagar New Delhi-110008 |
| Power Source | Not Battery Powered |
| Product Features | German Equatorial Mount with Slow-Motion Control Knobs, Permanently Mounted StarPointer, TheSkyX - First Light Edition Astronomy Software |
| Unit Count | 7 Count |
| Upc | 050234310451 |
| Warranty Description | 2 Years |
| Zoom Ratio | 90 multiplier x |
User
An out of the world experience
Amazing is just not enough to describe what you see and feel looking through the eyepiece.Venus was my first stop, "wow" was the word that came out when the image got focussed for the first time. I could see the phases of venus with just the 20mm eyepiece. 10mm made the image a bigger one and astonishing.Moon was playing hide and seek with the clouds but when it was well above the horizon and shining brightly, I was spell bound with its beauty. Honestly you could spend hours just looking at the moon. 10mm eyepiece gave an even closer look at the Carter's, the shadows casted by the craters and the mountain ranges on the moon.Jupiter looks like a 2mm ball with very faint bands of methane distinguishable if observed for longer durations. The four moons of Jupiter are just a very minute dots if observed very minutely. But I felty it requires more magnification power to observe Jupiter with it's methane bands and the giant red spot. (May be collimation issue is there)Couldnot see the most beautiful planet Saturn as clouds came in hope to see it when conditions are perfect.These were my first experience of amature astronomy with my first telescope.I don't write reviews at all but this Celestron Astromaster 130eq is such amazing piece that it made me to write such a review. Though there are some points which I would like to list to get the most out of the telescope.1. Lots of patience is required to be able to see what you actually want to see, trust me patience will give you all that you want from this telescope.2. Try to see the videos and go through the instructions manual before beginning assembly of the telescope as it's quite critical for one who has no idea of any such kind before.3. Lot of things has to go right to get the perfect views, if not getting the perfect view wait for the perfect condition to occur.4. The equatorial mount is very heavy and of solid built quality but the pointers are just not right and you can't be sure which degree u are setting on it.5. The tripod is also of heavy construction but if expanded fully it feels more shakey so I don't expand it.6. The secondary mirror was dangling loose when I first unpacked the telescope which totally dishearted me but I did manual collimation as per the instructions manual provided and it was fairly accurate but will eventually require a lazer collimation which again costs around Rs 6000/- to get more sharper images.7. The telescope is very heavy (around 16kgs) and very difficult to move it around in assembled condition. It gave me body pains the next morning after my first setup and observations.8. There are no cromatic abbrations as it is relfector telescope and the optics are of very good qualityThose who are still reading this review and disheartened because I didn't post any pictures of moon or Jupiter for them I just want to tell that pictures just don't do justice to what you can actually see with your naked eye because human eye has 1000 times better dynamic range than any camera. Even I have gone through all the pictures posted in the other reviews. Trust me you are going to see 1000 times better with your naked eye that any of those pictures.If you want to go for this telescope go for it without any hesitation as it will finally give you and out of the world experience.
User
This is a good telescope with clear,crisp view of night sky
I ordered the telescope on 16 Feb and got it on 19th. I faced some initial troubles while assembling the telescope for the first time. Especially the counterweights were not getting fit into the telescope's balancing slot. Finally, I found a way to make open the screws inside the counterweights by slanting the counterweight horizontally and then unscrewing its threads. After assembling, it takes little practice to point the telescope to a desired object using the help of finderscope/red dot finder.Lunar craters were awesome. So much clear and crisp and so much detail with the 10 mm eyepiece that it would seem like they are distant landscape on our own earth! Night sky was full of wonders. You can see much much more stars than you can with the naked eye. Suppose a region of sky where you can hardly resolve 2-3 stars with the naked eye. With the telescope you can see hundreds in the same region clearly. 10mm eyepiece gives more magnification (65X) but it also gives inverted look of the sky. So, when you need to see higher in the sky and you move the telescope tube up, your field of view will seem like moving down! So, you need to keep that in mind while using the 10mm eyepiece supplied.I could see the orion nebula, plieades nebula, uranus planet look like a moderately bright star. The view of Jupiter and its 4 moons were amazing. Could see the colored cloud bands of Jupiter and the moons Io, Europa, Ganymede and Callisto was changing their relative position so rapidly that in the early evening I saw all 4 moons in the same side of jupiter. But in the late evening about 3 hours later, one moon was on one side of jupiter and rest was on the opposite side. Sometimes, 2 moons on one side and rest 2 on the other side. This happens as all 4 revolve round the giant planet. As during this time of the year, Saturn rises very late in the sky, after 1:30 am so I didn't attempt to observe saturn. Actually I stay in a flat on the 3rd floor of an apartment in Kolkata and the building is 6 storied. So I have to carry the telescope 3 floors up and reassemble it there in the roof. As I could not take all the parts of the telescope in one go, so I have go up and then come down, take the remaining parts and again go up.One difficulty, I'm still facing is that the setting circles are not actually helping even after polar alignment. So, I find the objects only by using the red dot finder. And it takes an average of more than 15 mins to bring Jupiter at the centre of the telescope's field of view. Even for Moon it takes 4-5 mins to focus. So , you have to be patient and keep on trying until you get your desired object at the centre of the view. You need to align the 2 red dots of the finderscope and the target object in the same straight line. I have ordered Celestron Accessory kit worth 5700 rupees to get better view of Jupiter and orion nebula. Normally Orion nebula looks like a white cloudy patch in the sky, but with filters in the accessory kit I hope I will find the colorful view.
User
Solid Performer
I purchased the AM130EQ with full knowledge of its' capabilities and limitations. This is a budget telescope for those like me who have probably never seen Saturn's rings or Jupiter moons etc. For the price paid, I am very satisfied with the amazing views I have been dished for the last 3-4 days. To list I could see Jupiters bands, its' orange color and its four primary moons. Moon craters are very clear and watching them on a crescent moon made for an breathtaking sight. Today, I saw Saturn, its' rings and two of its' moons Titan and lapetus. Saturn did not exhibit any specific coloration though. Besides this, I have also been observing (sweeps) the sky around Sirius, Orion, Leo and I am astounded by what the telescope can see, especially in the light and air polluted skies of Mumbai.I am still on my first week and haven't purchased any AX yet, but the two EPs provided by Celestron along with the AM130EQ have been more than adequate to satiate my desire for great views. I do plan to buy the Celestron Kit / Barlows / EPs / Collimator / Finderscope soon.Now a few tips for those in India, especially Mumbai. Polar Alignment is a must. This scope is NOT a binocular, and hence should never be used without proper alignment, not unless you love to explore the virtues of frustration. I made that mistake, and spent a good 5-10 mins finding the moon, it was just hopeless given the EQ mount, nothing is predictable unless aligned. Second, you don't need to actually see the polaris, just know where North is and assume a 18-20 degree inclination. Third, the star-pointer should be renamed as star-vicinity-pointer. Do not make the mistake of assuming it'll take you to a star or an object in the sky, instead it'll take you in its vicinity and you should be able to view the target object within a few sweeps. I am easily able to find bright objects this way, I have not tried this technique on DSOs which are not apparent to the naked eye.Lastly, the tripod shakes, yes. Its' best to keep its' legs unextended. That way, the eyepiece align to your eye-height in the sitting position (practical isn't it?). Also unrelated to this product, but to save yourself some frustration do download & install Stellarium a must-have if you wish to have a targetted sky-exploration.Hope this was helpful.Edit: Please buy a 25 or upwards plossl eyepiece, doing so will eliminate a lot of your frustration with the star dot finder. Think of it as the best finderscope for your telescope.
User
Absolutely Useless Product and Terrible Customer Service - A Complete Waste of Money
I recently purchased this telescope, and to my utter disappointment, the starview finderscope is completely non-functional. It’s supposed to be a crucial part of the telescope, but it’s nothing more than a decorative piece at this point. Despite following all the instructions and troubleshooting steps, it simply does not work.To make matters worse, when I reached out to the seller for assistance, I was met with complete indifference. They offered no help, no solution, and no willingness to address the issue. It’s appalling to spend hard-earned money on a product only to be left stranded when it doesn’t work as advertised.Now, the telescope is just sitting there, taking up space like an expensive toy. It’s a total waste of money, time, and effort. I deeply regret this purchase and would strongly advise anyone considering this product to think twice. The lack of functionality combined with the complete absence of customer support makes this an experience I wouldn’t wish on anyone.Save yourself the frustration and look elsewhere for a reliable telescope and a company that actually stands behind their products.
User
Celestron astromaster 130eq is absolutely perfect
Totally worth it purchasing celestron astromaster 130eq telescope. It’s easy to operate the telescope after knowing quick guide. For the first time i watched the moon so clearly and closely with just 10mm eye piece. I haven’t used barlow lens till now, it’s beyond my imagination of the views if i use barlow lens. Perfectly recommended to the amateur astronomers.Watched the moon soo clearly with moon spots but i havent got the perfect video to record it but i just got a glimpse. Everything’s perfect with the product and packaging.
User
Rudimentary but a great one to start with
I am reviewing this after 17 days of delivery. Some of the points I would like to mention :1) Easy to assemble2) Rudimentary, but a great one to start with3) Initially takes a bit time to adapt to equatorial setting, if not done beforehand4) The big downside is its shakiness... A little disturbance, even after proper balancing, makes the target go out of the eyepiece5) Ideal to see nearby objects viz - Moon, Sun and Venus and eclipses6) Don't expect much from it.. eg : you can't exactly see The great Red spot on Jupiter, and beautiful saturn rings with default eyepiecesRefer to the attached pics taken during annular solar eclipse of 21 June, 2020
User
Worth the price!! Go for it.
Ideal telescope for beginners. I bought it for my daughter who is interested in astronomy. First of all, big thanks to Appario Retail for the wonderful packaging and great service. Believe me, it is one of the best telescopes in this price range, only thing is that you have to buy a few more optics for utilising maximum of it's abilities. The telescope is extremely easy to assemble and there is a pictorial guide too. Eventhough it can be assembled without tools, a small screwdriver will be handy especially to tighten the slow motion clutches and finder scope. The presentation of the telescope is good and the tube looks beautiful with a wonderful colour combination and emblem. Don't be confused with other reviews which states that the finder scope is useless. If u know how to allign it, then it is of great help. In fact alligning is so simple too. I simply pointed the telescope to a distant building then switched on the finder scope. Then I used the screws to slightly move it sideways, up and down so that the building was in the center of the finder scope and the laser pointed was also pointing at it. Then I looked through the scope to ensure that the building is still in focus. Done. It's that simple. I have tried to view some celestial bodies but since sky was cloudy, I couldn't have a good view. Then I tried terrestrial viewing. The 20 mm gave decent magnification and a straight view, where as the 10 mm gave more magnification but an inverted view. Altogether the product is worth the money and built quality is excellent. The tripod is sturdy and the eq mount is very strong. I'll update my review after a few days of use. I recommend the scope for all amateur astronomers. Thanks for reading. Thanks Amazon.
User
Beginner scope for the space fanatic
i bought this scope after a lot of research and with a strong belief that a 5 inch scope would gather more light and offer the best view of the heavens....can't complain about the details on the moon. it was pretty amazing.i also tested it for terrestrial viewing using the provided 20 mm erecting eyepiece and I must say it was pretty impressive. Got a pigeon that was at least 300 mt away and could see it's feathers in brilliant detail, too many trees near my home limit the view this should be capable off. I'm not able to see the planets yet, i'm guessing it's the collimation is off way too much and the 130 EQ as I hear can be unforgiving if the collimation is not perfect.The product itself feels premium and the setup was quite simple. i downloaded a youtube video to guide me through. The manual however skips the step of attaching the mounting ring.love what i got for my scope. Bug the EQ mount seems hard to tame though, I hate the fact that it's not stable at times and when i want to make some minor adjustment to get the tiny mars/jupiter in view!
User
Alın ve uzay macerası yaşayın.
Çok iyi bir teleskop. Başlangıç için 50AZ modelini almıştım ama arasında çok fark var. Andromeda, jüpiter, saturn ve niceleri telefonumda var ama "AMAZON TÜRKİYEDE RESİMLERİ AÇSA GÖSTERECEM!" Eğer çok üst segment alıp para basmayacam diyorsanız ideal. Çok ekmeğini de yedim ürünün ;) 2 eksisi var el ile taşınmaz çok ağır. Ekstra lens alıp geliştirmek lazım. Jüpiterin 2 büyük çizgisi ve büyük kırmızı gözü lens yardımı ile gözüküyor. Ayrıca fotozeynep ile 1 günde kapınızda.
User
Excelente qualidade - Vale cada centavo
É bem preciso na busca de planetas quando se regula bem a buscadora. As lentes que vem nele é de altíssima qualidade e só fica "devendo" uma barlow para aumentar o zoom.- Antes de comprar, é importante saber a latitude e longitude da sua localidade.- Se vai comprar, compre uma barlow também. Respeitando a capacidade do telescópio- Zoom real máximo é de 260x (sem aberrações nas imagens)- Para ver a lua, fica muito bom com o filtro lunar e as lentes de 10mm e 20mm dão e sobram- A regulagem precisa é muito boa- Se for fazer imagens/vídeos, recomendo um suporte para celular ou câmera DSL
User
Great for first time users
After much searching and investigating I picked this telescope as it had the largest aperture for my price range.It is very well built and was easy to setup and build. The guide is useful, but ended up searching YouTube for a video guide - this also included how to balance the telescope [...]).The telescope itself was supplied with 2 lenses, a 20mm and a 10mm. The 20mm is plastic and I only use it as a starting lens to position the telescope first to what I want to see. The 10mm is a good little lens and give nice view of the stars and moon. I also purchased the 'Celestron AstroMaster Accessory Kit' at the same time - this included lens filters and additional 5mm, 15mm and 2x lenses. This gives more range of magnifications to use with the telescope.Viewing with the telescope is very good. The moon is amazing, but you will NEED a moon filter - it is very bright. You can clearly see the moons of Jupiter and with my additional 5mm lens I can just about make out the markings of Jupiter. As for the other planets they have not been visible in the evenings yet - but can't wait until Saturn appears!The only fault is the StarPointer. It's not that good, but you can work around/with it.I have even had my 4 year old daughter looking at the moon - which she found fascinating as she could see the craters very clearly.Since buying this, I have also contacted Celestron support (issue with the additional lens). They were quick and put me in touch with their local distributor (Hama) in the UK. Hama were also very helpful.All-in-all this is very good for the price it costs. I wanted a good telescope that would allow me to get started in Astronomy, without using it for a short while and having to replace it when I want more. This is a good start and with the right lenses will do for what I want it for. Good quality lenses are not cheap (it's the price of the telescope itself for a set), but I can now slowly upgrade this over time now that I have a decent telescope.
User
unable to see any thing
not usable
User
Worth the extra cost over the Powerseeker 127EQ
Tried the Powerseeker 127EQ first and was only acceptable. Then I bought the Astromaster 130EQ and found it to be a fine quality sharp image excellent Reflector Telescope. You should be prepared to learn a bunch before feeling accustomed to this Reflector but you will be rewarded for your efforts. A laser collimator is a must to check, and if necessary, realign the mirrors, known as Collimating. I spent some time learning how to collimate this Scope, or align the mirrors and I devised an additional step in the beginning as I am a former technical writer.First, making sure the laser Collimator is NOT in the focuser tube and is definitely OFF, stand a few feet in front of the opening or aperture of the telescope and look into the opening where you will see the cross frame in front, the mirror in the back, and the reflection of the front cross frame in the back mirror. Then slowly and carefully concentrate on what you see and move your view slowly so the mirror and reflection of the cross frame appear centered within each other and the telescope tube. The point is to confirm that the main mirror is perpendicular to the axis of the tube such that all parts viewed appear to be all centered or concentric with each other. If looking straight down the tube center, you see the reflection of the secondary mirror frame up front off center and offset from the actual frame up front, then carefully adjust the primary mirror in back so everything looks aligned. That means the back mirror reflection of the front cross frame should be aligned behind the frame when looking absolutely down the center of the tube and the mirrors appear correctly centered. After you have assured a nearly aligned primary mirror when viewed from the front, then you can proceed to install the laser collimator into the eyepiece focuser with the indicator target pointing forward as the telescope does. Turn on the laser and DO NOT LOOK into the front of the telescope until you are done and the laser is out and OFF. Slowly adjust the secondary mirror up front carefully and slowly loosening and tightening very delicately each of the three screws until the laser dot is centered on the target. Remember to very delicately loosen and tighten the screws slowly and in steps between the three until you become accustomed to how the adjustments affect the laser dot on the target.Once you have centered the dot on the target adjusting the secondary mirror up front, then TURN OFF the laser and rotate the laser Collimator in the focuser tube such that the target opening is facing the back of the Telescope where the primary mirror is. Turn on the laser and observe the laser dot on or near the target. The dot should be centered in the target and likely will be close or off towards the outer part of the target. Very carefully loosen the locking phillip screws of the back large primary mirror to allow further adjustment with the larger knurled knobs that adjust the mirror. Very slowly adjust one knob at a time while you become accustomed to the results of each adjustment as they affect the movement of the laser light dot on the target of the collimator. Do this all slowly until you gradually learn the tricks to collimate. Do not make big adjustments to the primary mirror unless you have to. When done, turn OFF the laser collimator and remove it from the focusing tube. Once again, DO NOT look at the laser beam or the front of the telescope while the laser is in use.Now that the eyepiece focuser tube is open, look in the tube and you should see a reflection of your eye's pupil in the center of the small secondary mirror and mirrors and cross frame should all look centered upon each other or concentric.NEVER LOOK AT THE LASER BEAM END, ONLY THE DOT ON THE TARGET WHEN IT IS INSTALLED IN THE TELESCOPE.A laser collimator really is a must for easy collimation testing before each use of the telescope and especially after transporting the telescope as vibrations may change mirror alignment or collimation.I highly recommend pointing the telescope horizontal during mirror collimation outdoors as the laser light may be considered offensive by planes with resulting complaints and possible law actions. I collimate indoors.DANGER; never look at the laser beam as eye damage can result. Only look at the light dot on the target when the collimator is installed in the telescope. The laser collimators are very low power but safety practices should always be a way of life.In actual use, I just barely saw the cluster of galaxies between Virgo and Leo on a dark night near the new moon and gladly told myself it was worth the money and effort to have seen the dim but visible galaxies with the fuzzy center nuclei of stars. Dark conditions and eyes adjusted to the dark are necessary.I also viewed Jupiter and five of it's moons in very good detail on a marginal seeing night. The planet was actually too bright and required a filter to lower the the brightness and improve contrast. For the price, it is an excellent light gatherer. I also have a Powerseeker 80EQ Refractor that exhibits very clear images.The Telescope paid for itself when I could see deep space distant galaxies. That is a result of the larger light gathering ability of the Reflector.I recommend Dean Fuller's video on YOU TUBE on how to operate an equatorial mount and polar align for beginners. It was faster and easier to understand than the written instructions.
Trustpilot
2 weeks ago
5 days ago