


⚡ Upgrade your ride with genuine GM precision — don’t settle for less!
This genuine GM OEM back panel air vent valve (part number 13596856) is engineered for a perfect fit across a wide range of Chevrolet and GMC cab models including Silverado and Sierra series. Lightweight and compact, it ensures optimal ventilation while maintaining factory-grade quality and durability. Highly rated by users for easy installation and reliable performance, this part is a must-have for maintaining your vehicle’s original integrity.
| ASIN | B00TABJ09W |
| Brand | General Motors |
| Color | レギュラー |
| Customer Reviews | 4.7 4.7 out of 5 stars (499) |
| Date First Available | September 18, 2015 |
| Exterior | ____ |
| Is Discontinued By Manufacturer | No |
| Item Dimensions L x W x H | 27.2 x 11.7 x 4.6 cm |
| Item Weight | 135 g |
| Item model number | 13596856 |
| Manufacturer | General Motors |
| Model | Silverado 1500 Sierra 1500 Silverado 250 |
| Product Dimensions | 27.18 x 11.68 x 4.57 cm; 135 g |
| Year | 1999 |
J**N
Perfect fit for my 2005 GMC 1500 4 door
L**N
Good fit easy to replace.
R**B
This product is OEM. It's easy to install and indeed stopped the leak. These are the source of major leaks in GM trucks as is the door couplers between the door jambs and the truck chassis. The other major spot is less talked about is beween the windshield wipers under the hood that leads to the cabin air filter. Another place which is not a major source is the door jamb rubber weather seal. The water can travel down it into the door sill because of water surface tension. Replacing that and taking care of any rust on the flange it connects too fixes that problem.
R**Z
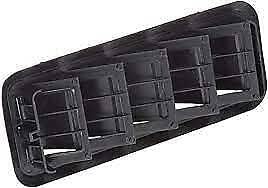
East install - From the outside of the cab (on the top side of the vent), take a long screwdriver to press down on the top tab on the old part. (Use a rubber mallet if needed.) The old part will fall out and drop on the floor. Clean the old decomposing rubber off the cab around the perimeter of the hole. From the top, I used a wet soapy rag wrapped around a short & narrow piece of plywood. From the bottom of the vehicle, I was able to reach and clean the remaining gunk around the hole by hand. Then from the bottom of the vehicle, slide the new vent in place. The new vent only partially slipped into place. Going back to the top of the vehicle, a tap on the top of the vent with the screwdriver to help seat the new vent the rest of the way.
A**R
Perfect fit for your gm pickup
Trustpilot
1 month ago
5 days ago