🚀 Seal Your Ride, Fuel Your Adventure!
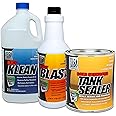
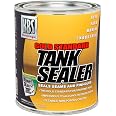
The KBS Coatings 53000 Auto Fuel Tank Sealer Kit is a comprehensive solution for sealing fuel tanks up to 25 gallons. This all-inclusive kit includes KBS Klean, RustBlast, Tank Sealer, gloves, and complete instructions. It effectively seals pinholes and weld seams, is resistant to various fuels and solvents, and prevents rust and corrosion, ensuring optimal fuel flow for multiple vehicle types.


| Vehicle Service Type | Multiple Vehicle Types |
| Item Weight | 9.22 Pounds |
| Capacity | 25 Gallons |
| Fuel Type | Gasoline, Diesel |
| Product Grade | Like New |
| OEM Part Number | 53000 |
| Global Trade Identification Number | 00818032011167 |
| UPC | 818032011167 |
| Manufacturer | KBS Coatings |
| Model | 53000 |
| Item Weight | 9.22 pounds |
| Product Dimensions | 10.5 x 8.4 x 8.2 inches |
| Country of Origin | USA |
| Item model number | 53000 |
| Is Discontinued By Manufacturer | No |
| Manufacturer Part Number | 53000 |
C**L
Works great!
Works great! Just have to take your time a not rush anything.Pics show before, during, and after.
H**R
Works pretty well
Sealed a motorcycle tank. Still holding up
R**T
Seals well, be ready for the fumes and the mess
My gas tank was for a 1978 International Scout II that had been sitting for a decade when I got it. The tank was nasty and had some pinholes. First I drained the tank, cleaned it with degreaser and an old chain, then de-rusted it with electrolysis. There are some videos on youtube to show how its done. Then I broke out this sealant kit and cleaned it again. The gloves that come with this kit are worthless. Get some good, thick rubber or kitchen cleaning gloves for this project. Also, get a couple walmart or bread bags to put over your shoes when using the sealer. I spilled it on my feet and I'm waiting for it to wear off. The cleaner is a powerful degreaser so I drained it and saved it to clean the engine with later. I followed the instructions precisely, except I missed the statement to NOT allow the Blast primer to dry in the tank. I did save the primer when I drained the tank, so the next day I re-Blasted it again, then allowed it to dry. I used JB Weld on the 5 pinholes, which were really just pinholes before adding the sealant. The instructions say not to let it sit in the tank for greater than 30 minutes, but if you are in a high humidity area like I am, it really should sit in the tank for much longer. You have to keep rolling the tank to make sure it is fully coated and does not get too thick in one area. I made sure the seam and the bottom of the tank were well coated before pouring it out into a bucket. I then hung the tank and painted the outside of it with a chip brush. I also cleaned, primed and sealed the metal fuel filler tube from the truck. There were a couple places on the outside where I got it too thick and it bubbled up and separated from the tank after it dried. I can see where that would be a problem, so make sure you do not let it set too thickly on the inside. Gotta keep rolling it every 5 minutes until it is dried. I did it inside my garage with the fan blowing, you have to have ventilation for this project. Plan on waiting 4 days to put fuel in it. I let it dry, then filled it with water and did a pressure test, it passed sat. Let it dry again and installed the tank. I like this option much better than spending over $350 for a new aftermarket plastic tank.
J**H
Fo;;ow the directions, easy to apply
Takes some time to apply, But it does a great job coating the inside of the fuel tank
U**R
Cleaning the tank before applying the sealer is VERY important.
I have a gas tank from an old pickup truck that mounts behind the seat. This is a very large , long tank. Tank preparation before using the sealer was a lot of work. I actually ended up building a setup to rotate the tank with gravel and water in it, as it was too big to rotate by hand. I had to add a chain to the gravel and continue rotating it until the water came out clear. This took most of an afternoon. This was done BEFORE using the cleaner in the kit. After using the cleaner and the rust converter in the kit, applying the sealer is a strenuous job. It is a thick liquid that needs to have the tank rotated in all directions, which my simple setup would not do. I had to do this by hand, and you only have about 45 minutes to do it and get all of the tank interior coated. I would recommend that two people perform the job, as I was really tired when it was done. It did seal the tank effectively. Good luck.
R**S
Great Service
questions asked on late Friday were answered on Monday. Almost couldnt believe they called back. Worried about wrecking a 3000 dollar paint job on my motorcycle tank. Was advised as how to cautiously proceed. Just excellent service and product did its job. Looked like a brand new tank inside when finished.
N**A
Saved me from buying a new rototiller!
I have an older rototiller that had been sitting for a while. Unfortunately, I did not drain the tank after I last used it. The metal tank had rusted and the filter insde the tank had deteriorated. The KBS restoration kit is a bit exspensive, especially for such a small fuel tank, but I could not find a replacement tank on the open market. I decided to give it a try and it seems to have worked really well. The cleaning process requires a little patience, but it is the most important step in the process. The instructions are well written. I am happy with the results!.
S**I
as described
lots of work but works very well and what a deference it made!
Trustpilot
1 month ago
4 days ago