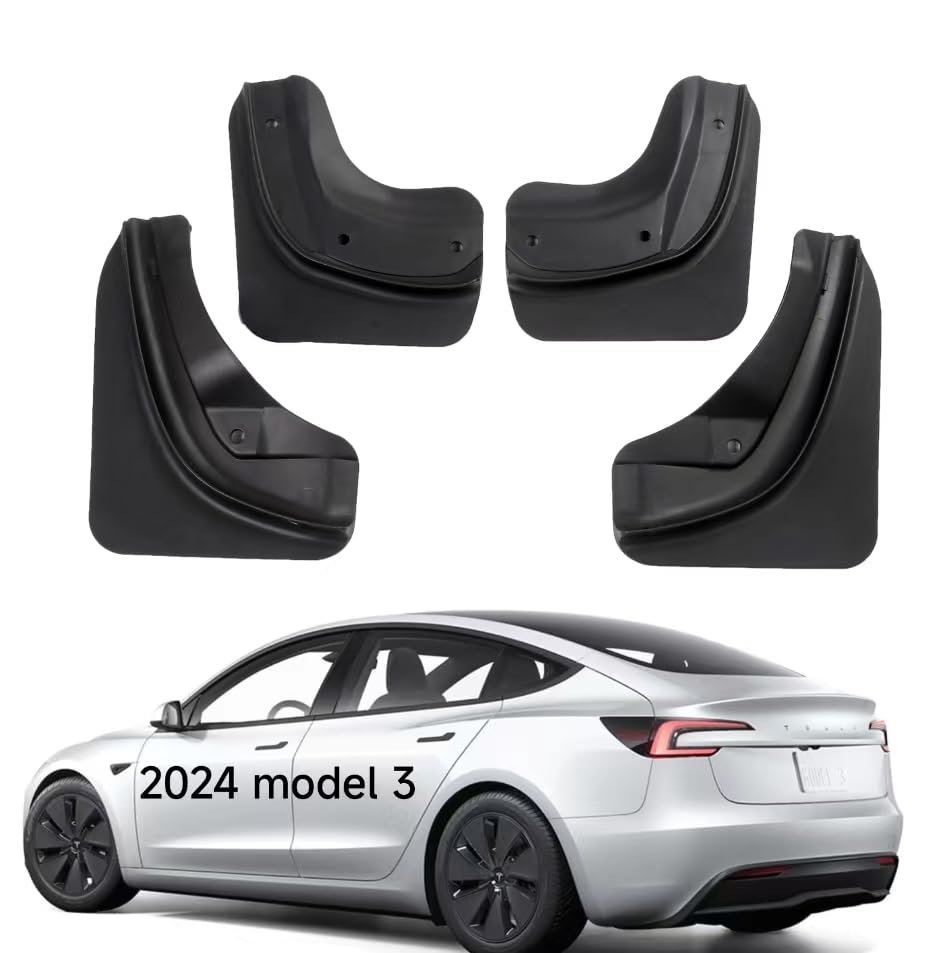

🚀 Elevate Your Ride with Style and Protection!
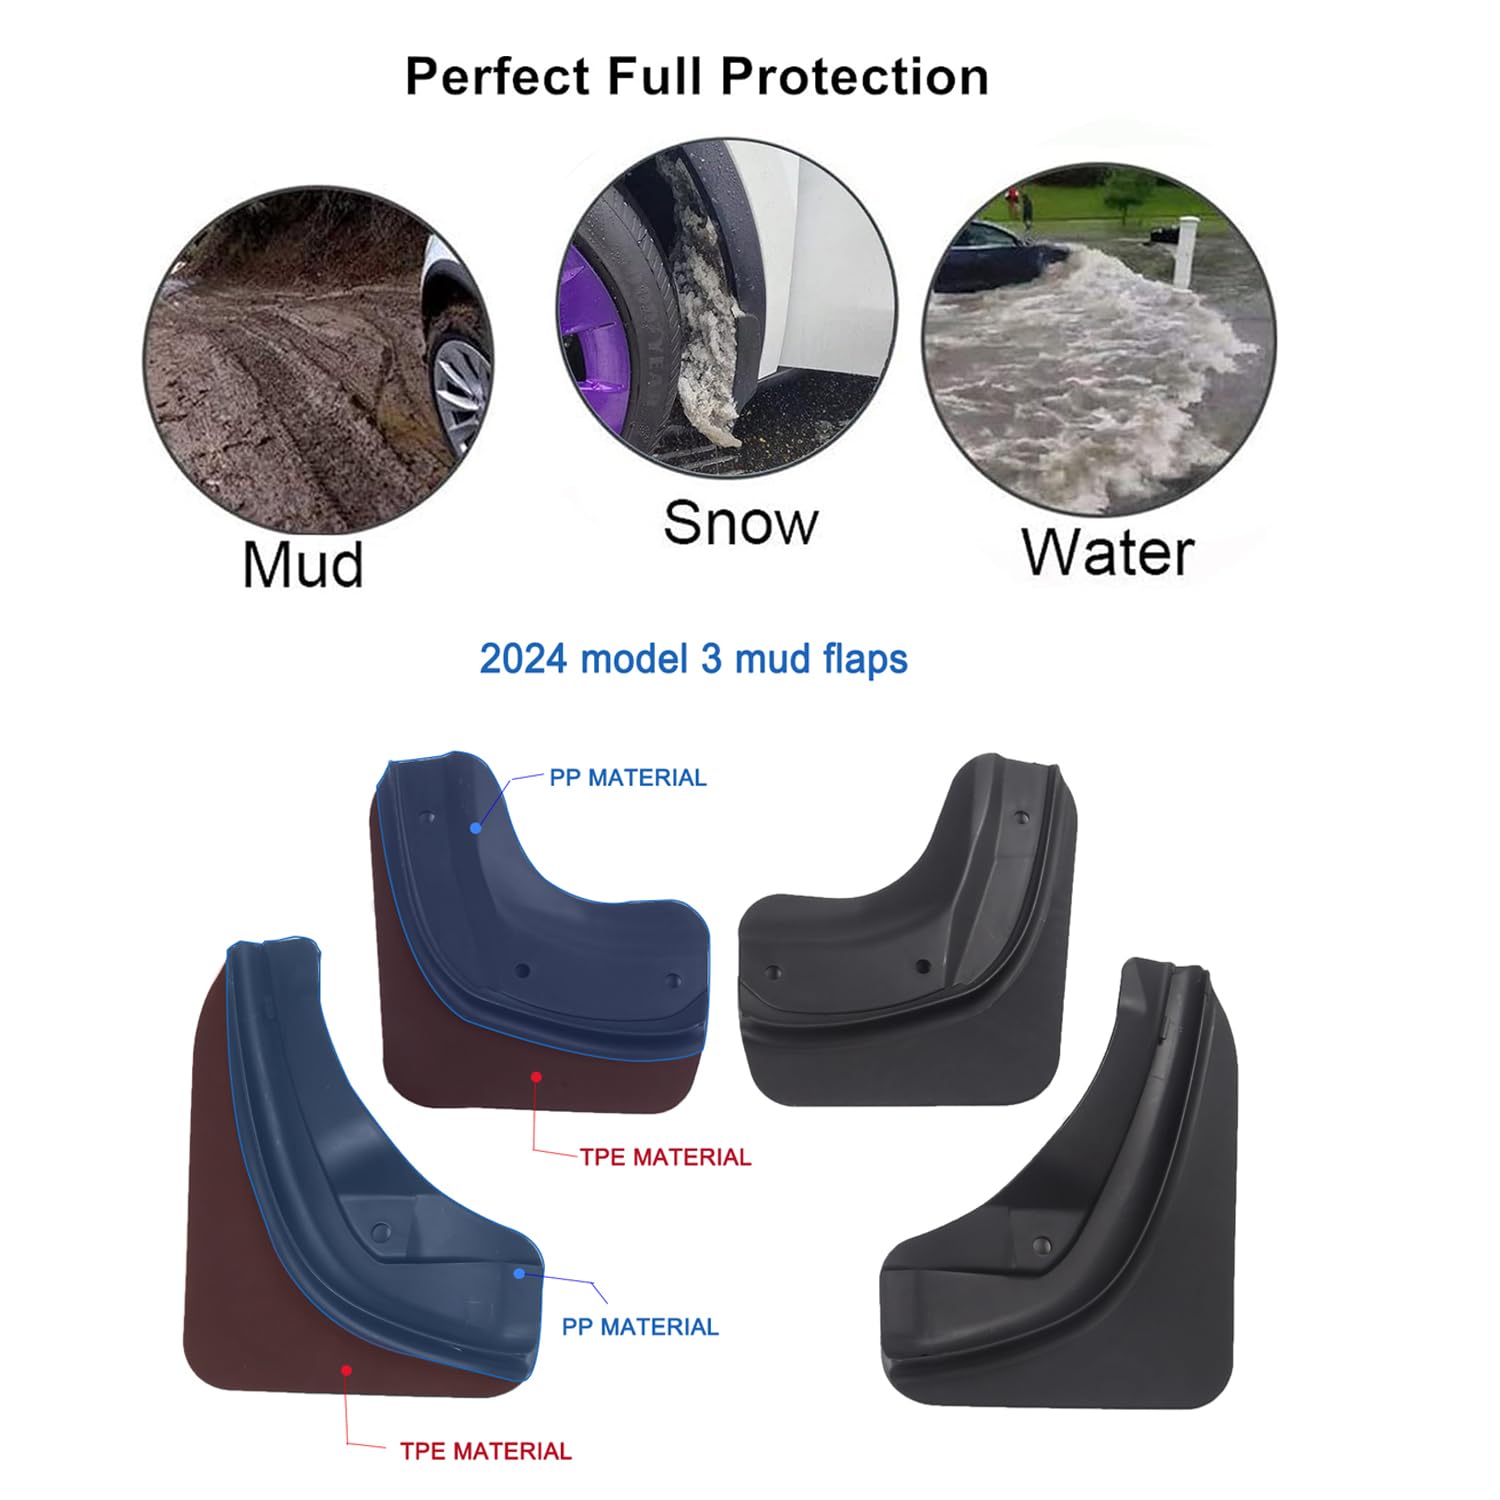
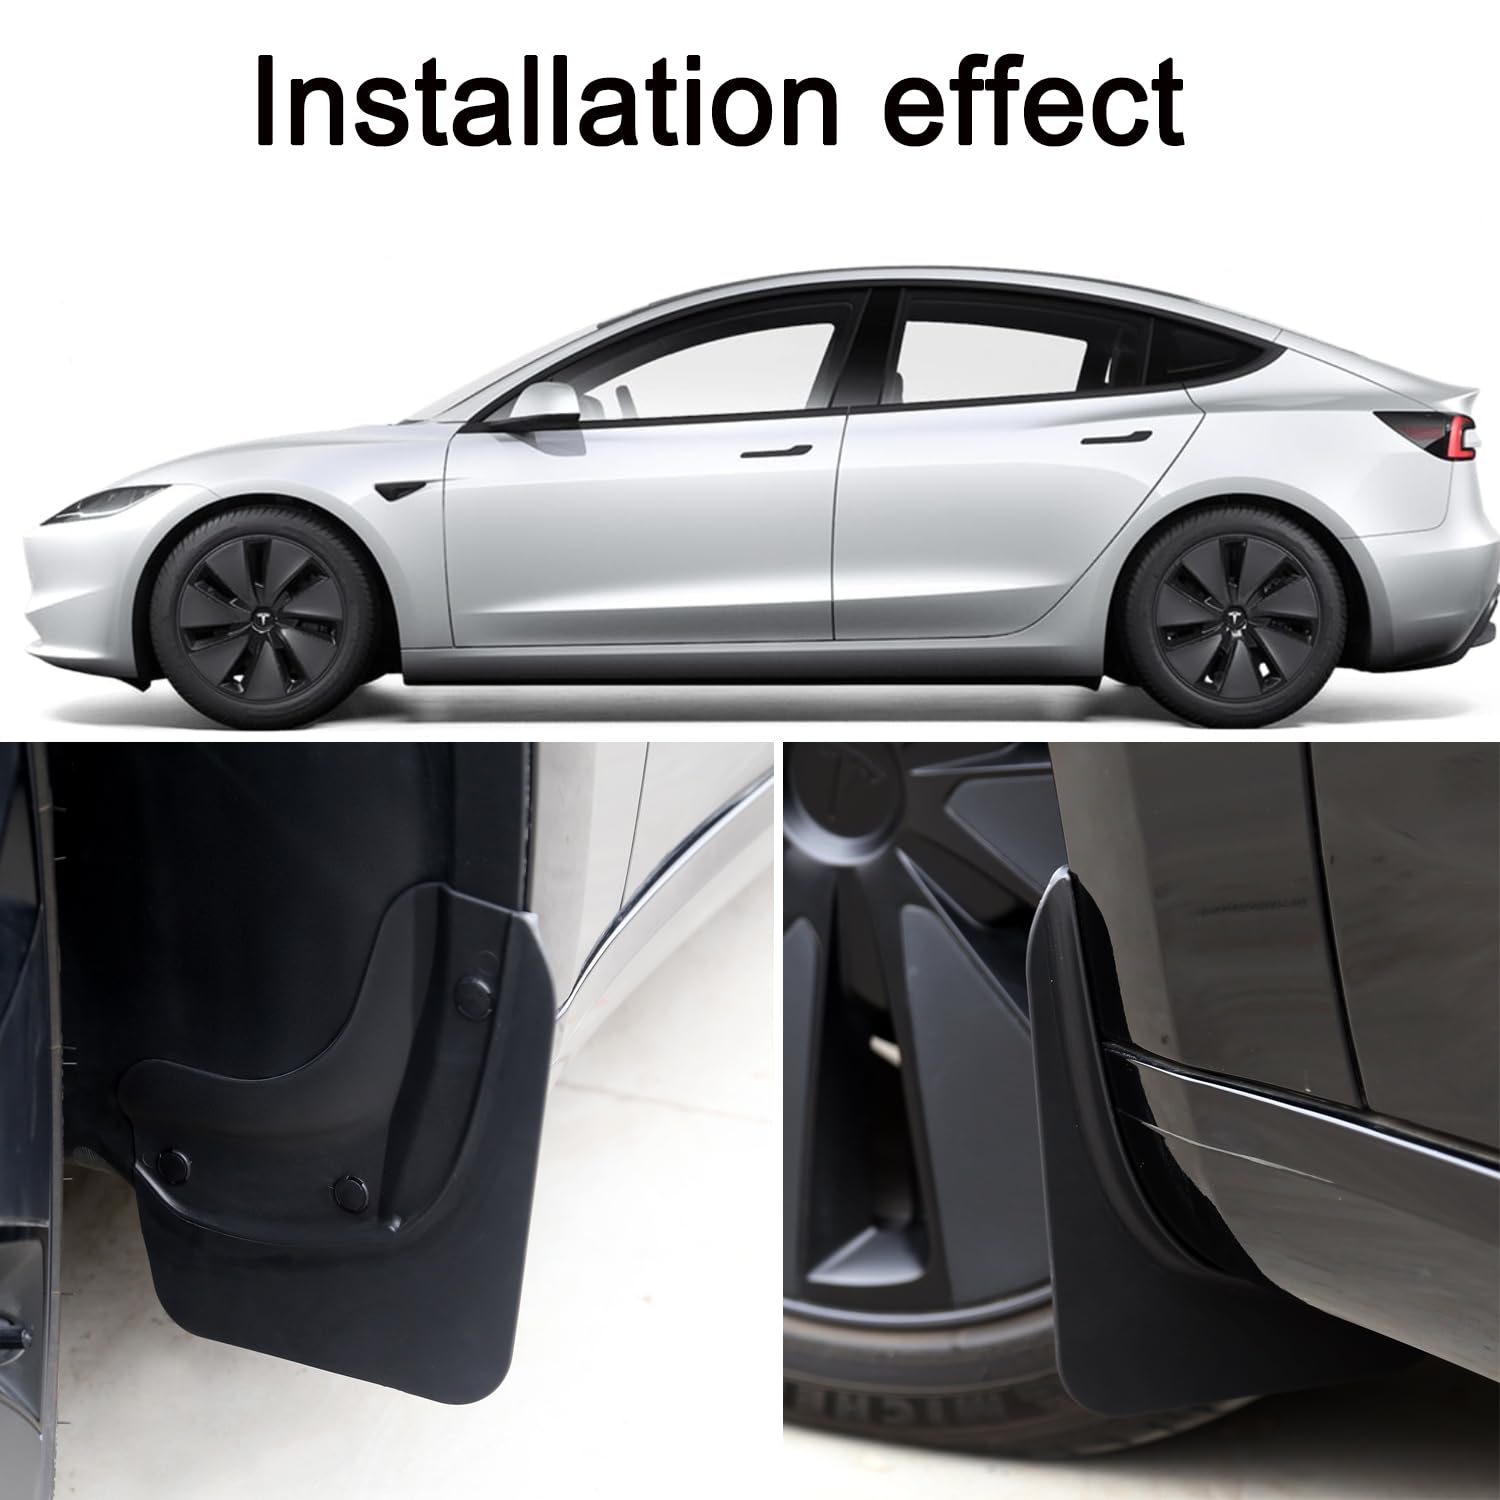
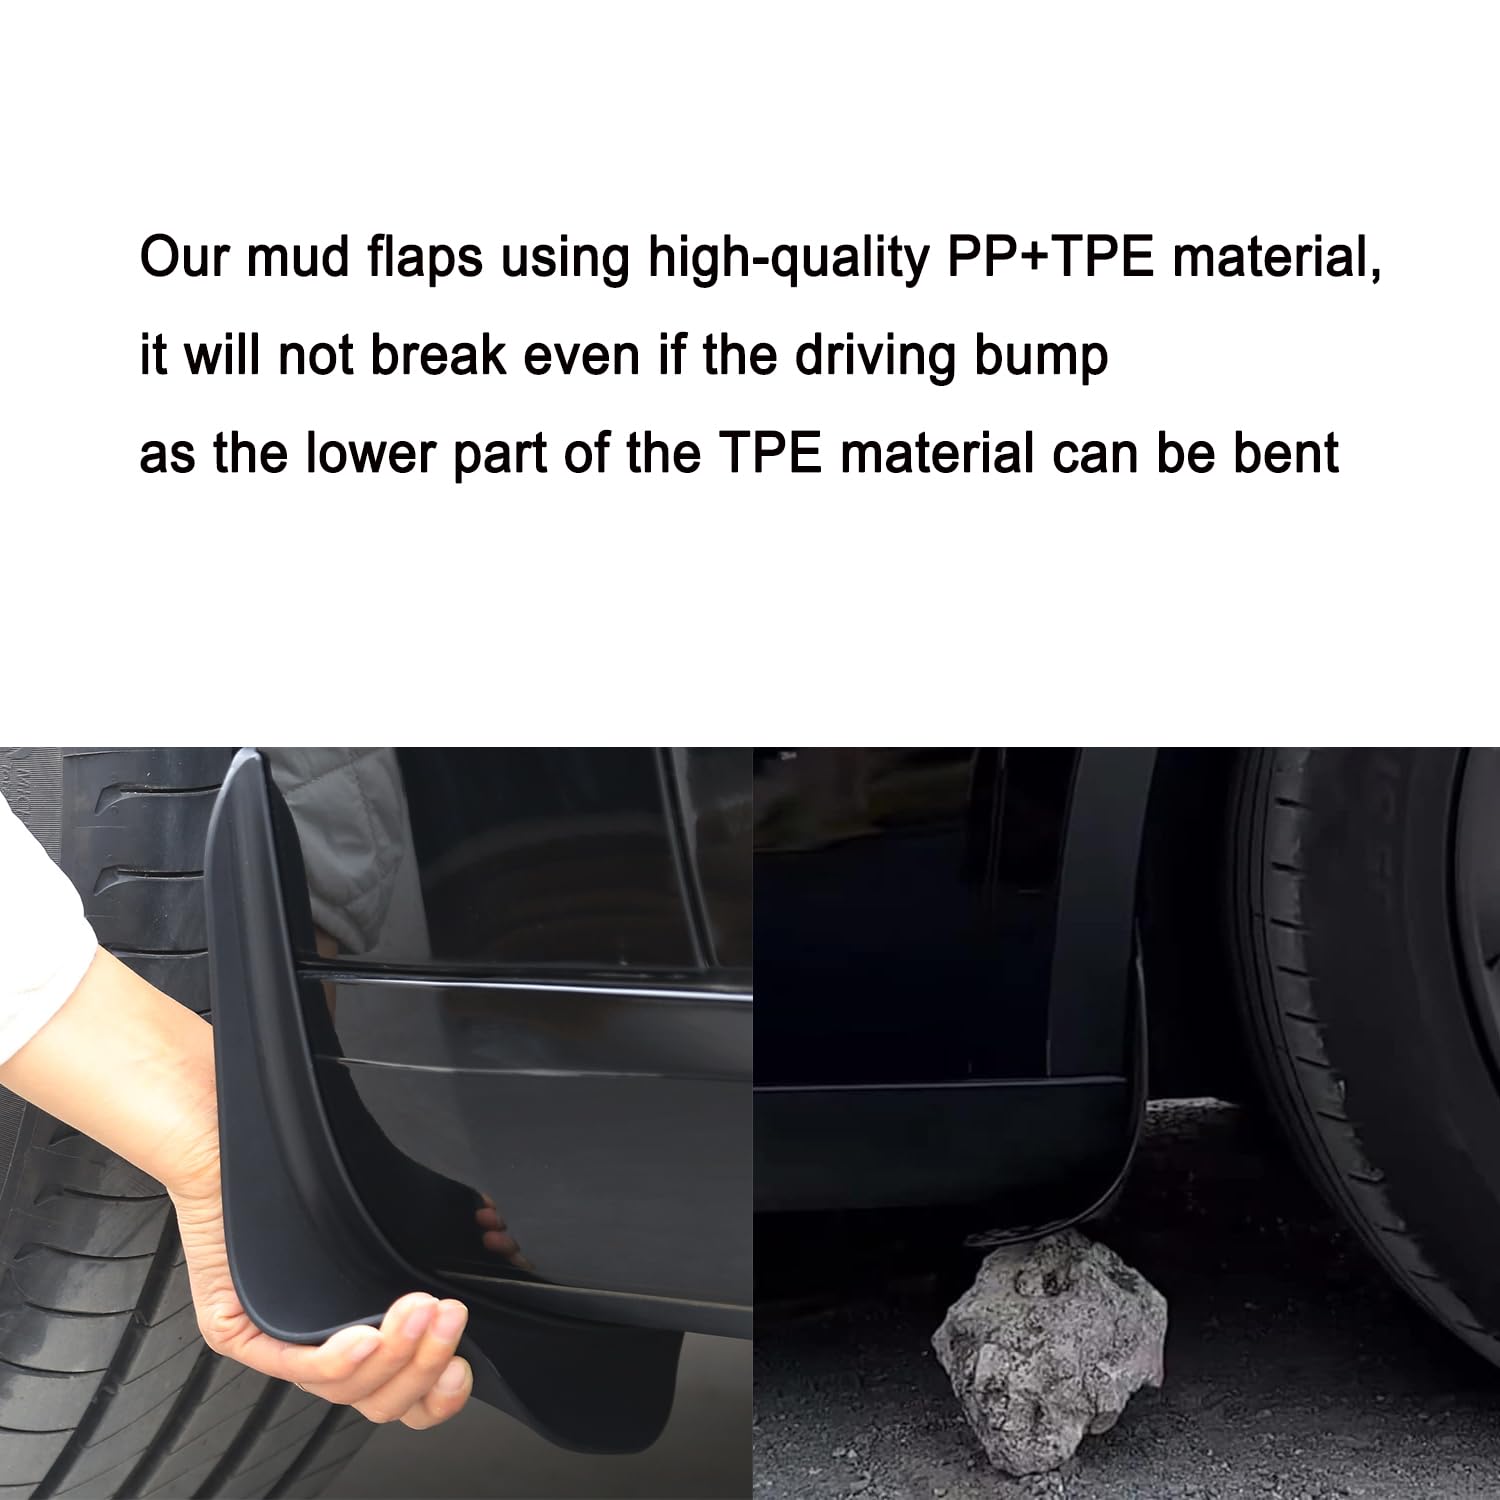
The Nansure 2024 Tesla Model 3 Highland Mud Flaps are custom-designed splash guards made from durable PP and TPE materials, offering easy installation and superior protection against dirt and grime, all while enhancing the sporty appearance of your vehicle.
| Manufacturer | Nansure |
| Brand | Nansure |
| Model | Model Y |
| Package Dimensions | 31 x 28.1 x 8.6 cm; 996 g |
| Item model number | Model Y |
| Manufacturer Part Number | Nansure |
| Position | Rear |
| Item Weight | 996 g |
V**E
Excellent product for and finish
Easy to install. Fits with the front OEM looks. Great product. Recommended.
S**G
These are good for Model Y
Wanted something that would match the OEM mudflaps on the front and these fit the bill. Easy to install and while not super wide (and the staggered tires of the MYP make this worse) they still look good and work better than nothing. And the match to the OEM flaps is quite good and hardly anyone can tell they aren't from Tesla originally.Reasonably priced and look and work well. Makes them a winner in my book.
X**R
GREAT PRICE/EASY INTALL - JUST FOLLOW MY STEPS (INSTALL HACK)
I normally dont write a review but i was so satisfied and i also found a simpler way to install these that i just had to share. If you follow my steps you'll be done in less than 20 min.NOTE: There is a more correct way to install but its more of a hassle and lets face it, if you're like me i just care that it looks good, does its job, and is on tight. The only steps to follow below is for the rear flaps (if you cant install the front on your own you dont deserve a car lol j/k)The reason i did whats listed below is because on the rear there is a screw which needs to be removed but what ends up happening is the nut on the inside comes loose and you end having to remove the fender cover to hold the bolt on the inside fender wall while you screw. My steps below avoids this hassle and ive attached photos as proof.Tools: Box cutter, trim remover or flat head will work, #10 size socket and ratchet.STEPS FOR THE REAR:1. Loosen screw underneath but DO NOT remove completely. (See 2nd Photo)2. On the mud flap make one incision with the box cutter on the hole where the bottom screw will go into on the side facing toward the outside of the car. (See 3rd photo)3. Place mud flap as though to install but angle it toward the tire so it gives you wiggle room on the bottom, insert the short side of the flap hold first and bend the other side over the screw until it slide into place. (See 4th photo)4. Then the rest is self explanatory. Check out my finished photos to see how it came out for me after following these steps.
M**E
Perfect fit easy to do
These are very good and fitted perfectly to my MYLR 23They do seem to reduce the amount of dirt that is attracted to the rear of the car
T**S
They stop mud and grim from hitting the side of our MX
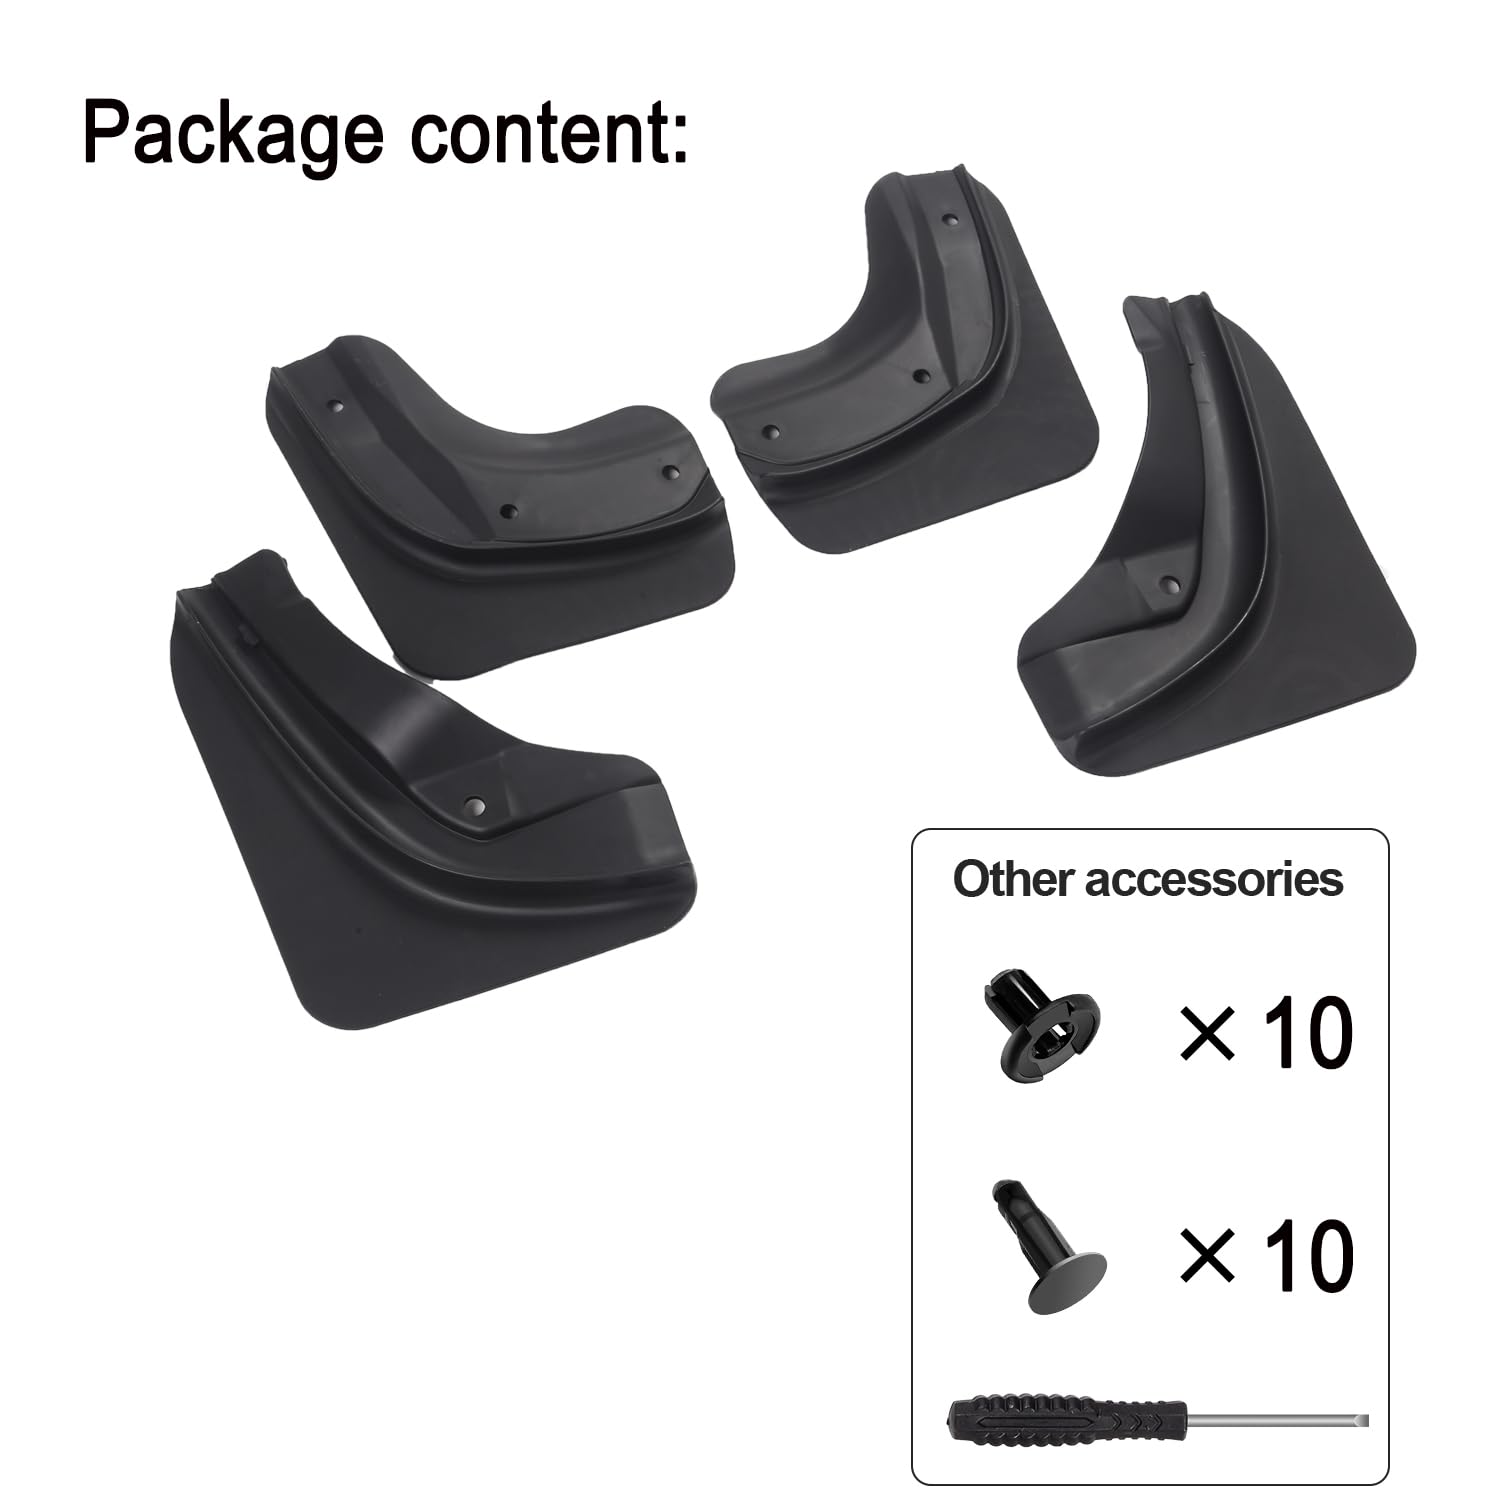
These were pretty easy to install and came with extra rivets (that's a plus). I used a mallet to wedge on the tire to the rivet top to better secure it as having the tires/wheels on the vehicle make it difficult to put enough pressure to get them to lock. Overall these are just fine. Used the clips provided to attached to vertical of fender well in order to NOT drill holes. Did tighten the clips a bit with vice grips before installing. The single hole lined up perfectly. Thinking of applying double sided tape to the lower portion of the fender well to that angled part of the flap to hold it tighter against the vehicle. Each flap was marked with which side it went on and where (although just looking at them should tell you that).
Trustpilot
2 months ago
2 months ago